Build a Vivado Project
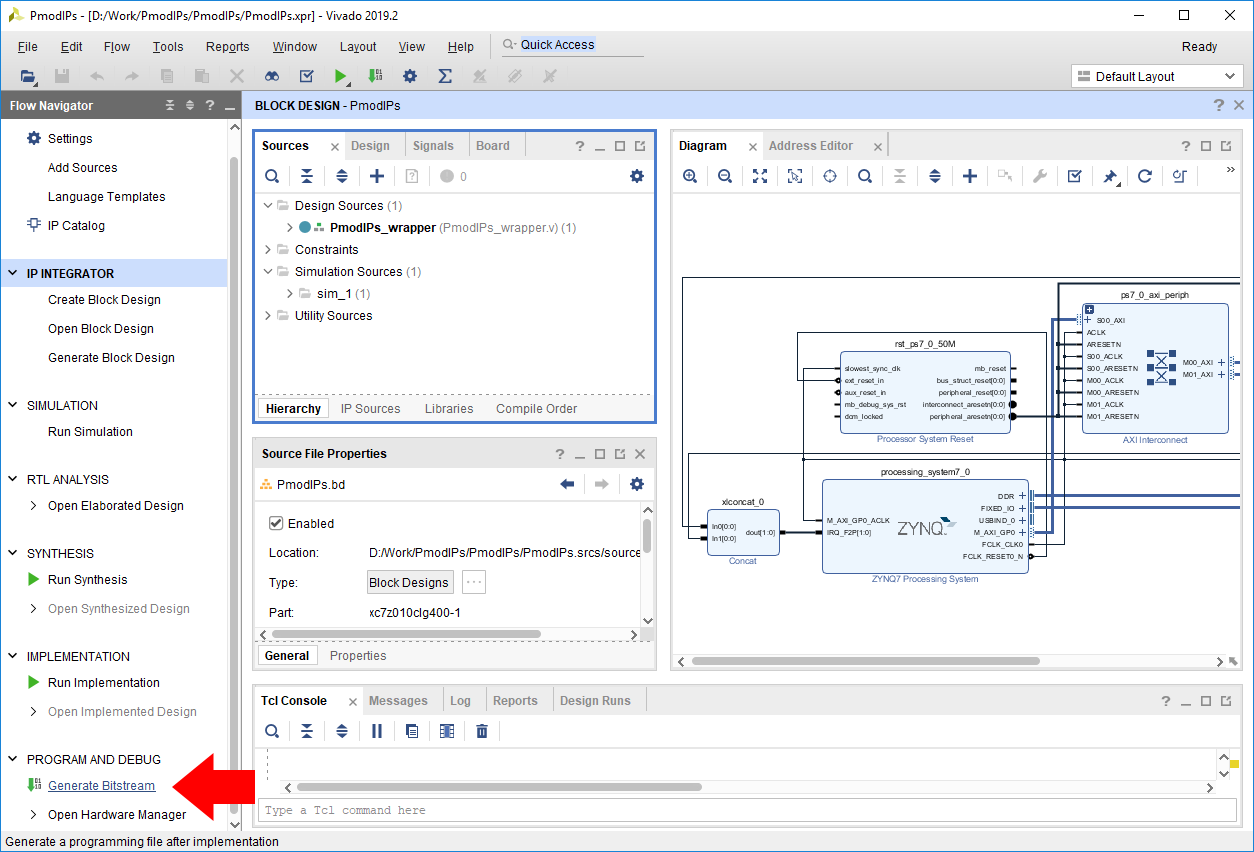
At this point, the Vivado Project is ready to be built, by running it through Synthesis and Implementation, and finally generating a bitstream. Click the Generate Bitstream button in the Program and Debug section of the Flow Navigator pane at the left side of the window.
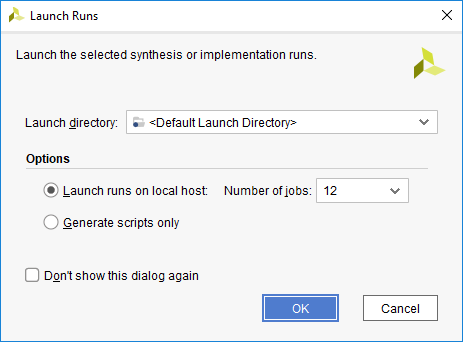
A dialog will pop up with several options for how Synthesis and Implementation should be run. Most should be left as defaults. Of particular importance is the Number of jobs dropdown, which is used to specify how much of the resources of your computer should be dedicated to the build. A larger number of jobs will dedicate more resources, which will allow the build to be completed faster. It is recommended to choose the highest available number.
Note: Critical warnings about how IPs included within another IP were packaged with a different board value can be safely ignored. The same is true for warnings related to negative CK-to-DQS delays seen on some Zynq boards.
Depending on the complexity of the design, the board used, and the strength of your computer, the process of building the project can take between 5 and 60 minutes.
When complete, a dialog will pop up that presents several options for what to do next:
- Open Implemented Design can be used to view the actual hardware design that has been implemented and will be placed onto the chip.
- View Reports can be used to view additional information about the design, including how much of the resources of the FPGA will be used by the design.
- Open Hardware Manager can be used to go directly to Vivado's Hardware Manager, which can be used to program a hardware design onto a board. This is typically used for designs that do not involve a software component.
- Generate Memory Configuration File can be used to create a file for programming an FPGA-only design into flash memory.
If none of these options are desired, click Cancel to continue.


