This is an old revision of the document!
Cora Z7 Pmod VGA Demo
Description
This simple VGA Demo project demonstrates usage of a Pmod VGA connected to the Cora Z7's Pmod ports. The behavior is as follows:
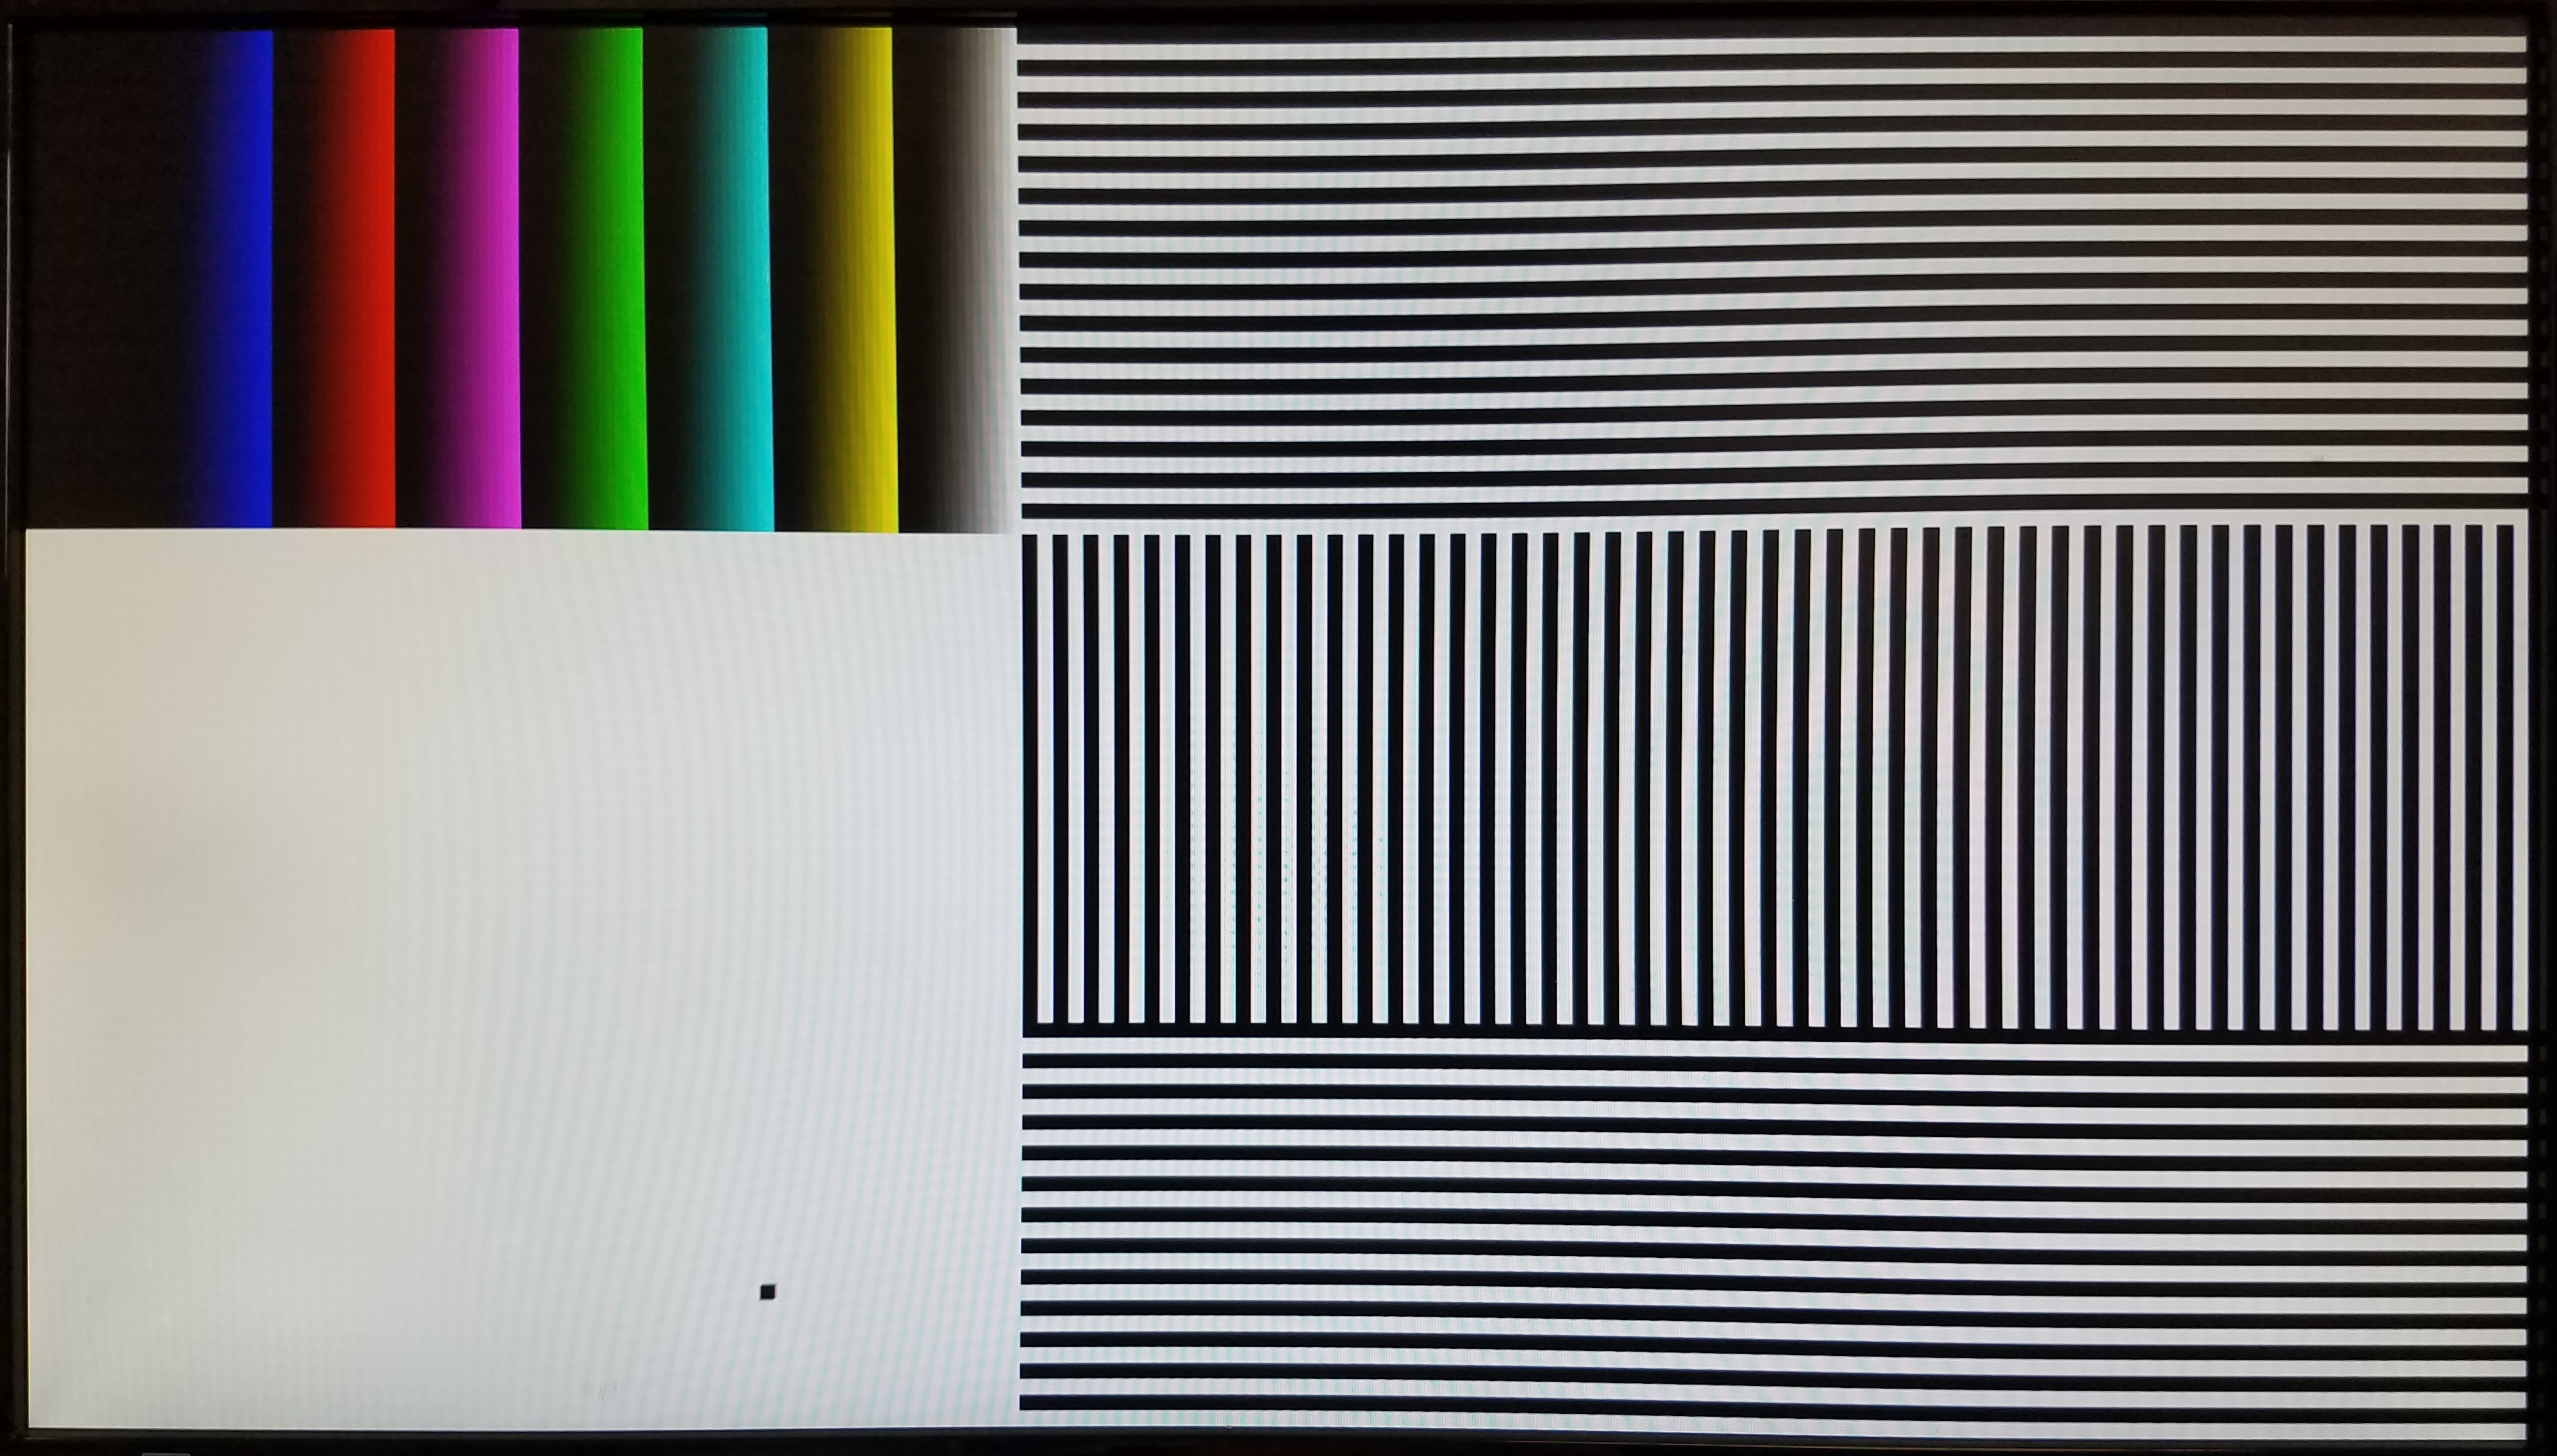
- A bouncing box and black, white, and multiple colors of bars are displayed on a connected VGA monitor.
- The Pmod VGA is controlled by the Cora Z7 through Pmod ports JA and JB.
- The screen resolution is configurable through HDL code.
Inventory
- Cora Z7 with a MicroUSB Programming Cable
- Vivado installation compatible with the latest release of this demo (2020.1)
- See Installing Vivado, Vitis, and Digilent Board Files for installation instructions.
- Pmod VGA
- VGA monitor and cable
Download and Usage Instructions
First and foremost, releases - consisting of a set of files for download - are only compatible with a specific version of the Xilinx tools, as specified in the name of the release (referred to as a release tag). In addition, releases are only compatible with the specified variant of the board. For example, a release tagged “20/DMA/2020.1” for the Zybo Z7 is only to be used with the -20 variant of the board and Vivado 2020.1.
The latest release version for this demo is highlighted in green.
Note: Releases for FPGA demos from before 2020.1 used a different git structure and used a different release tag naming scheme.
| Board Variant | Release Tag | Release Downloads | Setup Instructions |
|---|---|---|---|
| Cora Z7-07S | 07S/Pmod-VGA/2020.1-1 | Release ZIP Downloads | See Using the Latest Release, below |
| Cora Z7-10 | 10/Pmod-VGA/2020.1-1 | Release ZIP Downloads | See Using the Latest Release, below |
| Cora Z7-07S | v2018.2-1 | Release ZIP downloads | v2018.2-1 Github README |
| Cora Z7-10 | v2018.2-1 | Release ZIP downloads | v2018.2-1 Github README |
| Cora Z7-07S | 2017.4-1 | Release ZIP downloads | 2017.4-1 Github README |
| Cora Z7-10 | 2017.4-1 | Release ZIP downloads | 2017.4-1 Github README |
Note for Advanced Users: All demos for the Cora Z7 are provided through the Cora-Z7 repository on Github. Further documentation on the structure of this repository can be found on this wiki's Digilent FPGA Demo Git Repositories (Redirect) page.
Instructions on the use of the latest release can be found in this dropdown:
- Using the Latest Release
-
This page has been moved, the new location is Using a Digilent FPGA Github Demo's Releases (2020.1).This page has been moved, the new location is Using a Digilent FPGA Github Demo's Releases (2020.1).
At this point, the demo is now running on your board. Refer to the Description and Functionality sections of this document for more information on what it does.
Functionality
1. View Results
2. Changing the Resolution
You may want to change the display resolution if your VGA monitor does not support 1080p, or you want to modify the demo for a specific application.
To select a different display resolution, select the appropriate set of Sync Generation constants for your target resolution from the list starting at line 47 of top.vhd. Uncomment the ten corresponding constants, FRAME_WIDTH through V_POL, and comment the default versions of those same constants. The default resolution is 1920×1080 @ 60Hz.
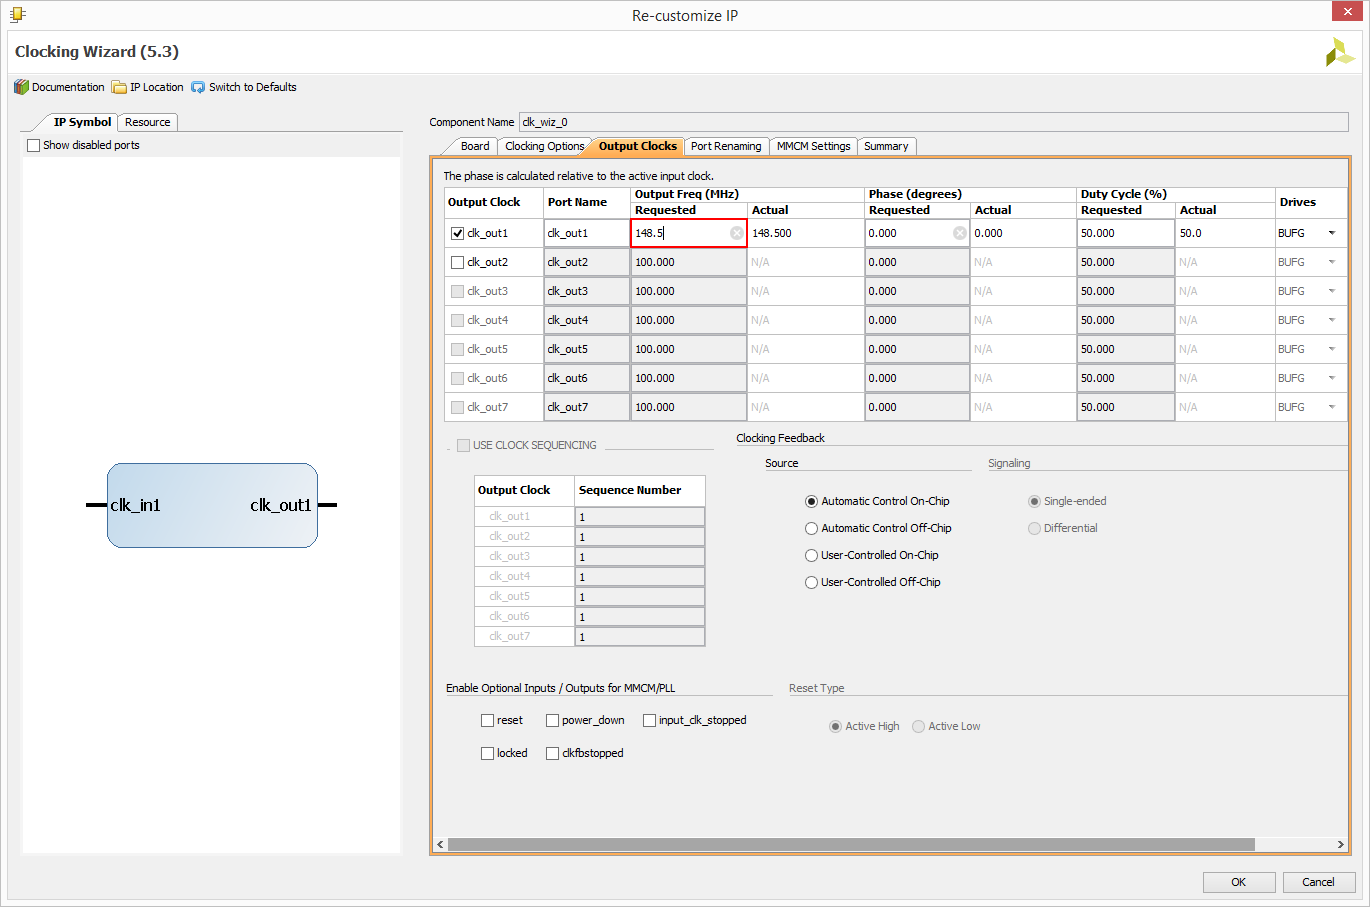
Next select Project Manager in the Flow Navigator. In the Hierarchy tab of the Sources box, expand top.vhd under Design Sources and double click on clk_div_inst. Change the clk_out1 Requested frequency - circled in red below - to the required pxl_clk frequency specified in the selected resolution's Sync Generation comment block. Select Ok, then Generate in the Generate Output Products dialog that pops up. Once the bitstream has been generated, reprogram your board with the new hardware.
Additional Resources
All materials related to the use of the Cora Z7 can be found on its Resource Center.
All materials related to the use of the list other products here can be found on their resource centers, linked below:
- Pmod VGA Resource Center
For a walkthrough of the process of creating a simple HDL project in Vivado, see Getting Started with Vivado for Hardware-Only Designs (Redirect). Information on important parts of the GUI, and indirect discussion of the steps required to modify, rebuild, and run this demo in hardware can also be found here.
For technical support, please visit the FPGA section of the Digilent Forum.
{{tag>project cora-z7}}


