This is an old revision of the document!
Arty General I/O Demo
Overview
Features Used
| Not Used | Used | |
|---|---|---|
| 4 User Switches | X | |
| 4 User LEDs | X | |
| 4 User RGB LEDSs | X | |
| 4 User Push Buttons | X | |
| 4 Pmod Connectors | X | |
| XADC Analog Input | X | |
| USB-UART Bridge | X | |
| Serial Flash for Application Data | X |
Description
Introductory level demonstration project for Arty, designed using Vivado 2015.1.
Prerequisites
Skills
- Basic familiarity with Vivado
- This experience can be found by walking through our “Getting Started with Vivado” guide
Hardware
- Arty FPGA board
- Micro-USB cable
Software
- Vivado Design Suite 2015.X
- Newer/older versions can be used, but the procedure may vary slightly
Board Support Files
- Arty Support Files
- These files will describe GPIO interfaces on your board and make it easier to select your FPGA board and add GPIO IP blocks.
- Follow the Wiki guide: Vivado Board Files for Digilent 7-Series FPGA Boards on how to install Board Support Files for Vivado.
Downloads
How to...
1. Generate the Project
1.1) Download the repository linked in the download section and place it in the location of your choosing.
1.2) Generate the GPIO project in the Projects folder by following this guide before continuing: How to Generate a Project from Digilent's Github
2. Build the Project
2.1) Click Generate Bitstream on the left hand menu towards the bottom. Vivado will run through both Run Synthesis and Run Implementation before it generates the bitstream automatically.
Note: If you want, you can click each step by itself in the order of Run Synthesis, Run Implementation and then Generate Bitstream.

3. Program the Board
3.1) Once you have generated your bit file, Click on the hardware manager and connect to your board by choosing the local server option.

3.2) Click program to load the project onto your Arty.
4. Run the Project
To run all the features of this demo, you will only need the Arty board.
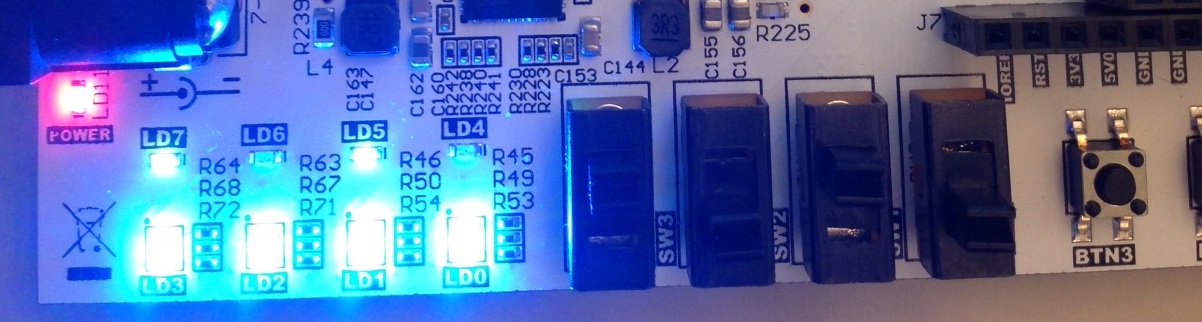
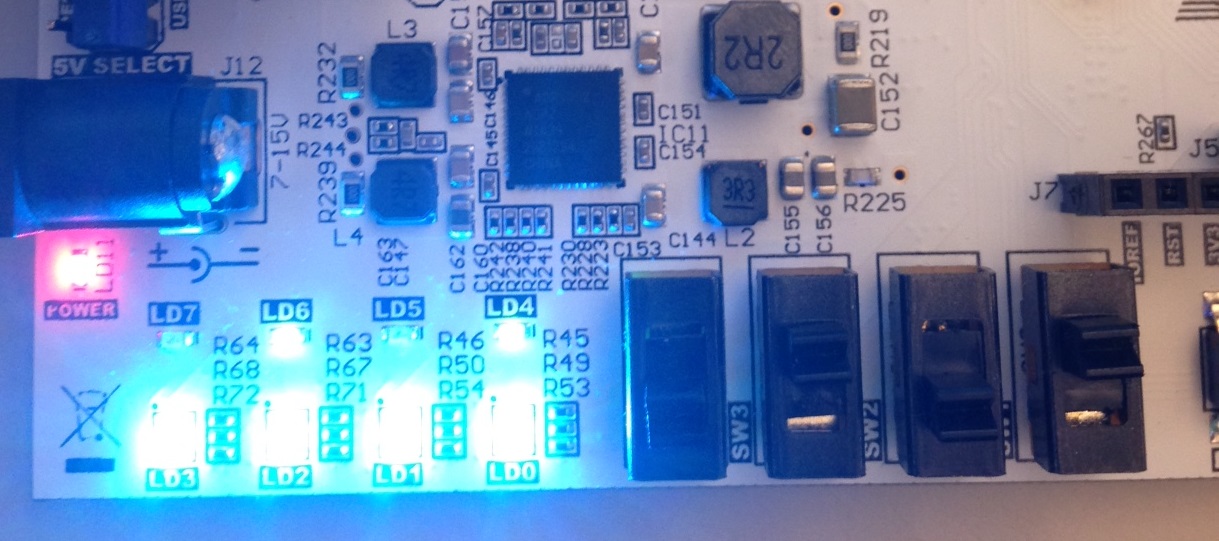
4.1) Using the Switches with Leds
For this section, all the switches are tied to their corresponding led. Every time a switch is toggled, the led directly above it will toggle with it.
The four tri-color LEDs will cycle colors with no interruption from other I/O.
4.2) UART Communication Using the Buttons
To see the UART communication channel, open a terminal program on your computer set to 9600 baud, 8 data bits, no parity bit and 1 stop bit. Choose the COM port that your ARTY is connected to (To determine what COM port your Arty is connected to, open up Device Manager on your machine. Under Ports (COM & LPT) you should see something like 'USB Serial Port (COMX)' where the X is the number of the connected COM port). On startup, ARTY will transmit “ARTY GPIO/UART DEMO!”. Whenever a button is pressed, ARTY transmits “Button press detected!”.

