This is an old revision of the document!
Using the Power Supplies
Bench top power supplies are one of the must-haves for any electronics hobbyist or maker. Unfortunately, they take up quite a lot of space. With the Analog Discovery 2 and WaveForms 2015, you can bundle multiple tools together in one small package, including an adjustable power supply.
Inventory
-
- Most of the functionality between the Analog Discovery legacy, the Analog Discovery 2, and the Electronics Explorer Board is nearly identical for most of the tools, except for the power supplies. The Analog Discovery 2 has more capability over the legacy, and the Electronics Explorer board has always had more capability than either. With that in mind, we will be focusing first on the Analog Discovery 2, then on the Electronics Explorer board, and finally on the Analog Discovery legacy.
- With the addition of the Digital Discovery, there is a fourth version of the Power Supplies tool. This version is covered at the end of this tutorial.
- A computer with USB port to run the software
Step 1: Analog Discovery 2
If you want some help getting your Analog Discovery 2 set up and calibrated, or installing WaveForms 2015, check out this quick start guide.
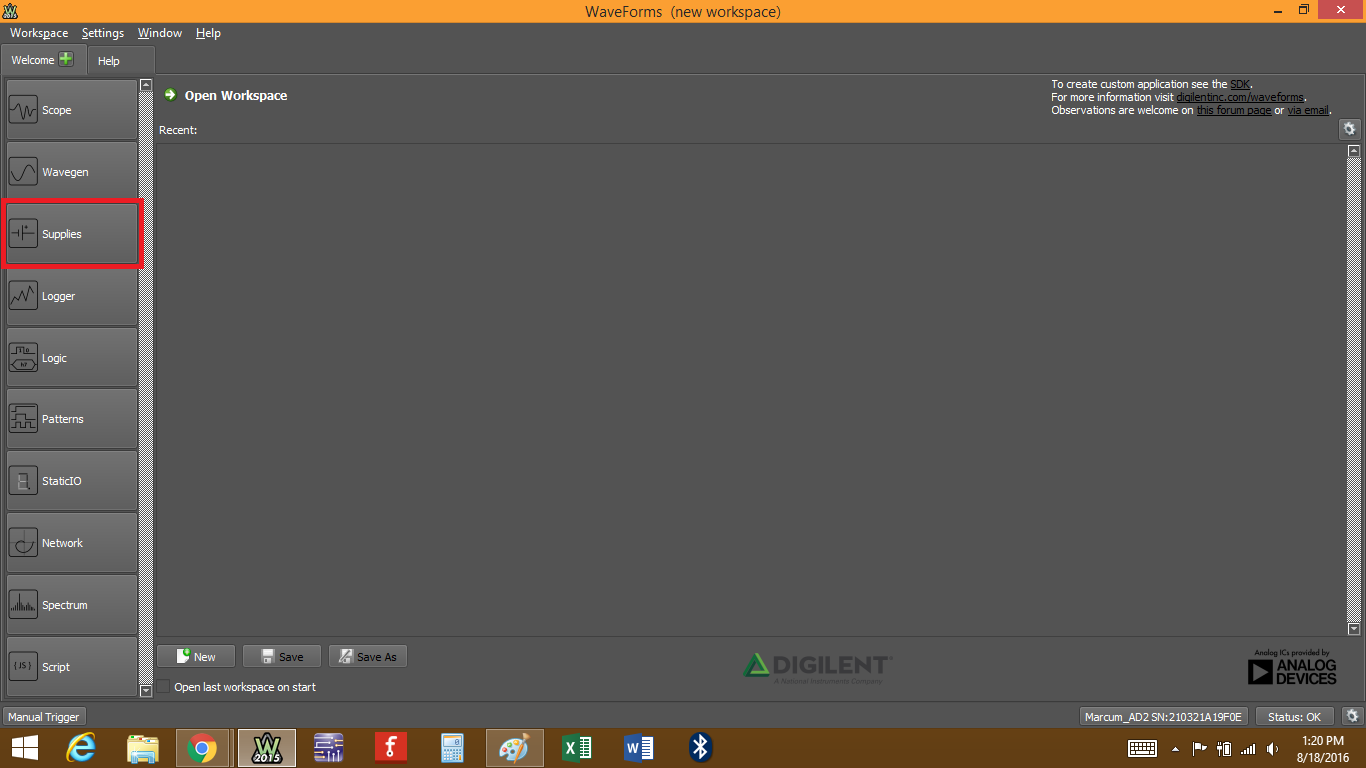
Once you have your Analog Discovery 2 and WaveForms all set up, open the power supplies by clicking on the “Supplies” button.
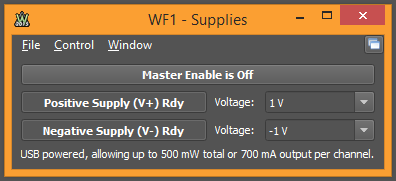
This will open the power supplies window.
At the top you have three options: “File”, “Control”, and “Window”.
- “File” lets you Save the current power supply setting as a new project. You can then Open that project to set the power supplies to the saved setting. You can also Close the power supplies window from here.
- “Control” gives access to the Run and Stop functions.
- “Window” lets you view other Waveforms tools you have open, the main Waveforms screen, or the Help window.
Below that is the Master Enable button, which is the run/stop button.
Next you have the ready/on/off buttons for each power supply. If the master enable is off, you can switch between ready and off. With master enable on, you can switch between on and off.
To the right you have two drop-down menus, one for the positive supply (V+) and one for the negative supply (V-). You can enter a value here directly with up to three decimal places. The accuracy of the output compared to the entered value will depend greatly on whether your Analog Discovery 2 is calibrated correctly. The positive supply can have any value between +500mV and +5V, while the negative supply can have a value anywhere between -500mV and -5V.
Since the Analog Disocvery 2 can be powered by either the USB or a 5V auxiliary power supply, you'll see one of two notes at the bottom of the window.
The auxiliary power supply note:

Most circuits won't require more than the USB capabilities; however, in the event that you do draw more power than the Analog Discovery 2 can output, the program will fault and turn off all tools and outputs. This will happen if any output pin is connected directly to GND, including both power supply pins. Simply remove or change whatever is drawing a high current and try again.


