This is an old revision of the document!
Basys 3 Keyboard Demo

Overview
Description
The Keyboard Demo project demonstrates a simple usage of the Basys3's USB-HID and USB-UART ports. The behavior is as follows:
* The user presses a key on the keyboard, this sends a keyboard PS/2 scan code to the Basys3 over the USB-HID port. This scan code is read and transmitted to a terminal application via the USB-UART bridge. When the key is released, a scan code of F0XX is transmitted, indicating that the key with PS/2 code XX has been released.
Features Used
| Not Used | Used | |
|---|---|---|
| 16 user switches | X | |
| 16 user LEDs | X | |
| 5 user pushbuttons | X | |
| 4-digit 7-segment display | X | |
| 4 Pmod connectors | X | |
| XADC Analog input | X | |
| 12-bit VGA output | X | |
| USB-UART Bridge | X | |
| Serial Flash for application data | X | |
| USB HID Host with mouse | X | |
| USB HID Host with keyboard | X |
Prerequisites
Hardware
- Basys3 FPGA board
- Micro-USB cable
- USB Keyboard
Software
- Vivado Design Suite 2016.4
- Newer versions can be used, but the procedure may vary slightly
Downloads
Basys3 Keyboard Project Repository – ZIP Archive GIT Repo
Download and Launch the Basys 3 Keyboard Demo
1) Follow the Using Digilent Github Demo Projects Tutorial. This is an HDL design project, and as such does not support Vivado SDK, select the tutorial options appropriate for a Vivado-only design. Return to this guide when prompted to check for extra hardware requirements and setup.
2) In order to fully use this demo, you will need to connect a serial terminal to your Basys 3. Plug your board into your computer with a Micro USB cable and make sure that board is turned on. Then open a serial terminal (such as TeraTerm) on your computer. In the terminal application setup the serial port to connect to the appropriate port for your board, with a baud rate of 9600. Then return to the Github Projects Tutorial to finish programming and running the demo.


Using the Basys 3 Keyboard Demo
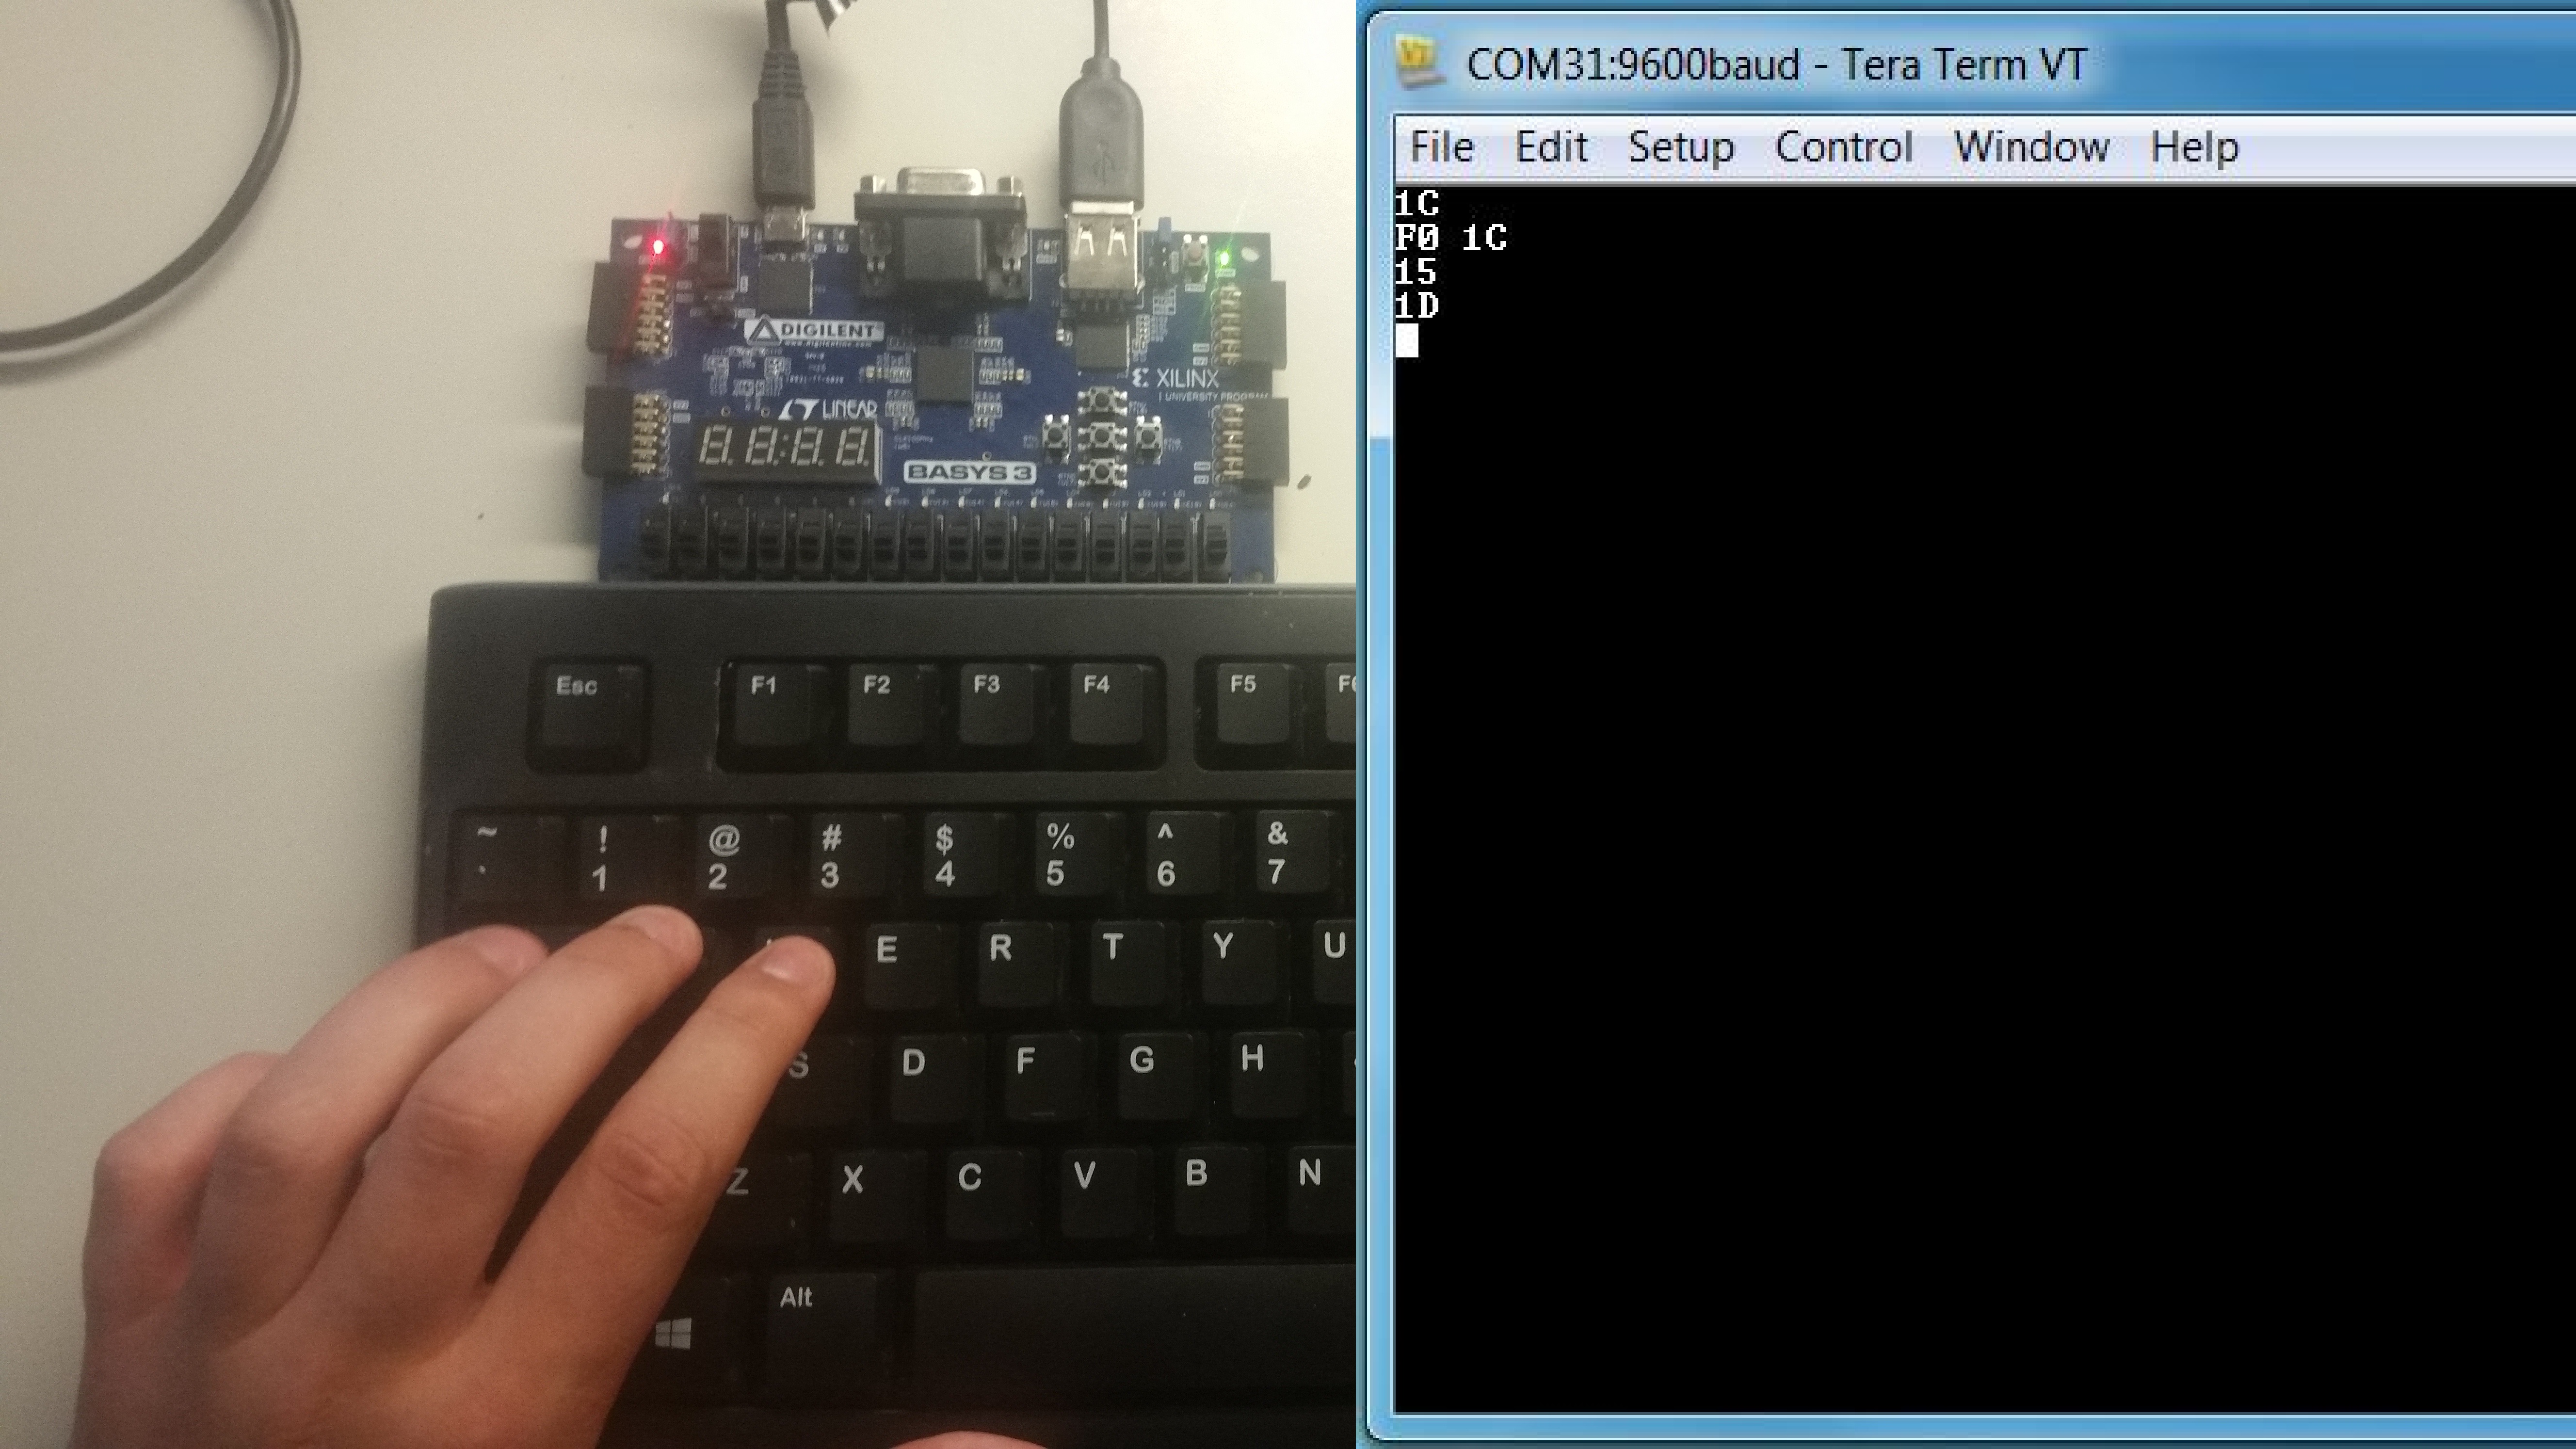
1. Key Press
When a button is pressed, the value of the scan code will be converted to ASCII and transmitted to the terminal. In the picture, 'a' is pressed, so a scan code of “1C” is sent to the terminal. The expected scan code for each key can be found in the keyboard diagram at the top of this guide.

2. Key Release
When the 'a' key is released, a scan code of “F0 1C” is sent over UART.

3. Multiple Key Presses
When multiple keys are pressed their scan codes are sent over UART in order. In this case, Q (“15”) was pressed, followed by W (“1D”).