

This is an old revision of the document!
Using the Script Editor (Under Construction)

Introduction
This guide explains the use of the Supplies instrument in WaveForms. This instrument is used to create and run scripts that can control all of the other instruments in WaveForms.
Prerequisites
- A Digilent Test & Measurement Device
- A Computer with WaveForms Software Installed
1. Opening the WaveGen
1.1
Plug in the Test & Measurement Device, then start WaveForms and make sure the device is connected.
If no device is connected to the host computer when WaveForms launches, the Device Manager will be launched. Make sure that the device is plugged in and turned on, at which point it will appear in the Device Manager's device list (1). Click on the device in the list to select it, then click the Select button (2) to close the Device Manager.
Note: “DEMO” devices are also listed, which allow the user to use WaveForms and create projects without a physical device.
Note: The Device Manager can be opened by clicking on the “Connected Device” button in the bottom right corner of the screen (3.), or by selecting “Device Manager” from the “Settings” menu at the top of the screen.

1.2
Once the Welcome page loads, in the instrument panel at the left side of the window, click on the Script button to open the Script Editor instrument.

1.3
When the Script Editor has opened, it will display the script editor (1), the output panel (2) below the editor, and the control toolbar (3) at the top.
2. Using the Script Editor
This section walks through how to use the Script Editor
2.1 Hardware Setup
To demonstrate the Script Editor, the Scope and Wavegen instruments will be used.
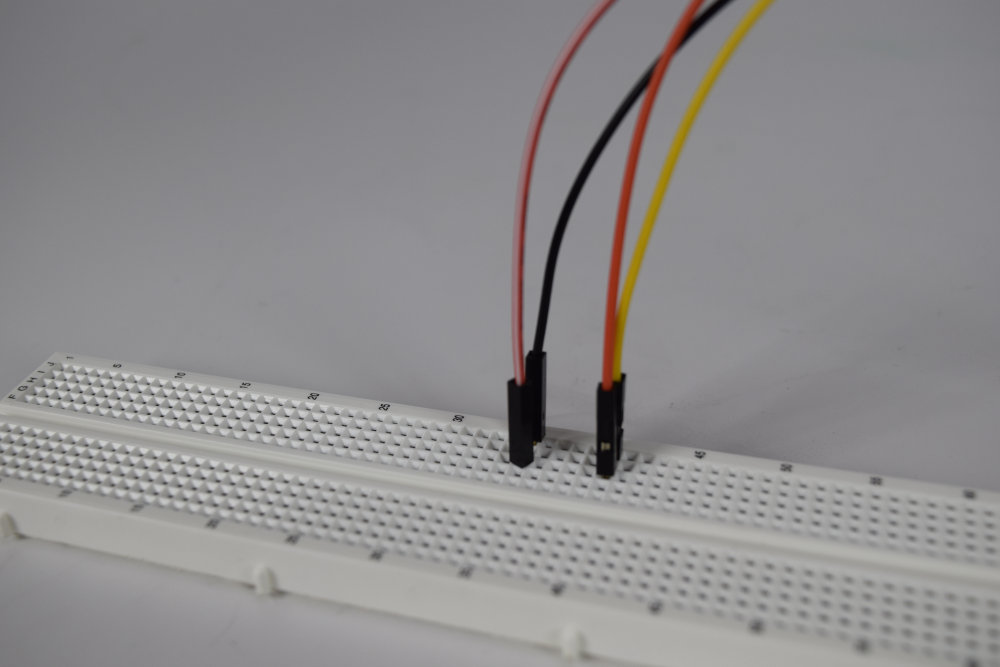
First, connect the Test & Measurement scope Channel 1 pin (orange wire) to the device's wavegen Channel 1 output pin (yellow wire). For devices that use differential input channels, make sure to connect the scope Channel 1 negative pin (orange wire with white stripes) to the ground pin associated with wavegen channel 1 (black wire).
2.2 Software Setup
For the Script Editor to make use of the instruments, they must be open in WaveForms. In WaveForms' Welcome tab, open the Scope instrument, then open the Wavegen instrument.

2.3 Running the Script
Return to the Scripts page by clicking on its tab in the bar at the top of the screen. Click the Run ( ) button to start running the script.
Print statements and uncaught errors are shown in the output panel.

2.4 Debugging
Debugging is done inside WaveForms itself, allowing the user to step through the execution of the script. The debugger is accessed by clicking the Debug ( ) button, which will open a new window with the Qt debugger tool.
 image: Debugger
3. Script Editor User Interface Overview
This section walks through the different controls and features present in the Script Editor.
3.1 The Control Toolbar
The control toolbar contains menus and control interfaces used to configure the Script Editor.
File is used to open an existing WaveForms script, save the current script, or close the Script Editor.
image
Control accesses the Debug, Run, Stop and Abort actions.
image
View has options to enable the Output panel, code completion or add a plot panel.
image
3.2 The Script Editor
The Script Editor is an editor where the JavaScript code can be viewed and edited.
Next Steps
If voltage values seen in the Voltmeter are significantly different from the expected voltage output of the Supplies, please calibrate the device by following the Calibration Guide. link
For more guides on how to use both the Digilent <test & measurement device> and WaveForms, return to the device's Resource Center, linked from the Test and Measurement page. link
For technical support, please visit the Scopes and Instruments section of the Digilent Forums. link