

Most department heads, lab managers, professors, and students who buy the Analog Discovery 2 know that it’s great for a beginning circuits class. In fact, we offer an Analog Discovery 2 Student Bundle just for that purpose. But it might surprise you to find out that the Analog Discovery 2 can be useful for an entire electrical and computer engineering curriculum. Many students don’t know that the tool they used in circuits 1 can also be used to help them in digital logic.
National Instruments has provided a set of seven example labs designed to show exactly that. They are a free download and available to anyone. For the next few weeks I’ll be delving into these labs. I will be highlighting each of the 7 topics, tools they use, and what courses they might be useful for.
From the text:
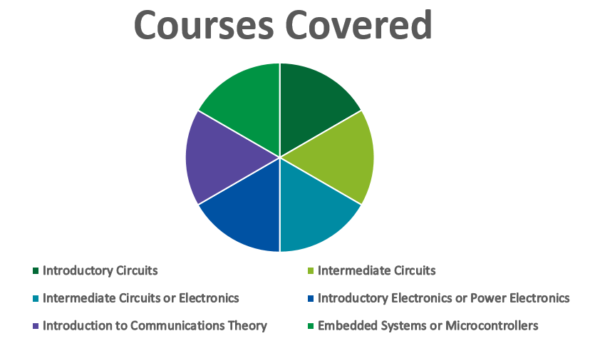
Complementary Labs for Electrical Engineering contains seven labs designed to span multiple courses in a typical four-year Electrical Engineering undergraduate program. These labs are designed to show how the Analog Discovery 2 can be used to complement existing lab setups by providing a way for students to experiment and use hardware at home, without the pressure of having to finish a lab within a dedicated lab period. These labs do not cover a full-semester of topics; instead, these labs are meant to provide instructors with a few ideas on how they could integrate the Analog Discovery 2 into their own courses in order to give students a more holistic engineering experience.
To introduce the series, I’ll give a brief summary of each lab:
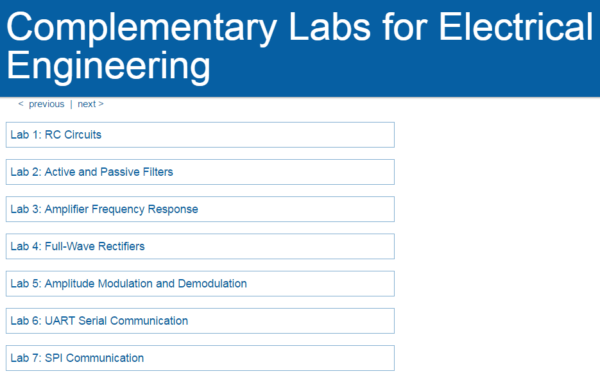
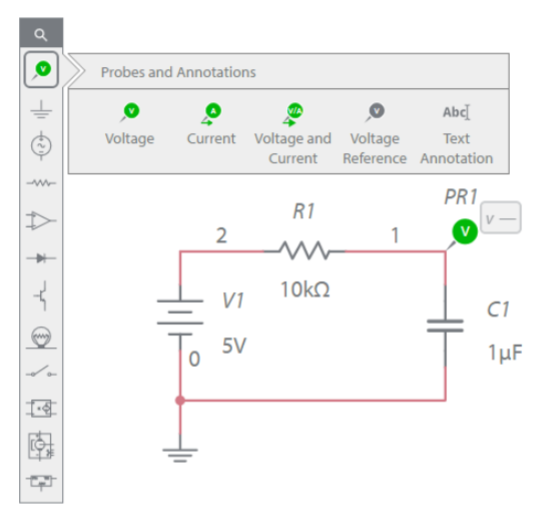
Lab 1: RC Circuits
This lab goes over the basic characteristics of RC Circuits, covering both DC and AC analysis, simulation, and experimentation. Students will learn about the equations that govern capacitor charging and discharging, the time constant, as well as low-pass and high-pass filters. Advanced students can build on the lab and challenge themselves to design band-pass and band-stop RC filters.
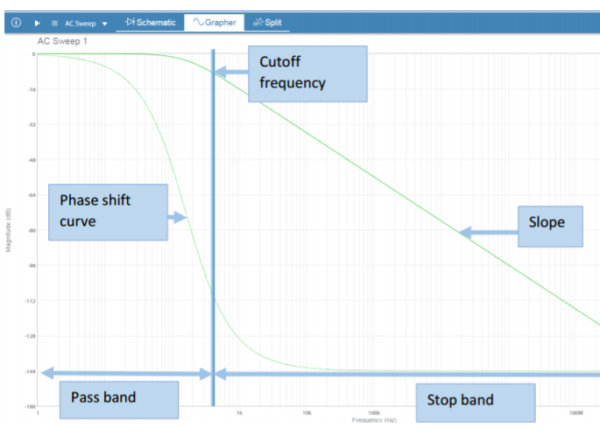
Lab 2: Active and Passive Filters
This lab introduces the basic terminology of filters such as slope, passband, stopband, and cut-off frequency. Students will learn about transfer functions for passive and active filters. Advanced students can challenge themselves with exploring higher-order active filter implementations, such as Chebyshev and Butterworth.
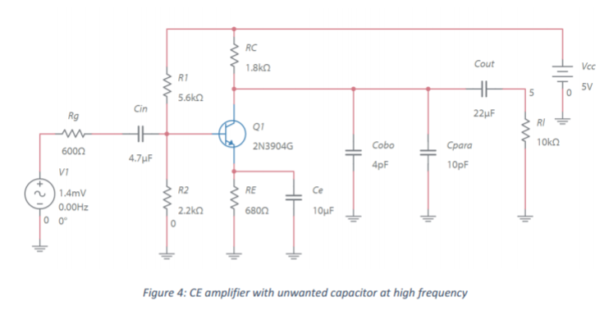
Lab 3: Amplifier Frequency Response
This lab introduces the importance of circuit frequency response. Students will look at the frequency response of two amplifier circuits, one made with transistors and the other opamps. By comparing the small changes in their frequency responses while still providing the same overall function, students will learn about what design considerations need to be taken depending on the input frequency range. Advanced students can challenge themselves to design with high speed opamps and compare the results.
Lab 4: Full-Wave Rectifiers
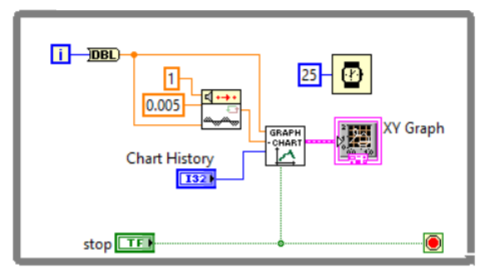
This lab builds a full-wave bridge rectifier and explores the IV curve of a diode. Students first simulate and build the rectifier to get experience with what a rectifier is. Next, students use LabVIEW to explore the individual components of the rectifier to visualize and understand how they limit the operating range of the rectifier. Advanced students can choose to explore how to overcome the threshold voltage limit when using diodes in a rectifier or to explore more about programming practices and user-friendliness.
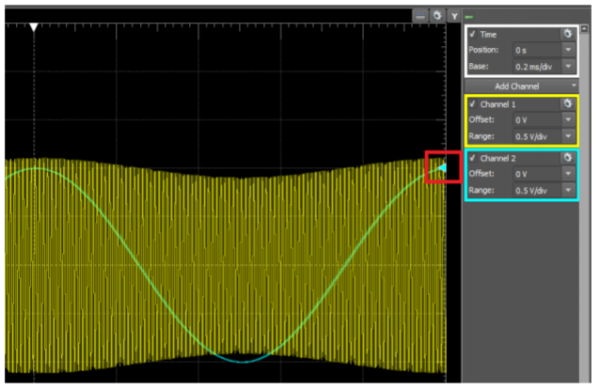
Lab 5: Amplitude Modulation and Demodulation
This lab gives a basic introduction to communications theory with amplitude modulation and demodulation. Students will explore the mathematical theory behind amplitude modulation and use the Analog Discovery 2 to visualize the effects of amplitude modulation in the time and frequency domains. Next, students will use LabVIEW to program an AM demodulator. Students will use the AM demodulator they programmed to explore and visualize how the modulation coefficient affects the demodulated signal, as well as how different parameters such as windowing and averaging affect the FFT. Advanced students can challenge themselves to build a system to send data between two Analog Discovery 2s or build an analog AM demodulator.
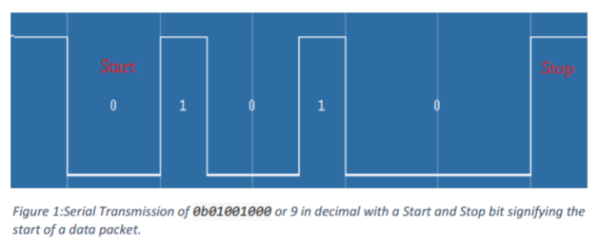
Lab 6: UART Serial Communication
This lab explores the basics of serial communication using a chipKIT uC32 microcontroller as the transmitter and the Analog Discovery 2 as the receiver. Students will explore and visualize how factors such as baud rates and endianness affect serial communications. Advanced students can challenge themselves to build a multi-device transmitter and receiver system.
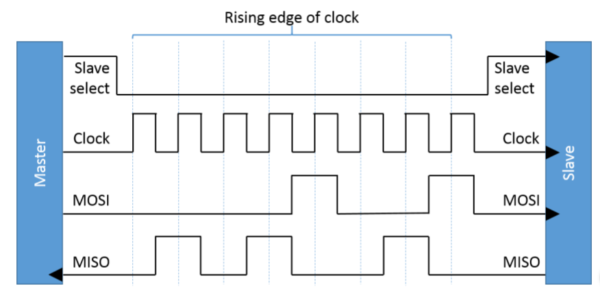
Lab 7: SPI Communication
This lab explores communication using the Serial Peripheral Interface (SPI) bus. Students will learn about the basic theory behind SPI communication, using an Arduino Uno as the SPI master and the Analog Discovery 2 as the SPI slave. Using LabVIEW, students will be able to visualize the slave select, clock, and MOSI lines of the SPI bus and learn how to extract the message from these lines. Advanced students can challenge themselves by modifying their code to encode and decode ASCII signals as well as add a layer of encryption to protect their data from unwanted observers.
Stay tuned for more detail on each of these labs, and check them out yourself. Let us know what you think by commenting below. And make sure to subscribe to our newsletter for more exciting announcements!
Getting The Most Out Of Your Analog Discovery: Lab 1
Getting The Most Out Of Your Analog Discovery: Lab 2
Getting The Most Out Of Your Analog Discovery: Lab 3
Getting The Most Out Of Your Analog Discovery: Lab 4
Getting The Most Out Of Your Analog Discovery: Lab 5
Getting The Most Out Of Your Analog Discovery: Lab 6
Getting The Most Out Of Your Analog Discovery: Lab 7
One Comment on “Getting the Most From The Analog Discovery 2: A Series”