

Today, I will walk you through the steps to log into your Raspberry Pi’s console from another PC or laptop. The method utilizes Secure Shell (SSH), a secure network protocol for data communication, which is very useful for remote operation via command-line. Via SSH, you can quickly copy text or files across to your Pi’s command line instead of typing it all out. Another benefit of using SSH is that you can use your Raspberry Pi without a dedicated display (also known as “headless”) which allows you to leave the device set-up in a particular configuration without the worry of anyone disrupting things.
![]()
This guide will be completed on Raspian, which is the official and recommended Raspberry Pi Operating System available on the NOOBS distribution from the Raspberry Pi Foundation. On Windows, you will need to download an SSH client. The most commonly used one is called PuTTY, you can look for putty.exe under the heading for Windows on Intel x86.
1. ADD YOUR RASPBERRY PI AS A HOST
PuTTY doesn’t have an installer package, it’s just a stand-alone .exe file. When you run it you’ll see the configuration screen below:
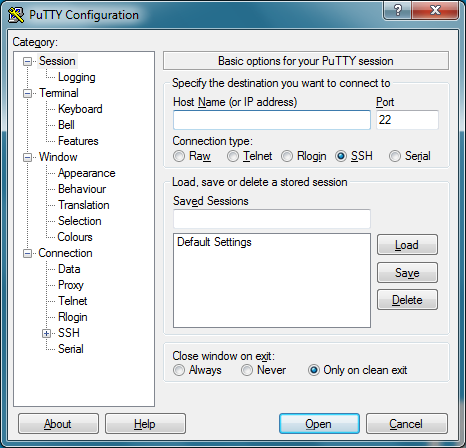
Type the IP address of the Pi into the Host Name field and click the Open button. If you don’t know the IP address, just type hostname -l in the Raspberry Pi command line. There are more ways to find your IP address here.
2. CONNECT
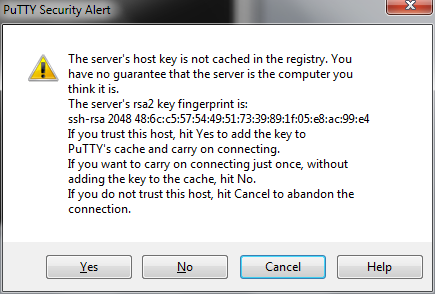
When the connection works you’ll see the security warning shown below; you can safely ignore it and click the Yes button. You’ll only see this warning the first time when PuTTY connects to a Pi that it has never seen before.
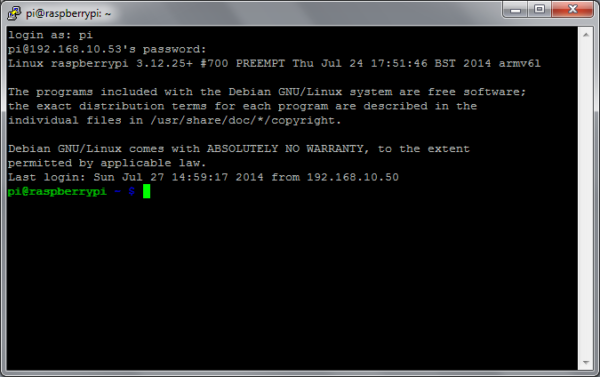
You’ll now have the usual login prompt. Log in with the same username and password you would use on the Pi itself. The default login for Raspbian is pi with the password raspberry. You should now have the Raspberry Pi prompt which will be identical to the one found on the Raspberry Pi itself.
That’s it! You can now type, copy and paste commands and generally screw around on your Raspberry Pi’s command line! Thank you for reading my blog post, for a more detailed instructions check out this Instructable. If you are interested in making a Raspberry Pi project but don’t have the right supplies, you can purchase the LabVIEW computing kit for the Raspberry Pi 2. This kit includes a copy of LabVIEW 2014 Home Edition and everything you will need to run LINX 3.0 and start working on projects. Please comment with any questions or comments you may have.