As many of you may have heard, we have some new applications notes for using Pmods with Arduino Uno. These projects have recently been made available on the new Digilent Projects website where you can download the project code and review the included Fritzing images (when applicable).
In celebration of these newly available files, we have created this Beginner’s Guide to Pmod App Notes to help those of you unfamiliar with Arduino get started on your first Pmod and Arduino Uno project. While covering the many resources that may come to help in your creative pursuit, we will also review the Pmod NAV project as an in-depth example throughout this guide.
Getting Started with Pmod App Notes
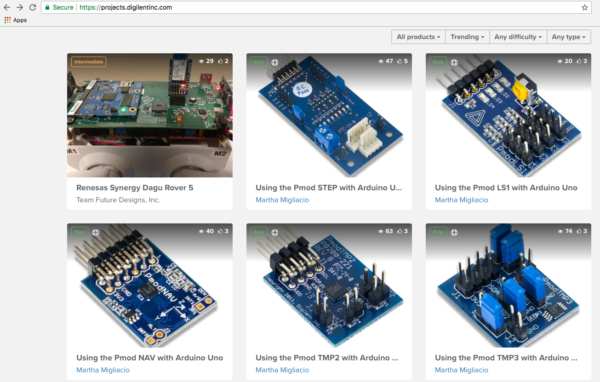
You can begin your Pmod and Arduino Uno project by visiting the new Digilent Projects website to browse from 40+ Pmods with supporting project code (many of which also include Fritzing images) and other Digilent related projects. Each project will open with a short description where you can learn about the project outcomes, the difficulty level, and project needs (i.e. the “things” you will be using). Below the list of project components you can find the Arduino code and sometimes a Fritzing image to make connecting your project parts even easier! Don’t worry if your project does not include a Fritzing image, like the Pmod NAV project we’re about to review, as they will have written instructions for the pins you need to connect at the beginning of the provided Arduino code.
Setting up Your Arduino Uno
For those of you as new to Arduino as I was, you will first need to download and install the Arduino IDE. This installation link can be found on each Pmod project under “Software apps and online services” but can similarly be found in the Getting Started with Arduino resource provided here.
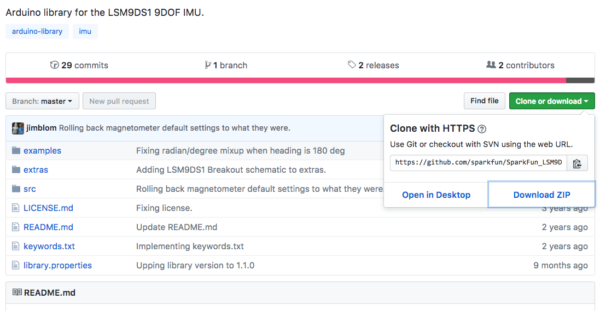
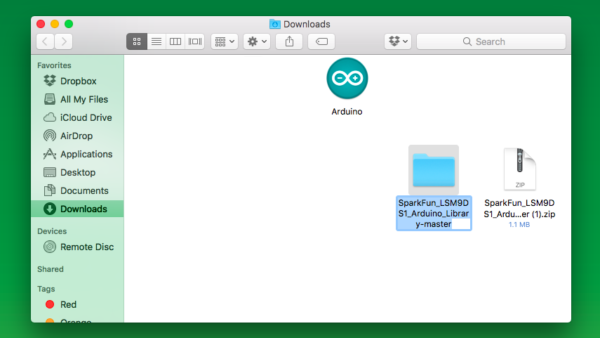
After downloading the Arduino IDE you may also need to download additional libraries referenced in the Arduino code for your Pmod project. The code given for the Pmod NAV project lists the needed libraries under “materials” with a link to the appropriate GitHub download. After clicking the provided GitHub link in your code description, you will want to choose “Download ZIP” in the drop-down menu below the green “Clone or download” button. Once downloaded you must rename this file by removing the “master” text at the end of the folder name (i.e. folder for this project library should be thus named “SparkFun_LSM9DS1_Arduino_Library”) and move the folder to your Arduino downloads folder (e.g. Documents>Arduino>libraries).
Returning to your Pmod NAV project, scroll down to the provided Arduino code and click “Copy the code” at the top righthand corner beside the project code title. Proceed by opening a new Arduino sketch, deleting all automatically loaded code, and pasting the code you copied from your Pmod NAV project. Check to make sure that everything works by clicking “Verify” (e.g. the √ icon) at the top left and confirming that no errors are reported at the bottom of your screen. If you receive any errors you can find help troubleshooting by visiting our dedicated technical support community on the Digilent Forum and posting under Add-on Boards. Once you receive a “Done Compiling” message you are ready to connect your Pmod NAV and Arduino Uno!
Connecting your Pmod NAV
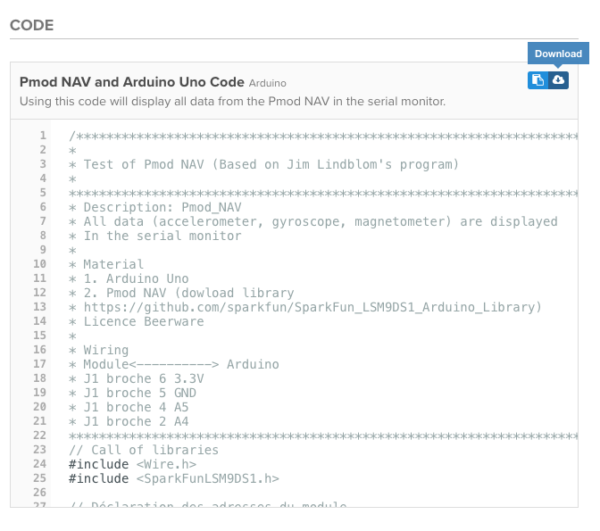
As our Pmod NAV project does not come with a supporting Fritzing image, you will want to read through the Arduino code description to figure out which pins to connect. In the above image you can find this information under “Wiring” where Pmod NAV pins 6, 5, 4, and 2 are given under the word “Module” and their subsequent Arduino locations are written under “Arduino”. If you have trouble figuring out which pins are located where on your Pmod NAV, try visiting the Digilent Wiki where you can find each Pmod’s pinout(s) pictured on the righthand side of your screen (see image below).
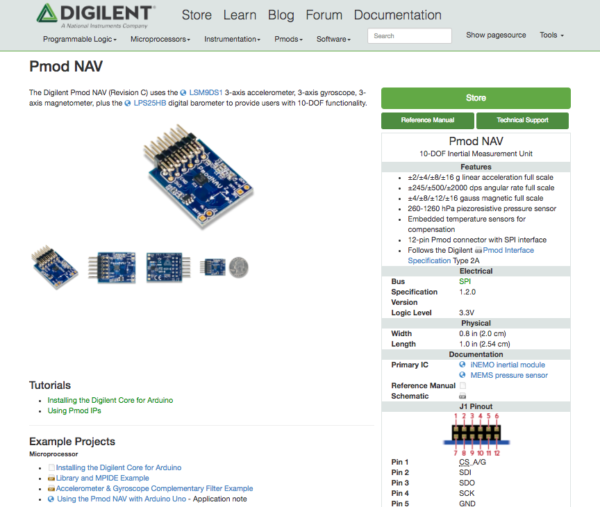
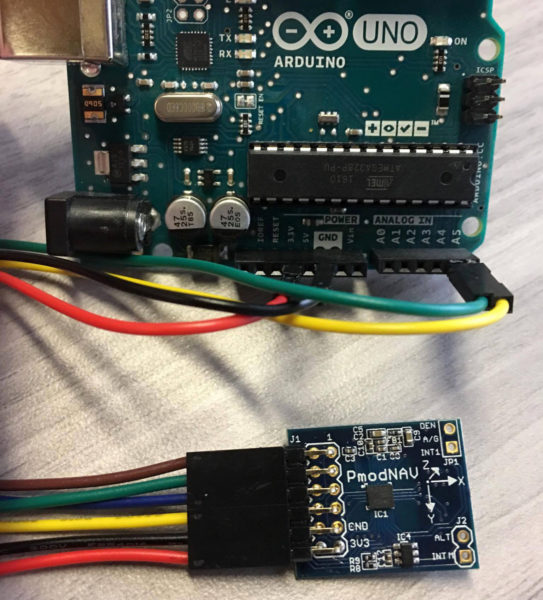
While connecting your Pmod you may also need a cable (not listed in the project hardware components) such as the 6-pin MTE Cable and 6-pin Header & Gender Changer, or the Pmod Cable Kit: 12-pin. When connecting my Pmod NAV and Arduino Uno, the 6-pin MTE Cable was recommended to me and actually made my project wiring much easier. Plugging this cable onto the top row of the Pmod NAV pinout (this project only uses pins 2-6) allowed me to quickly differentiate and find important pins like ground and power (much easier then when I used a standard 12-pin cable). The resulting connections can be seen below for those of you following along.
Starting your Sketch (and Getting Results!)
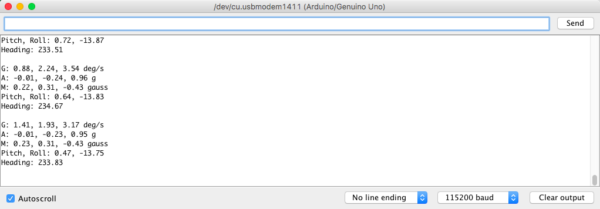
Now that you have your code setup and your Pmod NAV connected to your Arduino Uno you can connect your Arduino to your computer’s USB port. After choosing the correct port (e.g. Tools>Port>”/dev/cu.usbmodem…”) you can click “Upload” (i.e. the arrow at the top left of your Arduino script page) and wait for the “Done compiling” message at the bottom of your screen. At this point your Pmod NAV and Arduino Uno should be ready to go with results found when running the Serial Monitor (on Macs you can use the shortcut Shift+Command+M, or find this under the “Tools” dropdown menu) which should show constantly changing output similar to the image below.
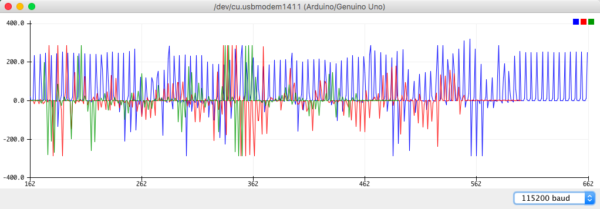
Another result output you can use is the Serial Plotter (using the shortcut Shift+Command+L), which plots the position of your Pmod NAV as you move it around. While connected to your Arduino Uno you can try picking up your Pmod NAV and watch the graph update as you change your Pmod’s position by rotating, wiggling, or turning it upside down in the air. An example of this output can be found in the image below with different peaks for various Pmod NAV movement.
Hopefully by now you have all of the resources you might need to get your Pmods up and running with Arduino Uno. Whether you’re a beginner (like me), or an experienced electronics enthusiast, we hope that this guide will help you create or teach others how to easily use Pmods in microcontroller projects.
Let us know what you plan on making in the comments below or share a project you’ve accomplished on the new Digilent Projects website. Stay tuned for future updates as we continue to add even more Pmod Application Notes projects to the growing Digilent Projects page!


