

Pmod Monthly is our YouTube-hosted monthly video series that features cool projects using Digilent peripheral modules, or Pmods. Each month, we offer the featured Pmods at a 30% discount for the duration of that month to encourage people to get their hands dirty and give these projects a try. And yes! The discount still applies on top of the Pmod Summer Sale!
Our featured project for the month of July is…
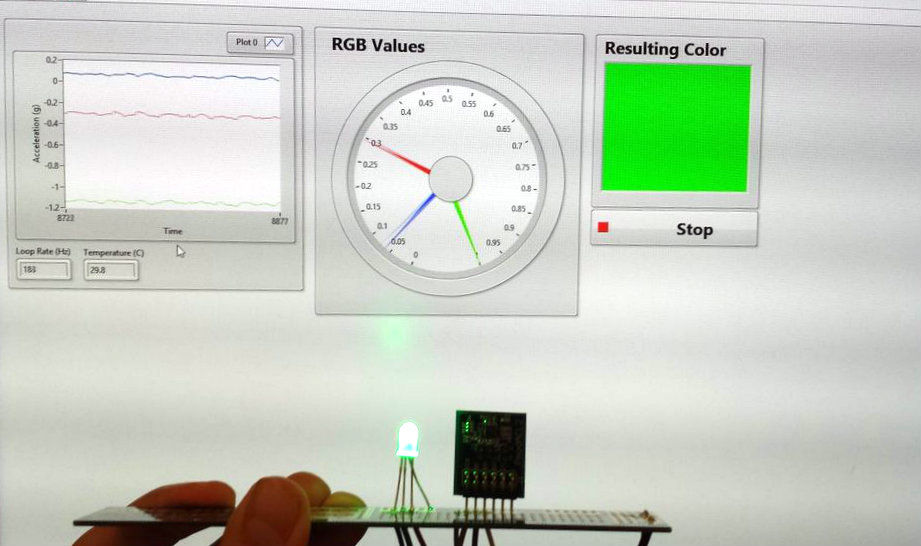
The Raspberry Pi Rainbow Ruler! This project changes the color of an RGB LED depending on the acceleration measured by the PmodACL2 MEMS accelerometer. The LabVIEW front panel is also updated to reflect the measurements of the red, green, and blue colors as well as the expected LED color, as can be seen in Figure 1.
In a previous blog post, Dharsan discussed the Raspberry Pi 2 version of this project. However, it will also work with the BeagleBone Black (BBB), so whichever handheld embedded Linux board you fancy, this project will work for you! And what’s more, the BBB could be used to illuminate the LED with a PWM signal, allowing for a wider range of colors. Check out Dharsan’s Instructable on the Raspberry Pi 2 edition.
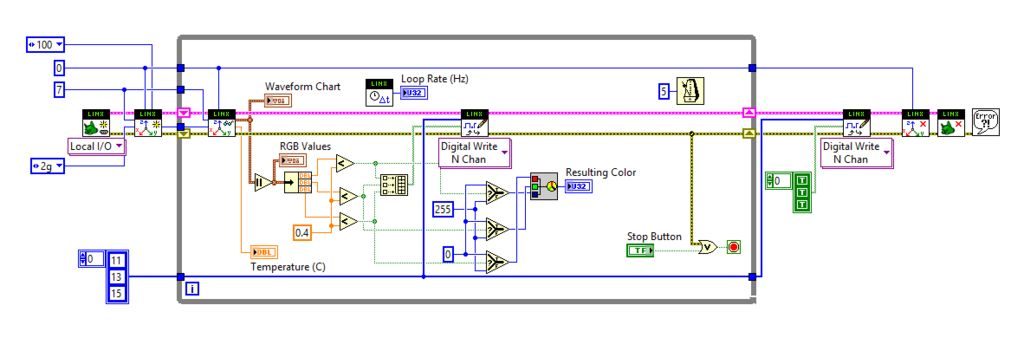
The hardware used includes a Raspberry Pi 2, a PmodACL2, an RGB LED, and a Digilent PCB Ruler. The software used is LabVIEW and LabVIEW MakerHub LINX, which provides easy-to-use LabVIEW VIs for interacting with the Raspberry Pi and other common embedded platforms like the BeagleBone Black. The PmodACL2 is one of the many sensors offered in the Digilent Pmod line. It uses the Analog Devices ADXL362 MEMS accelerometer chip, which is capable of up to 12 bits of resolution as well as useful features like activity/inactivity monitoring and free-fall detection. In order to get the PmodACL2 working with LabVIEW, Dharsan has written a sub VI that targets the PmodACL2 for easy drag-and-drop into a larger program. A total of 12 Pmod sub VIs have been added to LINX, including the PmodALS ambient light sensor and PmodGPS. And more are being created all the time! Check out another one of Dharsan’s Instructables on Plug and Play Pmods to see additional examples.

In order to purchase the PmodACL2 at an even further discounted price, you simply need to watch our Raspberry Pi Rainbow Ruler video that will be released on July 1st to discover the promo code. Once you have the code, simply enter it in during checkout from our store to receive an additional 30% off of the PmodACL2. In addition, we will be offering the PmodACL2 for only $10 with purchase of the LabVIEW Physical Computing Kit. This means users can get LabVIEW Home, the Raspberry Pi 2 and PmodACL2 all for under $100!
We hope you enjoy this project. Make sure to watch the video to see it in action! If you create your own version, please let us know in the comments below. We might even include it on our Wiki as a community project!
Check out these links for some other community projects using the Digilent PmodACL2.
Assist Glove – A Patient Aid Device