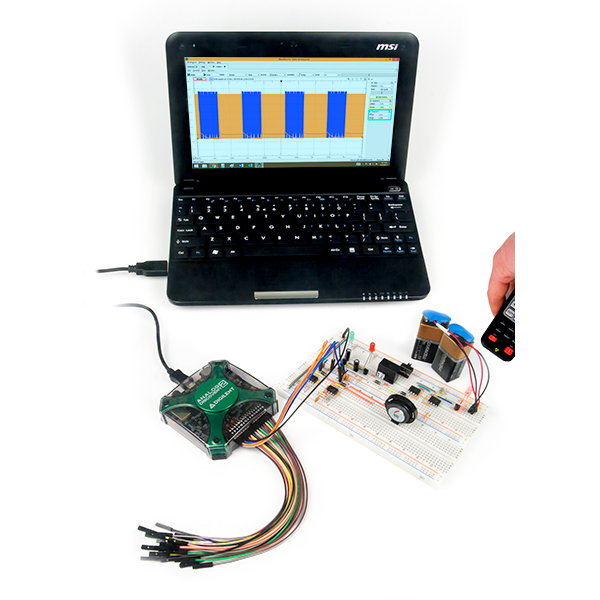
As engineers, we know the importance of having versatile and effective tools at our disposal. The Analog Discovery 2 from Digilent is one such tool that has become a staple in many labs and engineering projects. This compact USB oscilloscope and waveform generator is packed with features that make it ideal for a wide range of applications, from electronics education and research to product design and development. Some key features of the Analog Discovery 2 include a 2-channel oscilloscope, 2-channel arbitrary waveform generator, 16-channel digital logic analyzer, and a spectrum analyzer. With its impressive set of capabilities, it’s no wonder that the Analog Discovery 2 has been used in countless engineering projects in the years since its release. In this list, we will highlight a few projects that demonstrate the capabilities of this incredible tool and how it can help you take your engineering projects to the next level.

1. Build an analog theremin using only the Analog Discovery 2, the Digilent Analog Parts Kit, and your choice of an empty beverage can!
In this project, the Analog Discovery 2 is used to create a theremin, a unique electronic musical instrument that is played by moving one’s hands through an electromagnetic field. The project utilizes a beverage can as a resonant chamber and incorporates a proximity sensor to detect hand movements. With the help of the Analog Discovery 2’s waveform generator and oscilloscope, users can fine-tune the instrument and achieve accurate pitch and tone control. This project demonstrates the versatility of the Analog Discovery 2 as a tool for exploring and experimenting with different electronic circuits and applications.
Beverage Can Theremin – Hackster.io
2. Expand the capability of your Analog Discovery 2 by opening up its differential input to detect ground loops in your circuits!
This project showcases the Analog Discovery 2’s capability as a versatile and portable ground loop detector and its ability to aid in the debugging of complex systems. By utilizing the oscilloscope and waveform generator functions, this project allows users to detect ground loop issues and noise interference in audio and video systems. The project includes step-by-step instructions and code examples that enable users to easily build their own ground loop detector. The detector can also be easily modified and adapted for other applications.
Don’t Get Stuck in a Loop — Ground Loop Detector for Analog Discovery 2
3. Use an Analog Discovery 2 from Digilent to test hi-fi amplifiers!
This project utilizes the Analog Discovery 2 as a portable audio analyzer to measure the frequency response and distortion of a speaker system. By using the built-in waveform generator and oscilloscope, users can obtain accurate and detailed measurements of the audio performance of their system. The project also demonstrates the ability of the Analog Discovery 2 to generate and analyze complex signals in real-time.
Amplifier Testing Project Video on Youtube
4. Build your own DIY speaker impedance analyzer with Analog Discovery 2!
In this project, users can create their own impedance analyzer using the Analog Discovery 2 to measure the impedance of a speaker system. The project uses a simple circuit and custom software to generate a frequency sweep and measure the speaker’s impedance response. With the impedance data, users can determine the resonant frequency of the speaker and optimize their system’s performance.
5. Build a DIY ECG with Analog Discovery 2, a biomedical breakthrough for hobbyists in 8 easy steps!
In this project, the Analog Discovery 2 is used as a data acquisition device to build a DIY electrocardiogram (ECG) using LabVIEW. The project demonstrates the versatility of the Analog Discovery 2 as a tool for biomedical research, allowing hobbyists to do what would normally be limited to only biomedical research professionals. The project also provides a step-by-step guide on how to set up and use the Analog Discovery 2 for ECG measurements.
DIY ECG Using a Analog Discovery 2 and LabVIEW : 8 Steps
We want to see your AD2 projects!
Share your past and current projects with us by tagging us on social media using @DigilentInc, we love to share your projects! You can also upload your projects to the Digilent Project Vault, where others can learn from and be inspired by your work. Don’t forget to also tag us on Hackster.io, where we have an active community of engineers and hobbyists sharing their latest creations. We can’t wait to see what you’ve created!
Shop Now!
From building unique musical instruments to testing audio systems and even creating DIY biomedical devices, the Analog Discovery 2 has proven its value time and time again. We encourage all engineers and hobbyists to check out the Analog Discovery 2 on the Digilent shop site and see for themselves how this incredible tool can enhance their projects. Don’t miss out on the opportunity to explore the full potential of the Analog Discovery 2! Shop the AD2 now by clicking here: Shop Digilent


One Comment on “5 Ways to Use the Analog Discovery 2!”