An oscilloscope is a type of electronic measurement instrument used to monitor or analyze a voltage signal. Typically, the signal amplitude will be displayed as a function of time. Voltage signals can vary in amplitude, frequency, and overall behavior so the ability to visually qualify and quantify a voltage signal can be extremely important and useful. More often than not, an oscilloscope will have two voltage signal inputs such that both signals can be displayed at the same time, which can be really helpful if you want to compare an input signal to an output signal for reasons such as gain, phase shift, distortion, period, or just the waveform shape. Personally, I have used oscilloscopes to quantify and verify gain and phase shift of an output from filters or amplifier circuits given some input signal. Analog signals are usually the applied inputs due to their continuous nature, however, some digital signals can also be analyzed with an oscilloscope but are usually better off observed with a logic analyzer for various reasons (see my post describing logic analyzers).

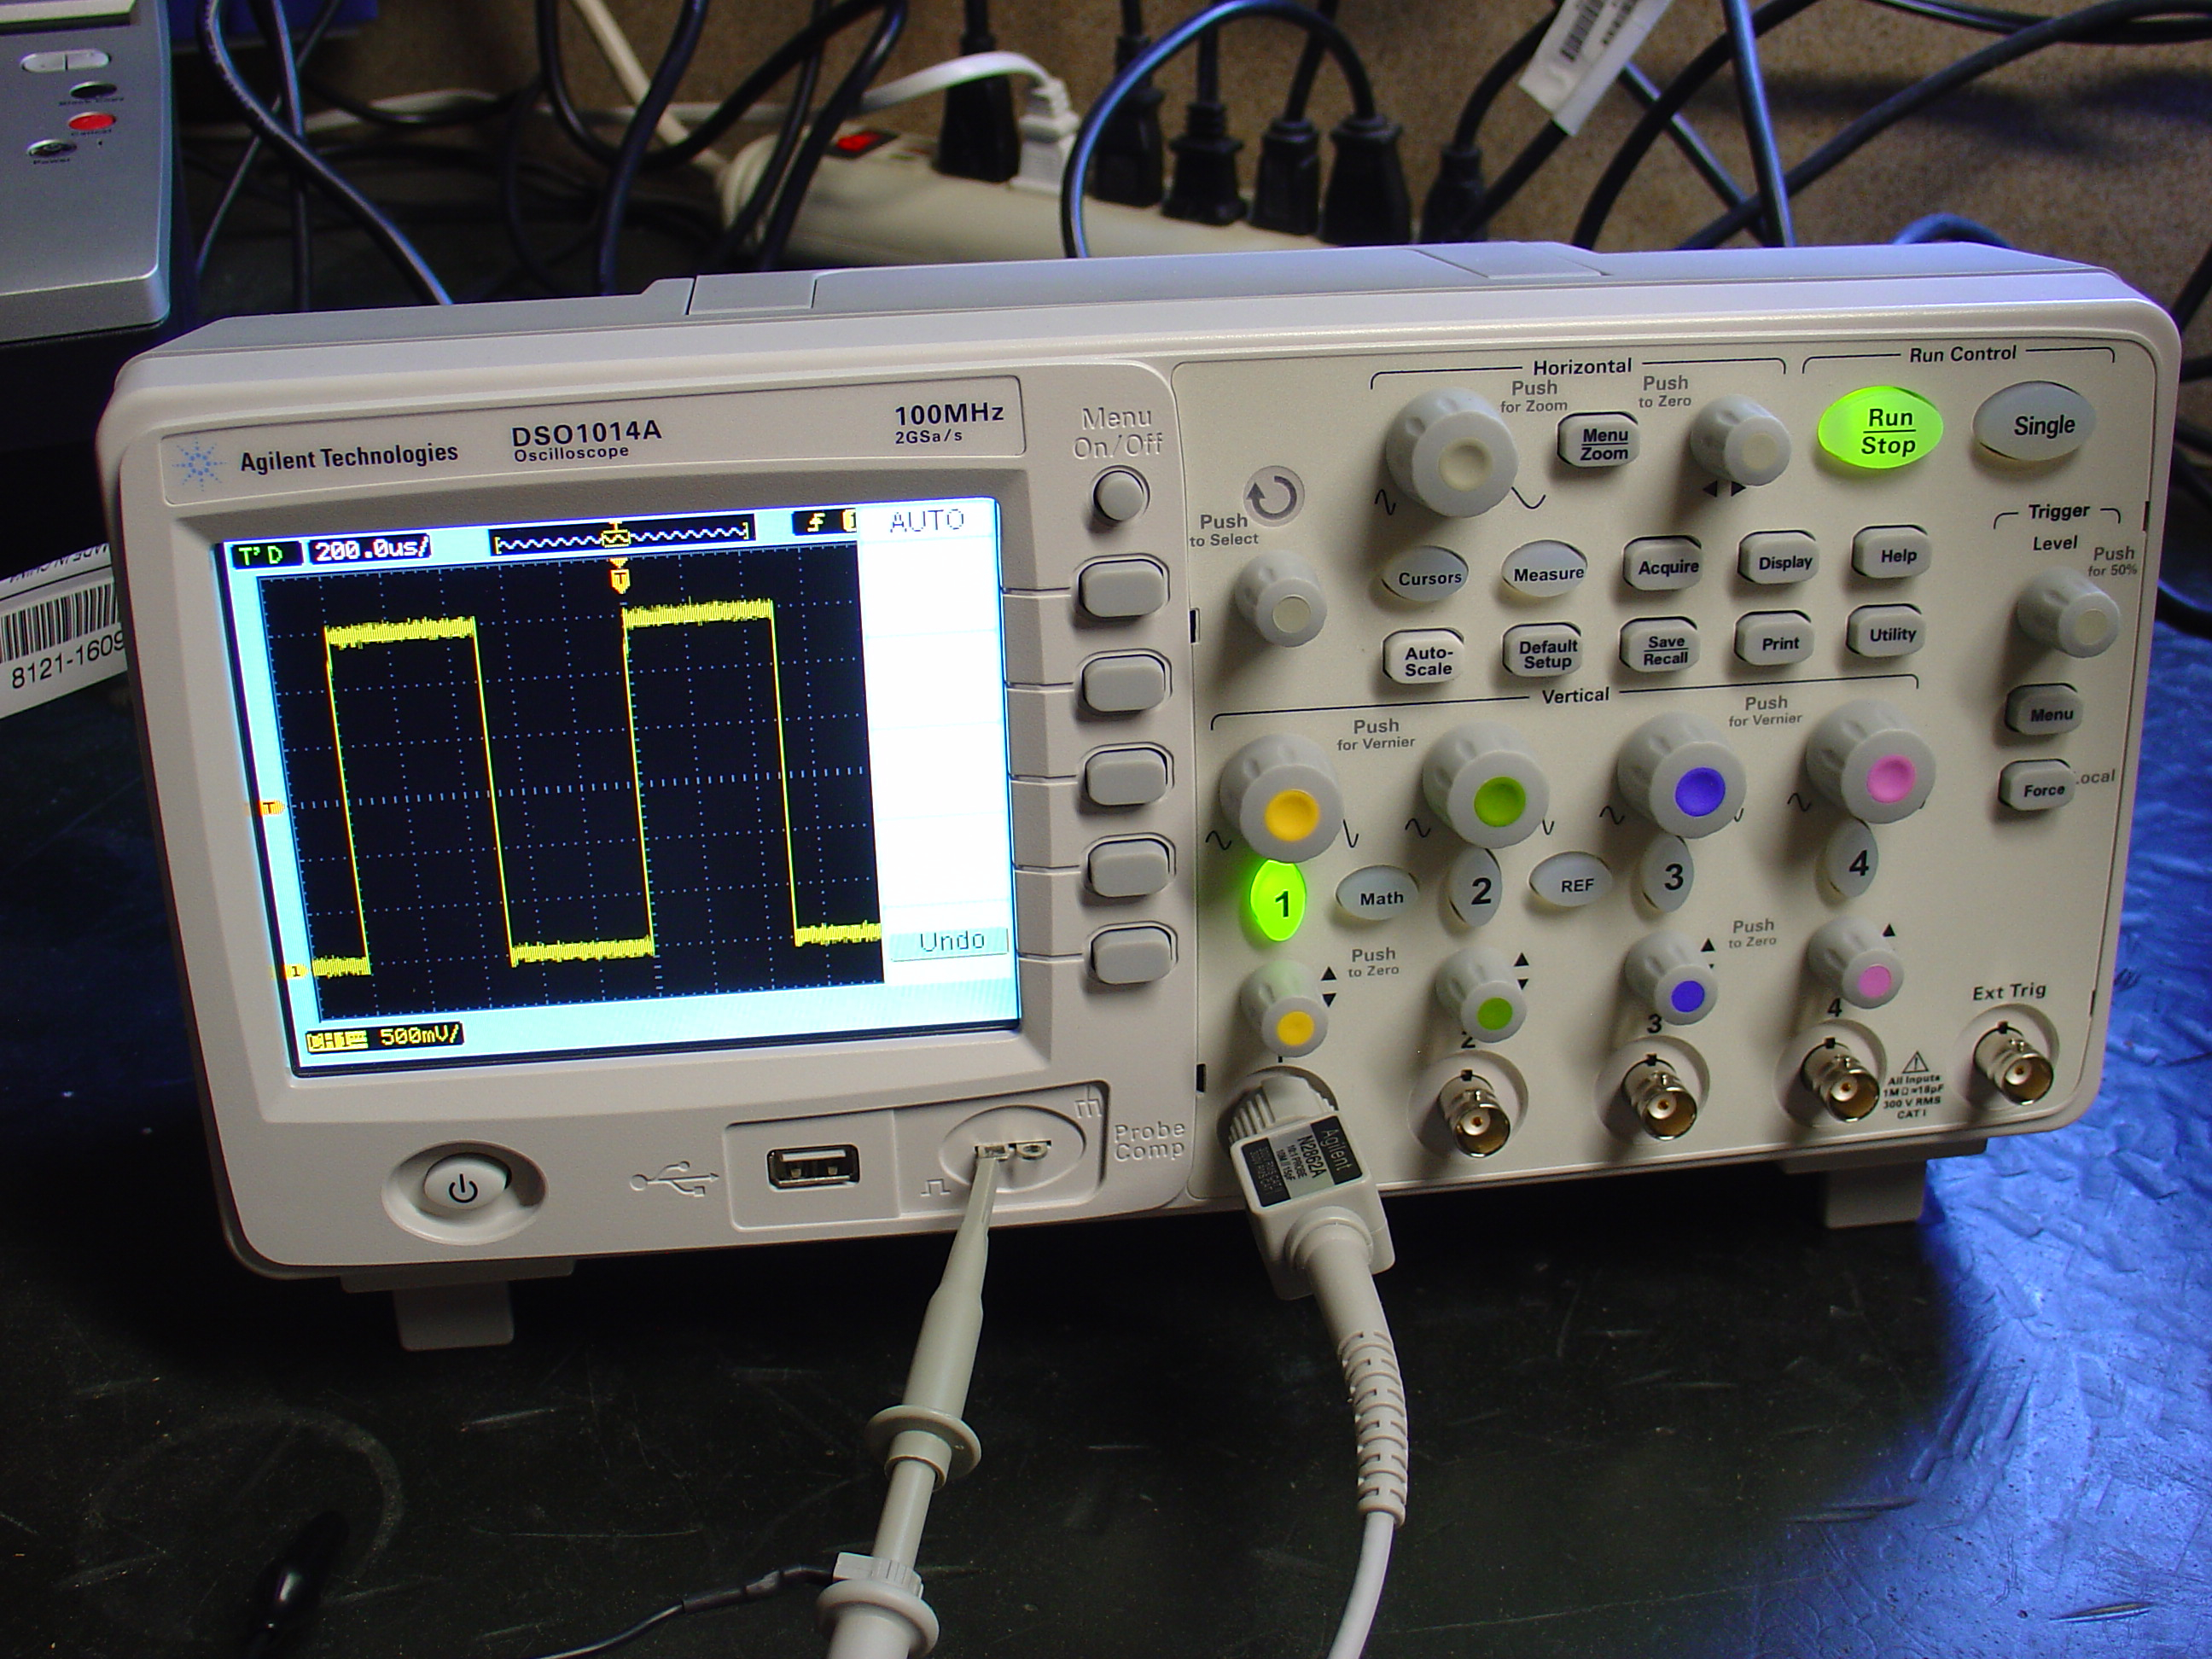
Above is an example of a typical benchtop oscilloscope displaying a square wave that might be coming from a digital signal. They can be intimidating to newbies but if you start with the basics, you’ll find them not too complicated to display signals. Photo from here.
Oscilloscopes also utilize what is called a “trigger” to display repeating, dynamic signals in a perceptively static state for analysis. For example: if you were interested in looking at a waveform with a frequency of 1kHz, the oscilloscope would show a blur of waves flying across the screen. Since that’s typically not very helpful, the trigger defines an event or condition to start the acquisition process, and displays that event or condition at time zero. For basic trigger operation, you adjust the trigger parameters to “hone-in” on a stable event for the wave that repeats at a regular interval. The display you will see will appear to be a static representation of what is truly a dynamic signal(s) making measurements, observations, and deductions possible with higher frequencies. For more information about triggers, check out my more detailed blog post.
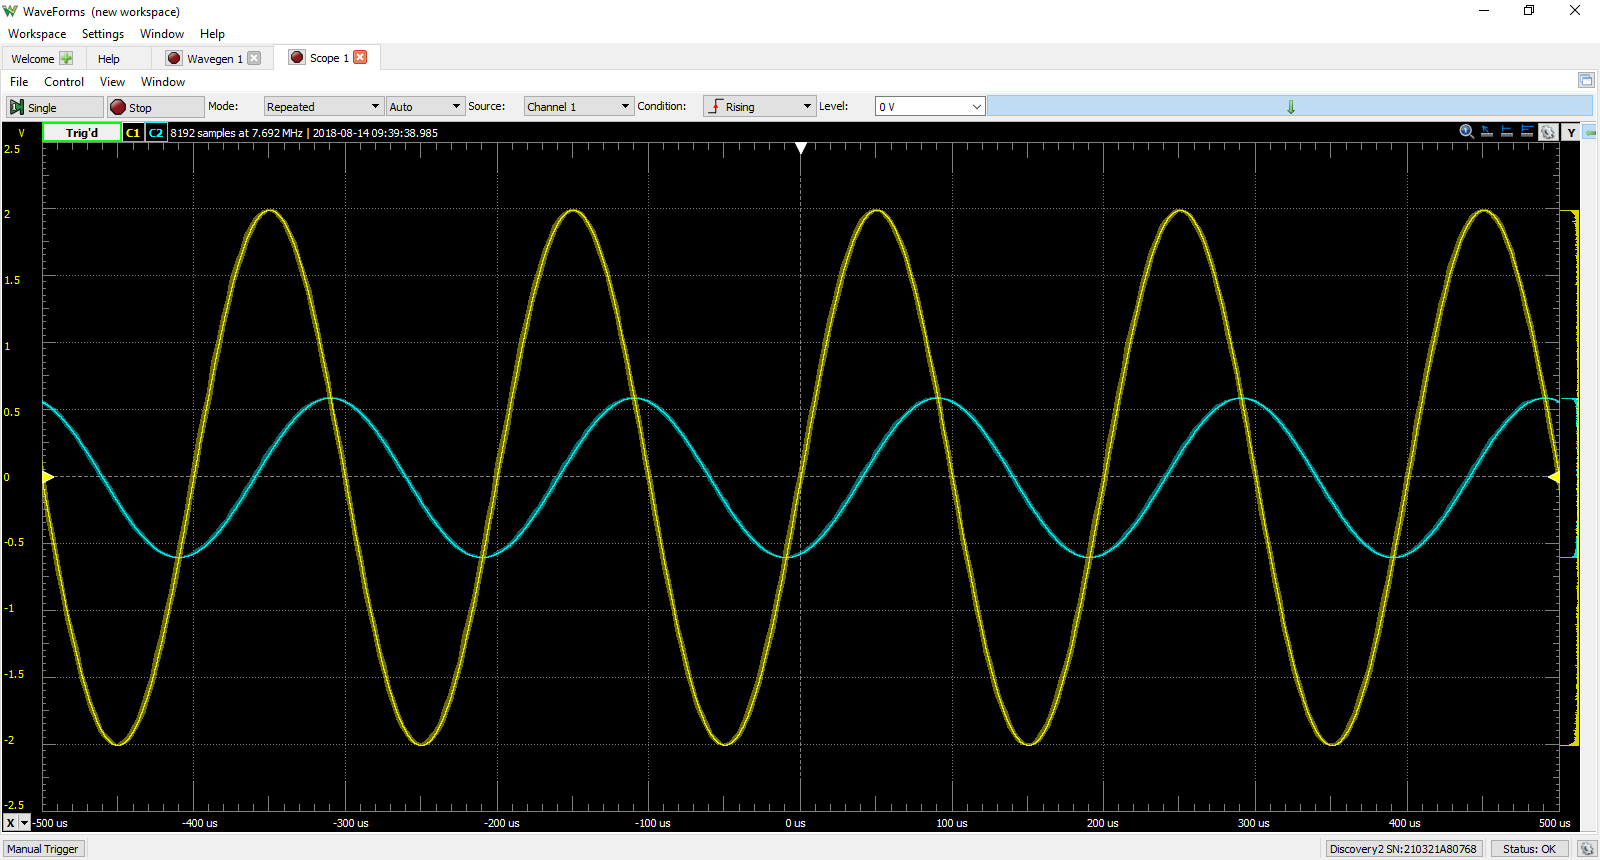
Usually, the scale of the time axis and the amplitude axis will need to be appropriately adjusted for the signals that the scope (the informal term of oscilloscope) is attempting to capture. You can download WaveForms software for free, and run it in demo mode to get some hands-on experience with an oscilloscope or use it with an Analog Discovery 2 or Electronics Explorer for scoping your own signals. Below is an example of an oscilloscope screenshot from WaveForms (using the Analog Discovery 2) of the input plotted against the output of a low pass filter (LPF). The input is the yellowish curve and the output is the blueish curve; plotting them on the same axis makes comparison easiest when analyzing the effect of the LPF on the gain and phase of the output when compared to the input. Without an oscilloscope, this would be much more labor intensive with less intuitive results. Right-click the image to view a larger version.

With this screen shot, we can see that at this particular frequency (5kHz), the LPF reduces the signal from about 2V to 0.5V (a function of the resistor and capacitor values) and phase shifts the input signal by 90 degrees lagging (expected for a first order LPF). Math could be done for a theoretical solution, but putting the input and output on an oscilloscope can validate expected behavior and might save time. I hope that was informative! Happy signal scoping!


Oscilloscope helps us to determine the electrical voltage signal through its use.we can analyse it in a CRO tube.