

With property nodes, you can start making your LabVIEW program more powerful and a lot more fun. Property nodes allow you to programmatically control the properties of a front panel object: things such as color, visibility, position, numeric display format, and so on. The key word here, programmatically, is changing the properties of a front panel object according to an algorithm in your diagram. For example, you could change the color of a thermometer indicator from green to red as its numerical value increases. These types of changes can help create a more intuitive user experience.
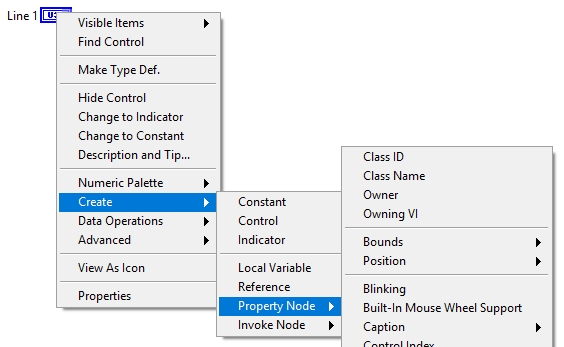
To create a property node, pop up on either the front panel object or its terminal and select a property from the Create>>Property Node submenu. A terminal with the same name as the variable will appear on the diagram. To see what options you can set in a control’s property node, click on the node with the Operating tool or pop up on the node and choose property. Now you have the choice of which property or properties you wish to select. Each object has a set of base properties (common to all types of controls), and usually, an additional set of properties specific to that type of control.
Just as with local variables, you can either read or write the property of an object (although a few properties are read-only). To change the mode of a property, pop up on it and select the Change to Write/Read option. The small arrow inside the property node’s terminal tells you which mode it’s in. A property node in write mode has the arrow on the left, indicating the data is flowing into the node, writing a new property. A property node in read mode has the arrow on the right, reading the current property and providing this data. The same analogy we used for locals, a control (read mode) and an indicator (write mode), holds for property nodes.
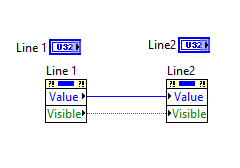 An interesting feature of property nodes is that you can use one terminal on the block diagrams for several properties (but always affecting the same control or indicator). To add an additional property, you can use the Positioning tool to resize the terminal and get the number of properties you need. Often you will want to use more than one option in an object’s property node. Remember, instead of creating another property node, you can select several options at a time by enlarging the terminal with the Positioning tool (much like you enlarge cluster and array terminals). You will see each new option appear in sequence; you can later change these if you like by clicking on any item with the Operating tool.
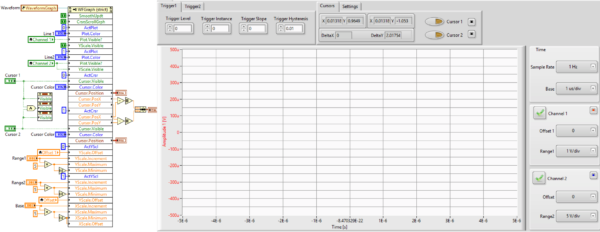
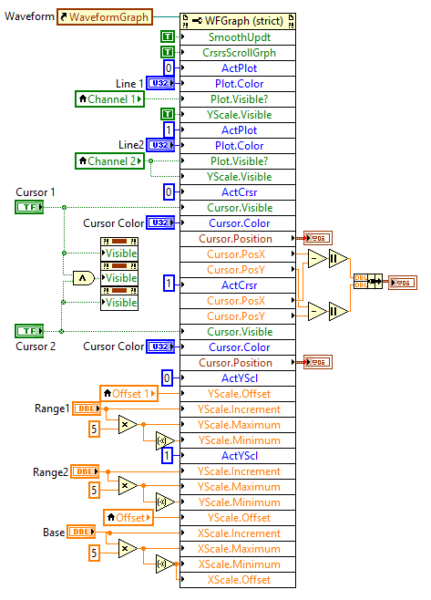 Almost all controls or indicators have the base properties. Most of them have more, especially tables and graphs (which can have over 100 properties). For example, it took all of the property nodes shown above(and more) to create the Analog Discovery 2 Oscilloscope interface shown below. The best way to learn about property nodes is to create some to go with your application and begin to play around with them.
You’ll find that property nodes are very handy for making your program more dynamic, flexible, and user-friendly. Thank you for reading my blog post, and for more information about using property nodes in LabVIEW check out this link. If you are interested in trying out LabVIEW for yourself, you can purchase a copy of LabVIEW 2014 Home Edition which includes everything you will need to run LINX 3.0. Please comment below with any questions or comments you may have.
Is there a way to collapse all the properties if the only one I have wired is a long way down the list?
Property node using reference is not clear to me despite your nice description.
How is it different from using a local variable to reference a property node?
Can you show a table indicating the differences?
An example of why to use one over the other and why not would help.
Thank you