Today we will profile another super useful tool in the WaveForms arsenal- the Voltmeter!
According to the Digilent Wiki:
Voltmeters are an efficient way to get a direct measurement of the voltage across a component. They are commonly found on digital multimeters (DMMs) but are also available as a tool in the WaveForms software.
These nifty little devices are good for when you need a simple interface to see a voltage value. It has two channels and shares the oscilloscope channels. The Wiki page goes further into depth using an example project and the Analog Discovery 2 to illustrate how to use this tool.
All you need to get started with this tutorial is the following:
-
A computer with USB port to run the software
-
A potentiometer
-
A LED
-
A small breadboard
If you do not have WaveForms already downloaded, check out the walkthrough to do so with our Getting Started Guide. Then click the Voltmeter icon.
![]()
Choose your settings by clicking the “Gear” button by the Run icon. Then back in the Welcome tab click on the “Supplies” icon to set the Power Supplies. Then it is time to set up our circuit!
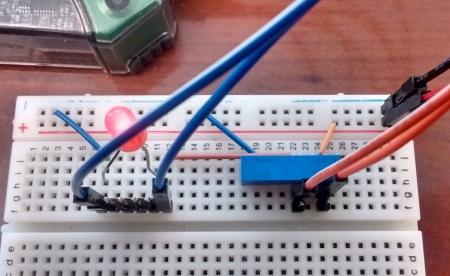
The circuit in this tutorial uses a potentiometer to control the amount of resistance presented to an LED.

The Wiki page provides full documentation regarding proper circuit set up.
Once you have set up your circuit, it’s time to measure the voltage! Enabling the Master controls on the Power Supplies provides energy to the system. Click the green “Run” button on the voltmeter tool to begin.
If you have any further questions about the Voltmeter tool, please ask them on the “Scopes and Instruments” section of the Digilent technical Forum.


That’s good to know that the voltmeter will tell you how many volts are flowing through the wires. I could see how that would be valuable information to make sure that you aren’t using trio much power and damaging your electronics. I’ll have to think about getting something like that for a project I’m working on.