

The Analog Discovery 2 contains a USB Oscilloscope tool that allows you to measure voltage as it varies over time. This can be incredibly useful when you need to see if the signals you intend to create from within your project or circuit are the signals that are actually being sent.
Although many problems can be solved by knowing the voltage at a given point, it is often helpful to be able to measure the current over time of a given circuit. We often get asked, “can the Analog Discovery be used to measure current?”
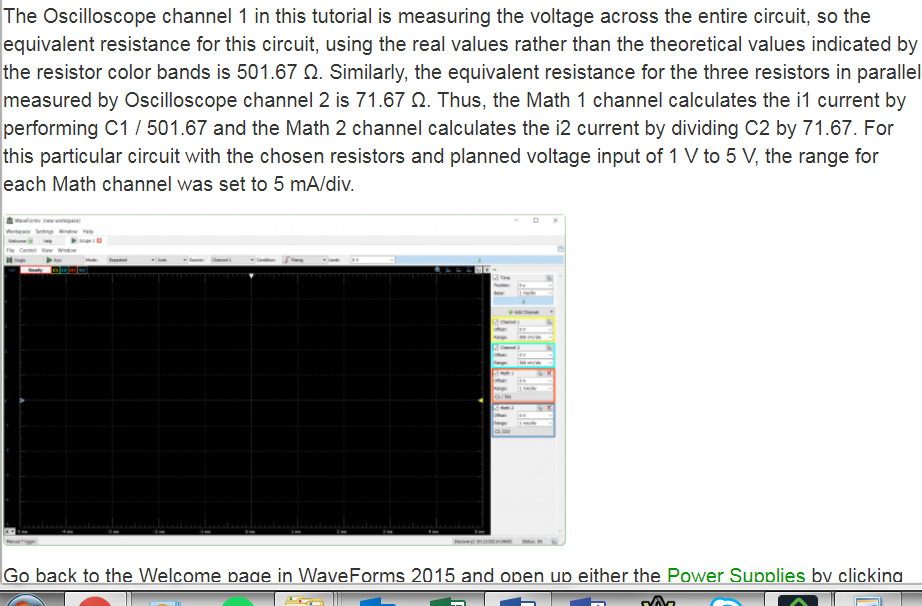
The answer is: directly? No, but you can measure the voltage over a resistor or resistance and use that value in combination with a math channel to calculate the current through that section of circuit in real time.
To learn how to measure current with the Analog Discovery, check out the tutorial on the wiki. The tutorial goes through how to measure current with an example circuit.
First, it has you set up an example circuit, whose current is to be measured:
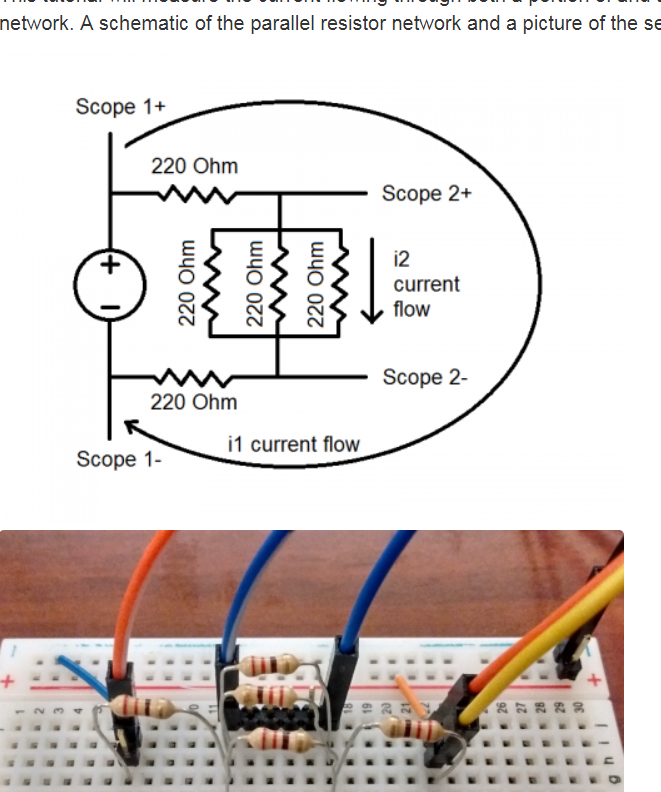
In this case, it is a simple resistor network. The tutorial will demonstrate how to measure the current through the entire resistor network, as well as through a smaller section of the resistor network.
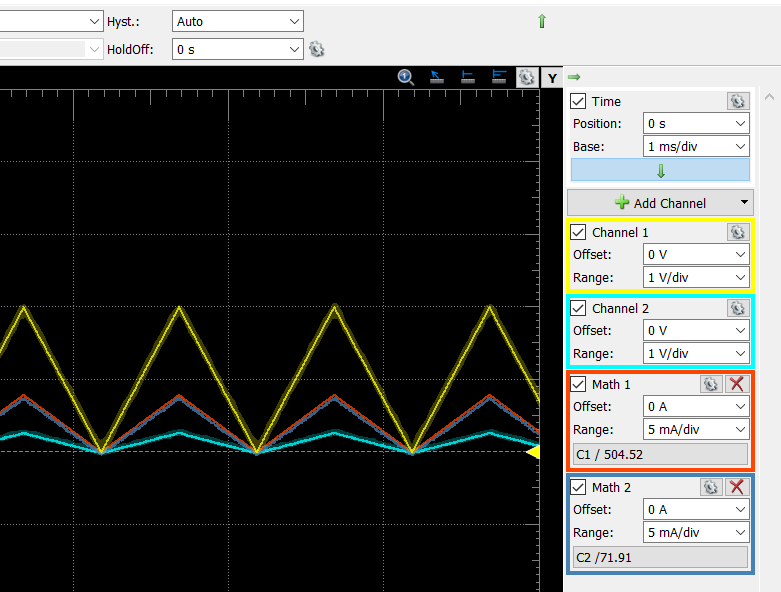
Next, the tutorial demonstrates how to set up two math channels, one to calculate the current for the whole circuit, and one for the smaller section.
Finally, the tutorial ends by demonstrating the input voltage, output voltage, and current as calculated by the math channel on the same plot.
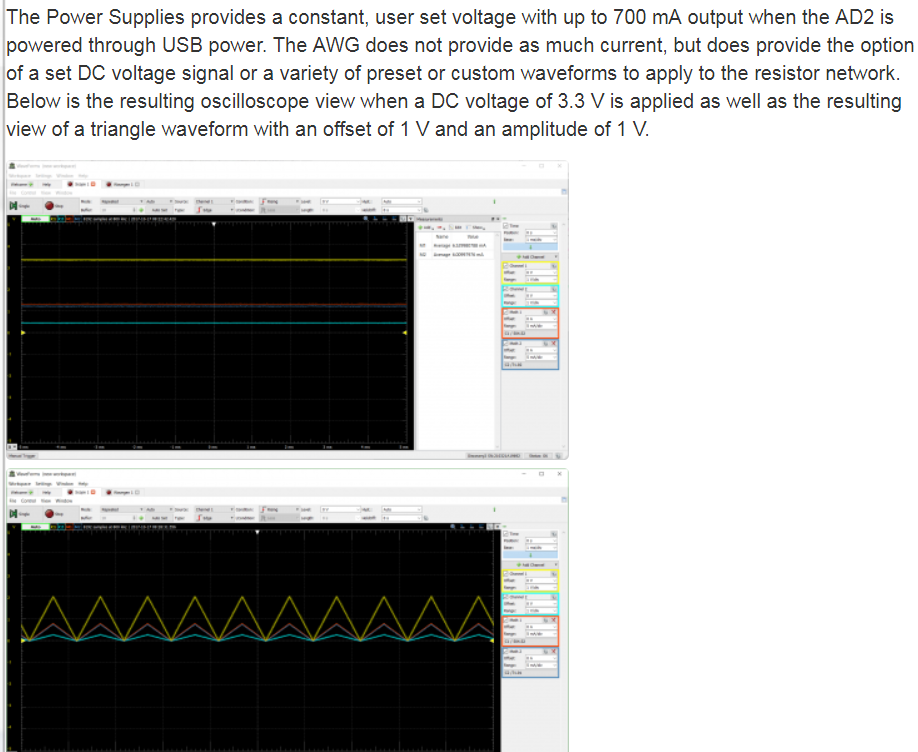
In this case, using a constant voltage as stimulus to the circuit, and a triangle wave.
You can find the entire tutorial on the Analog Discovery 2’s Wiki page.
Both the link to the tutorial as well as the link to the Wiki page appear to be broken.
Fixed! Thanks!