Want to have some LabVIEW fun? A few months ago, Davis Cook (dacook13) did a series of Instructables on using LabVIEW with Digilent products, and we thought it was a good time to revisit!
The first project is a basic tutorial on how to connect the a ADLX345 Accelerometer IC (found on the PmodACL) to LabVIEW, while the second explores how to filter out undesirable noise from those accelerometer readings. To do these projects, you’ll need a chipKIT Max32, a breadboard, a PmodACL, as well as a couple of optional items (depending on whether you want to build a base/platform). You’ll also need LabVIEW and LINX.
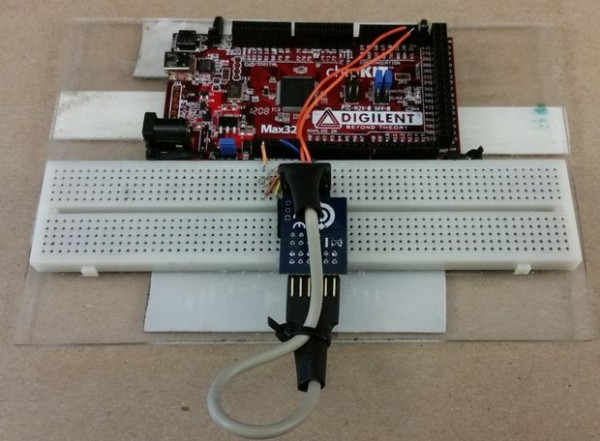
The circuit for both projects.
The former Instructable provides instructions on setting up the circuit and compiling the relevant code, which is fairly straightforward in LabVIEW. You then have to calibrate the output. You can also secure the project with the base or platform, but that remains optional. With the circuit already built going into the second Instructable, the first step will to be to use the code. You’ll need to decide on the best method or combination of methods for filtering. Then, set the filter controls and get rid of that noise!
This is a great set of projects to learn the basics of LabVIEW and filtering, and there are plenty of ways to use them. Let us know what you think!
I was the Digilent blog editor, and now I'm a contributor. I love learning about wearables and writing about social issues in STEM. Outside of work, I can be found watching Netflix with my cat, working on an art project, or trying to find new, delicious local foods.
I was the Digilent blog editor, and now I'm a contributor. I love learning about wearables and writing about social issues in STEM. Outside of work, I can be found watching Netflix with my cat, working on an art project, or trying to find new, delicious local foods.