

A good display is hard to find. So when I came across the Adafruit’s 1.8″ 18-bit color TFT LCD display with microSD card breakout I couldn’t wait to get it working on our chipKIT boards.
Products I used from Adafruit:
- 1.8″ TFT Screen
- Only the range finder in this robot kit, but you can get it on its own at Pololu
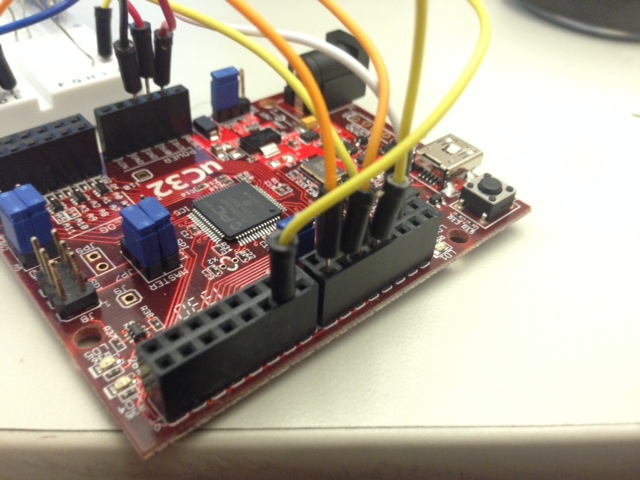
In the video, I used a Parallax PING sensor to measure distance and output image data to the screen using a chipKIT uC32. (You’re not limited to using the chipKIT uC32–any other board that supports SPI communication works too.)
You can see my code here.
What I did:
Adafruit provides a good tutorial on how to wire the screen up and get it working for Arduino boards here.
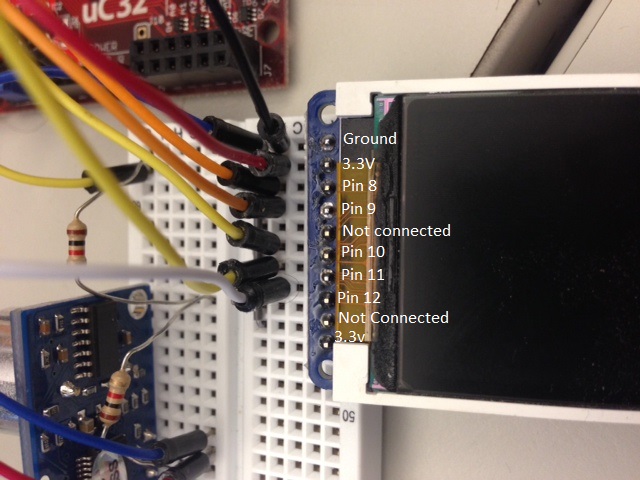
Then, I had to connect the LCD screen to the chipKIT and make sure the pins corresponded to my code.
Our demo file has some code pulled from Adafruit’s GFX library so that it will work on a chipKIT board. All I had to do was tweak the code (change the pins and make sure that the board was set right) so it would work on my UC32 PIC32 microcontroller. I used a similar approach to the one used in a previous blog post to create a bitmap array that could be output to the screen. The only difference is that I added a function that can take a monochromatic bitmap and output it to the screen.
For the completed demo, I used the PING sensor to measure distance and output a Digilent logo bitmap to the display on the screen, which is dependent on the distance from the sensor.
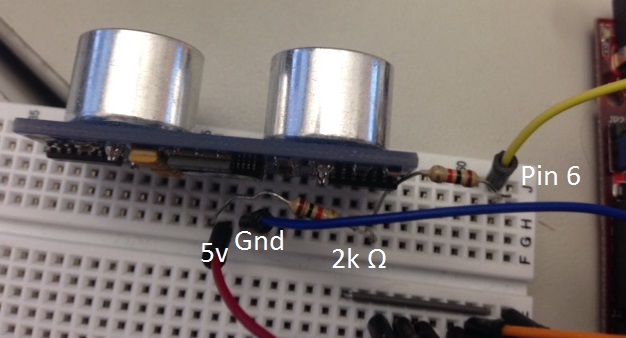
I also used the PING sensor as a scope, which graphs the distance from an object to the sensor over time.
You can see in the video below how the screen tracks the distance of my hand.
It was a lot of fun to be able to get a full color display on my chipKIT. Check out the videos, the demo code, and make sure to head over the Adafruit to try out one of their displays with your own uC32!