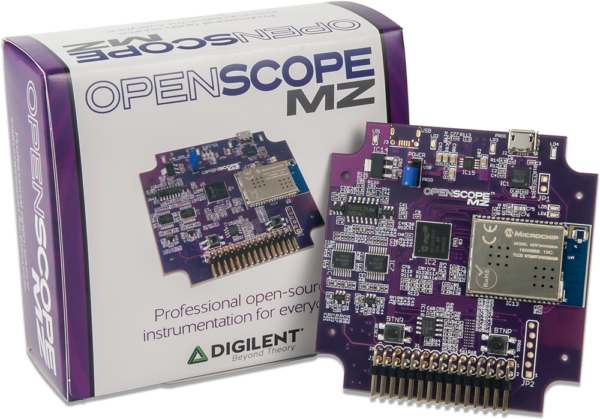
On Monday, we announced that the OpenScope MZ is now available. Together, with the 400+ people who backed the OpenScope MZ on Kickstarter, we have almost 500 OpenScopes MZ out in the wild already!
So, what happens once you get your OpenScope MZ?

Well, we created this guide to help you get started right away.
- Open Box and Check all the parts- When you get your OpenScope MZ, open up the box and check you have the fly-wire cable assembly and the OpenScope MZ.
- Get Waveforms Live running-
You’ll need a USB Micro Cable ( not included unless you purchase the accessory kit)
(I borrowed mine from my Sparkcore development kit) - Connect the USB Cable to your computer.
Once your OpenScopeMZ is connected, you should see blue flashing LEDs. - Download and Install the Digilent Agent
The Digilent Agent is a piece of software that allows your OpenScopeMZ communicate to your computer. You’ll need to do this at least once (to set up your Wi-Fi).
Visit the OpenScope MZ Resource Center scroll until you see the software download section:
Select the Digilent Agent, and you’ll go to the Digilent Agent page.
Choose your Operating system.
I’m using a Mac, so I download it and install it.
When it’s installed, you should see the Digilent Agent icon on your system tray.
That’s when you should open a browser window and visit www.waveformslive.com
- Connect and Calibrate your OpenScope MZ
One you are on Waveforms Live, you’ll be asked to Add a Device
(This will only work if you have the Digilent Agent installed!)
Once you are connected, you’ll be prompted to update your firmware.
In this firmware window you can revert your device to past versions using the drop down. We recommend always using the most current version!
When you hit <UPDATE> Your OpenScope MZ should have a red-led showing the firmware is being written.
Then, you’ll be prompted to calibrate your OpenScope MZ (for the most accurate measurements).
You’ll need a way to connect two sets of wires. You can use 2 paperclips, 2 staples or, in my case, I used breadboard wires.
You’ll be tying the Oscilloscope Channel 1 to +VCC and Oscilloscope Channel 2 to -VCC.
Then, hit <Begin>
Once calibration is done, you should be prompted to save the config file. We recommend saving it to your OpenScope MZ’s flash so you don’t need to do it again.
These steps done, you are able to begin using your OpenScope MZ over USB. If you don’t plan on using USB, but Wi-Fi, you’ll need to follow the <Set up Wi-Fi> menu and get the IP address of your OpenScopeMZ. You can follow that tutorial here.
- Take your first measurement!
With everything set-up, you can get started using Waveforms Live!
We have a lot of tutorials set up to help walk you through each of the tool options.
Tutorials for Waveforms Live - Enjoy and please share!
RT ghalfacree: Finally getting some time with my DigilentInc OpenScope MZ – very impressed so far! pic.twitter.com/KKfPwdCRTi
— Rastek Technologies (@Rastek_tech) June 30, 2017
Trying OpenScope MZ. Hope waveformlive can be ported to #esp32 pic.twitter.com/QLcnUX65zE
— Baoshi (@ba0sh1) June 23, 2017
Yay! Finally made it alive! #whatshouldihacknow ?@DigilentInc #openscope for #makers from #kickstarter https://t.co/rpbS1PAia4 pic.twitter.com/VffTkKlGXl
— Pawel Manowiecki (@pawel_manu) July 8, 2017
We are loving the posts on social media of people getting started with their OpenScope MZs! Make sure to share and tag us… and get measuring!


Hey Larissa: I use a 2018-vintage macbook Pro. It has the small USB-C connectors, but I have multiple USB A adapters. So I go USB-C to USB A to microUSB to OpenScope MZ. When I plug in the micro USB connector into the OpenScope, LED5 and LED6 flash red twice. And then…nothing. No “blue flashing LEDs” from step 3.
At that point, I’m dead. WaveForms Live device manager doesn’t recognize anything on a serial port.
What now?
Ok. I wasn’t patient enough. USB serial port shows up. I select that.
OPEN Device. LED5 blinks once. LED5 blinks twice. Device Manager sends message : Cannot Connect with Device.
Still no blue LEDS, blinking or otherwise.
Hi Chuck! Have you tried posting this problem over at forum.blog.digilentinc.com? They will be able to help out with specifics!
Thanks, David. It turns out that I was truly not patient enough, because it seems to work fine now.
Glad it got sorted!