Today we are going to learn how to build a DIY DJ mixing board using some Pmods as well as some other cost-effective materials. This post will cover the physical build of the board, but stay tuned for the next installments which will focus on wiring up the circuit, adding the code and updating and improving the project!
To start, you will need to gather materials. Depending on the intended complexity of your mixing board this can include some optional things but for the basic functionality that we are going for, you need:
- A PmodSWT
- A PmodBTN
- 3 bottle caps (I used gaterade bottle caps)
- 3 small CDs
- Hot Glue
- Duct Tape
- Breadboard and Wires
- Popsicle Sticks
- Tin Foil
- A chipKIT uC32
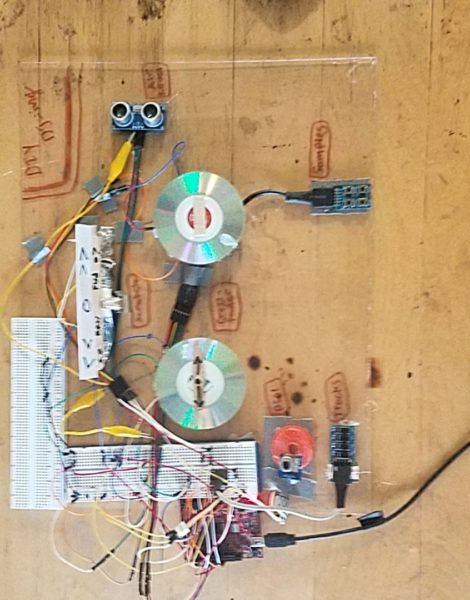
The most important feature on the mixing board that we are building is the ability to crossfade one track into the next. In this design we do that by using the PmodSWT to switch on and start playing a track, then the CD spinners to control the volume and transition them into each other. The PmodBTN allows us to attach samples or to trigger effects- right now mine is attached to two different drum beats, a police siren sound, and the classic airhorn sound.

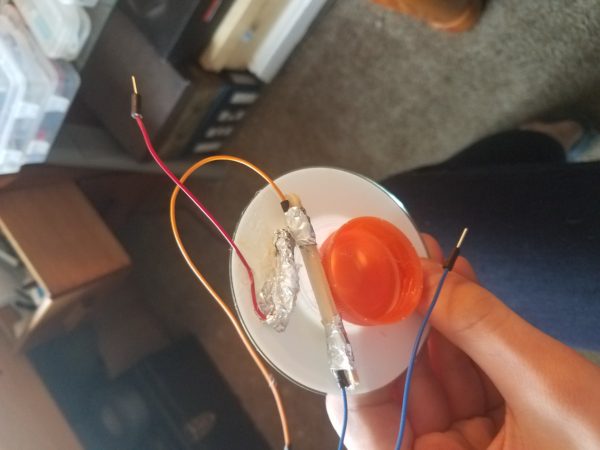
Since the Pmods include all the button and switches we need and save us the time and frustration that would be involved with soldering those up ourselves, we can get straight to the building of the CD spinners. The trick with these is that while they may look like they are using a potentiometer, they are actually just using two buttons and a wire connected to ground. I hot glued a Popsicle stick tangent to the bottle cap and wired two different digital pins to each end then attached ground as a sort of “fan” so it was between the two contact points. This allow me to “turn the volume up” when the spinner is turned to the right and then “turn the volume down” when it is turned to the left. This corresponds with a quickly iterating loop in MPIDE (the chipKIT IDE) so it is constantly reading the position of the spinner.

To secure the CD in place atop the bottle cap I hot glued half a Popsicle stick to the cap though the hole in the CD.
Once you have the crossfaders built, simply attach the Pmods. Congratulations, you now have the basic build of a DJ mixing board! The next steps will involve wiring the controls you have built to the chipKIT, then we will be working with code in MPIDE and Processing (using the Minim library) to manipulate the music. But before we get into that, feel free to explore more physical controller ideas.
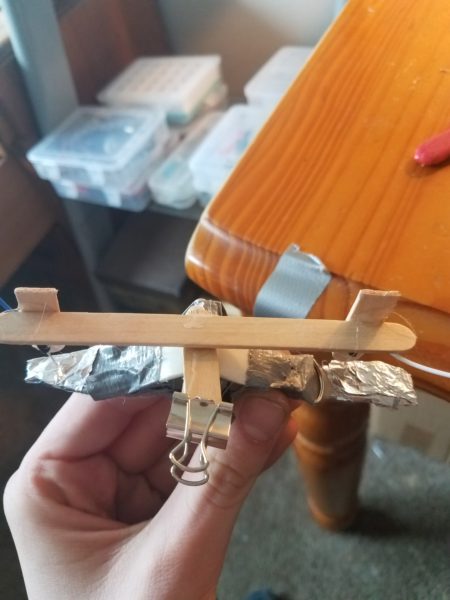
For example, one cool expansion idea would also be to attach a PmodMAXSONAR as a full pause switch so when you raise your hand a certain distance above the board everything stops for dramatic effect. You can also add a “scratch rocker” by using binder clips and some Popsicle sticks to control the reversing and fast-forwarding of the track.

Feel free to get creative with building different physical controls, and then stay tuned for part two where we delve into the code and how to wire everything up so that you can start mixing and controlling tracks! Part of the fun of this project is experimenting with different ideas so feel free try stuff out.

As always comment below with any questions or cool ideas you may have, and stay tuned for next week’s installment – wiring the circuit and adding the code!

