

For the past few weeks my fellow LabVIEW intern and I have been using LINX 3.0 to target the BeagleBone Black and the Raspberry Pi 2. After making several LabVIEW projects, I have my fair share of opinions about them both.
Specs
| Raspberry Pi 2 | Beaglebone Black Rev C | |
| Processor | 900Mhz Quad Core ARM | 1Ghz ARM Processor |
| RAM | 1 Gb | 512MB DDR3 |
| Storage | Micro SD Card (Required) Expandable via USB |
4 GB onboard flash storage. Expandable by USB & Micro SD |
| Audio | Stereo over HDMI or 3.5mm Jack | Stereo over HDMI |
| GPIO** | 26/40 Pins | 65/92 Pins |
| HDMI | Full Size HDMI port | Micro HDMI |
| Peripherals | 4 USB ports1 10/100 Ethernet port | 1 USB port 1 10/100 Ethernet port |
| Power Source | Micro USB | Micro USB or 5VDC connection |
A good way to begin the comparison is a hardware chart that I found here. Check out the link for an in-depth guide that takes a look at hardware, software, setting up the device and the community & projects around the device.
But rather than regurgitate the information on this site, my comparison will be based more on my experiences with each board and how well they worked with LabVIEW.
Setup
The BeagleBone Black comes with a pre-installed operating system which makes it extremely easy to set up if all you need is the 4GB onboard storage… unfortunately you need at least 8GB if you want to use it with LabVIEW. This means you will have to download and install the operating system to a 8 GB or larger micro SD card and then you will need to boot from the SD card by holding the user button during power up.
The Raspberry Pi doesn’t have any onboard storage, so its general setup is the same as what I just described for the BeagleBone Black. Overall, the setup is about the same for them both and can be done efficiently by following the setup videos on LabVIEW MakerHub.
Connections
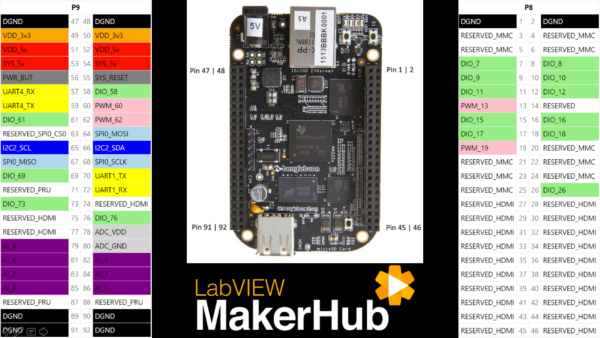
The BeagleBone Black has a total of 92 possible connection points and it has a large list of interfaces including I2C, CAN, SPI, UART, PWM. It also has four timers, five serial ports, seven analog inputs and 65 GPIO pins, check out the reference manual for more information. This many outputs make it extremely versatile for LabVIEW projects; my only real complaint is that the max analog input is 1.8V, but luckily I was able to use a PmodAD2 to get around this problem.
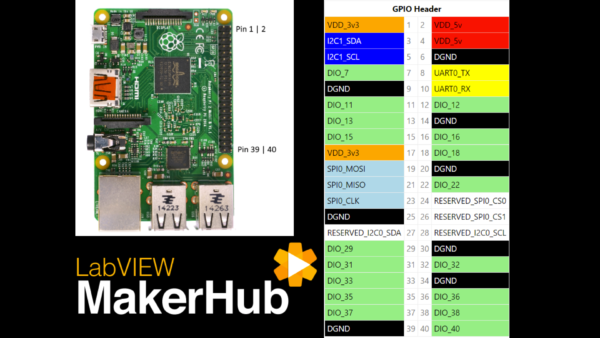
The Raspberry Pi 2, on the other hand, is much more constrained, it only has 40 possible connection points. The list of interfaces includes I2C, UART, SPI. It also has 26 GPIO, and the lack of analog input can be fixed using a PmodAD2 so it’s not a huge problem. Another issue is the lack of a designated PWM pin. I was able to use a GPIO pin to simulate PWM, but it made my code more complicated than my BeagleBone Black Code.
Operating system
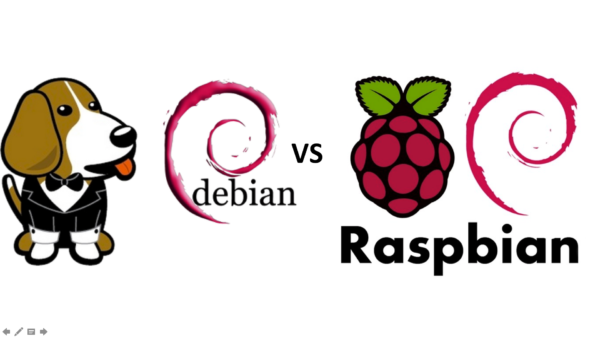
For the BeagleBone Black, you will want to use Debian 8.3; it can be downloaded here. Debian has a reputation within the Linux community for being very high-quality, stable and scalable. Debian also has an extensive and friendly user community that can help new users with support for practically any problem. For the Raspberry Pi 2, you will use Raspbian Jessie; it can be downloaded here. Raspbian is a free operating system based on Debian optimized for the Raspberry Pi hardware. Raspbian is an unofficial port of Debian Wheezy armhf (armhf being the hard-float ABI ARM port) with compilation settings adjusted to produce optimized “hard float” code that will run on the Raspberry Pi.
This should provide significantly faster performance for applications that make heavy use of floating point arithmetic operations. I didn’t notice much of a difference between the performance of the operating systems while using these boards with LabVIEW but it’s something you should keep in mind.
WiFi
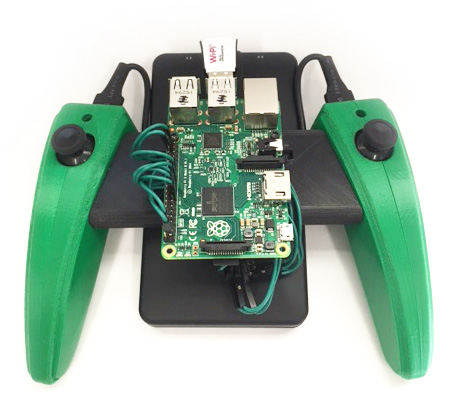
One of the major problems with the BeagleBone Black is how difficult it is to connect it to WiFi. There are steps available here to help combat this problem, but it took me several tries before I could get it working properly. I read in many places that the HDMI port on the BeagleBone Black can interfere with small Wi-Fi adaptors. For both boards I used a Wi-Pi as my Wi-Fi Module and it worked great once I got it set up. The Raspberry Pi 2 worked almost instantly, which made the BeagleBone Black struggle seem even worse.
If you are interested in creating your own project harnessing the capabililties of these products and LabVIEW, you should check out the LabVIEW Computing Kit for BeagleBone Black or Raspberry Pi 2. Each bundle includes LabVIEW 2014 Home Edition and all the accessories you need to start a project using LINX 3.0. Also, check out LabVIEW MakerHub for videos to help you get started.
Excellent read, I just passed this onto a friend who was doing a little research on that. And he actually bought me lunch since I found it for him smile So let me rephrase that: Thanks for lunch!
I was playing flash games on the raspberry pi but it was slow but coding a game makes it more slower it made no sense to me because the flash game was more detailed than me coding a game