

My name is Austin, and I’m a new Product Marketing Engineering Intern at Digilent. I am currently creating projects using LabVIEW and the chipKIT WF32 to teach people how to use LabVIEW, and am working on a project that allows users to control two different fans and a servo.
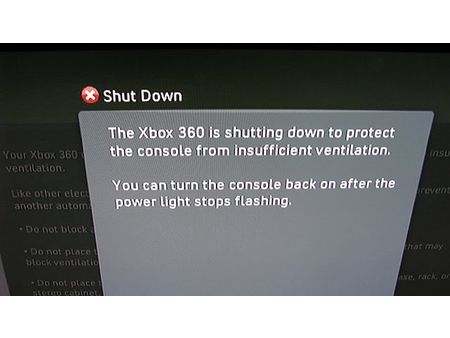
I started working on this project when my Xbox 360 died. The shock sent me into a downward spiral; I spent a lot of time considering what I could have done differently to avoid such a tragedy. I wondered whether it was the 60 hours I had spent playing Skyrim, or maybe it was the weekend I spent binge watching Game of Thrones.

After I was finally through the five stages of grief, I became determined to figure out what caused its untimely demise. I began doing some research, and I found out frequent overheating could drastically reduce the lifespan of most electronics. That’s when I began to suspect my entertainment center was the true culprit; though it is known that many entertainment centers trap heat, mine was especially bad. While my solid oak entertainment center seemed like a bargain at the time, the enclosed design made it very difficult for heat to escape. My poor Xbox had been working hard only to pump out heat which turned my entertainment center into a sweat lodge.
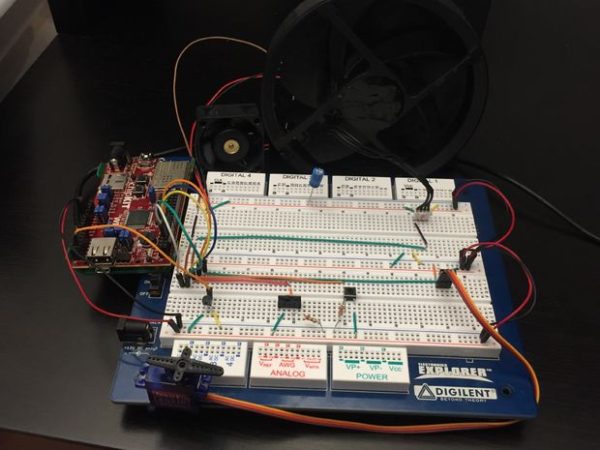
 I knew I had to figure something out before I dropped a bunch of money on a Xbox One; I couldn’t handle another loss. That’s when I grabbed my WF32 and my Explorer Board, and went to work. I decided that the best way to regulate the temperature of an entertainment center is to increase the air flow. In my project this is done using two different fans and a servo; the servo would be placed so that it would open a door to increase airflow. The fans will automatically turn on if a certain temperature is reached, and the servo will turn 90 degrees. Because of the many elements in this project I decided to use LabVIEW. LabVIEW’s visual nature simplifies the debugging process and allows for the creation of simple user interfaces like mine shown below.
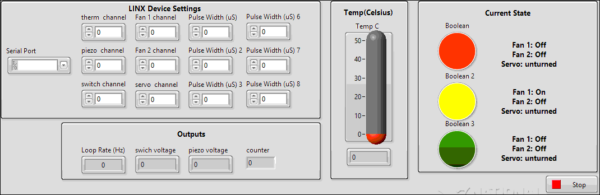
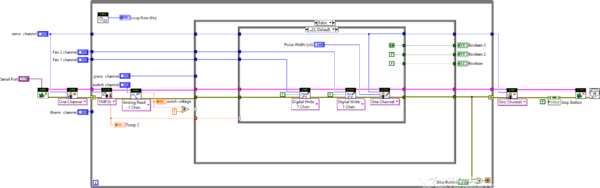
Another feature is that if a user knows that they are about to generate a lot of heat they can switch to manual fan control by flipping a slide switch. Once this switch is moved, the fans will turn on one at a time with each click of a button, switch and the servo will turn on the second click. Once the switch has been clicked three times, the fans will turn back off, and the servo will return to its starting position. This would help regulate the temperature of any device in an entertainment center without always running your fans (which would reduce the life of your fans and waste electricity). The LabVIEW block diagram is shown below.
You will find a link to my Instructable here. Thank you for reading, and feel free to comment with any questions you may have.
This sounds like a great project!
Why did you choose to use the EE board?
Thank you! I like using the EE board because of its all in one functionality. I especially like the built-in oscilloscope, I use it to check my circuit as I go. I also really like the large built-in breadboard, the extra space allows for much cleaner looking projects.
Definitely jealous of the solid oak entertainment center.
The LabVIEW code seems complex (from a inexperienced LabVIEW user’s perspective). How long did it take you to develop it? And I thought LabVIEW wasn’t able to directly interface with the WF32? Did you use some sort of special plug-in for LabVIEW to get it to communicate with the WF32?
This was my first project using LabVIEW but after spending some time learning the basics, the code only took a few hours. I used LINX to communicate with the WF32. LINX provides easy to use LabVIEW VIs for interacting with common embedded platforms like Arduino, chipKIT and myRIO.