

Introduction
An oscilloscope is an essential tool for visualizing electronic signals, and one of its most valuable functions is measuring frequency—the number of times a signal repeats per second. This skill is crucial for anyone working with AC circuits, digital clocks, or communication systems, helping verify that components perform correctly or diagnose faults when they don’t. In this guide, you’ll learn how to measure frequency step by step, from understanding the relationship between frequency and period to setting up your oscilloscope for accurate readings and using both manual calculations and automatic measurement tools with confidence.
Understanding Frequency and Period
Before you can measure frequency, it’s important to understand its relationship with period. A periodic waveform is one that repeats its shape at regular intervals over time.
- Period (T) – The time it takes for a waveform to complete one full cycle. The unit for period is seconds (s), though oscilloscope measurements often use milliseconds (ms) or microseconds (µs).
- Frequency (f) – The number of cycles that occur in one second. The unit for frequency is Hertz (Hz).
Frequency and period are reciprocals of each other. This relationship is described by a simple formula:
Frequency (f) = 1 / T
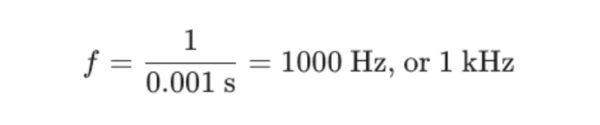
This formula is the key to measuring frequency manually on an oscilloscope. You don’t measure the frequency directly; instead, you measure the period of the waveform and then calculate the frequency from that measurement. For example, if you measure a period of 1 millisecond (0.001 seconds), the frequency is:
Preparing Your Oscilloscope
A correct measurement starts with a proper setup. Before you attempt to measure frequency, you need a clear and stable waveform on your display.
- Connect your probes. Securely connect your oscilloscope probe to an input channel (e.g., CH1). Attach the probe tip to your signal source and the ground clip to the circuit’s ground reference. A poor ground connection is a common source of noise and measurement errors. Also, make sure your probe’s attenuation (usually 1x or 10x) matches the scope’s setting for that channel.
- Set input coupling. Choose the appropriate input coupling. For most frequency measurements, AC coupling is a good choice as it blocks any DC offset and centers the waveform on the screen. If you also need to see the DC component of the signal, use DC coupling (this is often mandatory for accurate analysis of digital signals).
- Adjust the vertical scale (Volts/Div). Turn the Volts/Div knob to scale the waveform so it takes up a good portion of the screen vertically without being clipped. A signal that is too small or too large is difficult to measure accurately.
- Adjust the horizontal scale (Time/Div). This is the most important step for frequency measurement. Turn the Time/Div knob to adjust the horizontal zoom. You want to display at least one, but no more than a few, complete cycles of the waveform on the screen. This makes it easier to pick out one full cycle for measurement.
- Set the trigger. To get a stable image, adjust the trigger level so the waveform stops scrolling across the screen. Ensure the trigger level intersects with the waveform and select either the rising or falling edge.
With a stable waveform centered on your screen, you are ready to measure.
Step-by-Step Manual Measurement
Manually calculating frequency is a fundamental skill that helps you understand what the oscilloscope is showing you. The process involves measuring the period first.
Step 1: Measure the Period (T)
The period is the time duration of one complete cycle. You can measure it between any two corresponding points on the wave, such as from one peak to the next or from one rising edge to the next.
- Identify one cycle. Locate a single, complete cycle of your waveform on the screen’s graticule (grid).
- Count horizontal divisions. Carefully count the number of horizontal divisions that one cycle covers. You can use the cursors on many digital oscilloscopes for a more precise measurement, but counting divisions is the classic method.
- Calculate the period. Multiply the number of horizontal divisions by the Time/Div setting shown on your oscilloscope’s display.
Period (T) = (Number of Horizontal Divisions) × (Time/Div)
For example, imagine one cycle of your waveform spans 5 horizontal divisions, and your oscilloscope’s Time/Div setting is 10 microseconds (10 µs/div). The calculation would be:
T = 5 div × 10 µs/div = 50 µs
Step 2: Calculate the Frequency (f)
Once you have the period, calculating the frequency is straightforward. Use the reciprocal formula.
Frequency (f) = 1 / T
Using the period from the previous example (T = 50 µs):

That’s it. You have successfully measured the frequency of your signal. For a more detailed walkthrough of the oscilloscope interface, check out our guide on how to read an oscilloscope.
Using Automatic Frequency Measurement
Most modern digital oscilloscopes, including those in the Digilent lineup, offer automatic measurement features that save time and reduce human error. These features use the oscilloscope’s internal processor to calculate waveform parameters instantly.
To use this feature:
- Press the Measure or Meas button on your oscilloscope’s front panel.
- A menu will appear on the screen. Select the channel you are measuring (e.g., CH1).
- From the list of measurement options, select Frequency or Freq.
The oscilloscope will display the calculated frequency on the screen, often along with other parameters like period and amplitude.
While automatic measurements are fast and convenient, it’s good practice to occasionally perform a manual measurement to confirm the result. This helps ensure your setup is correct and builds confidence in your skills.
Note: Automatic measurements are only accurate if the trigger is set properly and the entire waveform is clearly visible on the screen.
Measuring Different Waveforms
The method for measuring frequency is the same regardless of the waveform’s shape. Whether you are analyzing a sine wave, square wave, or triangle wave, the process of measuring the period of one cycle and calculating its reciprocal remains constant.
- Sine waves – The smooth, rolling shape makes it easy to identify peaks or the center-line zero-crossings for measuring the period with highest accuracy.
- Square and pulse waves –These are common in digital electronics. You can measure the period from one rising edge to the next. The frequency measurement is straightforward, but be aware of other parameters like duty cycle, which describes the percentage of time the signal is in its high state. When measuring these, ensure your scope’s bandwidth is adequate to capture the fast edge transitions.
- Triangle waves – Similar to sine waves, the peaks are clear points to measure between.
The fundamental principle—one full cycle over time—applies to all periodic signals.
Troubleshooting Tips
If you’re having trouble getting a good measurement, here are a few common issues and their solutions.
- The waveform is unstable or jittering – Your trigger needs adjustment. Move the trigger level up or down until it intersects with your waveform. If it still jitters, make sure you’ve selected the correct trigger edge (rising or falling) and the correct Trigger Source (e.g., CH1).
- The signal looks like a solid block of color – Your Time/Div setting is too high (zoomed out too far), meaning too many cycles are compressed into one screen width. Decrease the Time/Div value to “zoom in” horizontally until you can see individual wave shapes.
- The waveform is jagged or angular (aliasing) – Your oscilloscope’s sample rate may be too low for the signal’s frequency. This can create a misleading picture of the waveform. You can sometimes fix this by adjusting the Time/Div setting (zooming out), but it may also indicate you need an oscilloscope with a higher bandwidth.
- There is no signal on the screen – Check your physical connections. Is the probe securely connected to the oscilloscope? Is the ground clip attached? Is the channel enabled on the oscilloscope?
For a deeper dive into oscilloscope functionality, explore our guide on using the oscilloscope.
Practice Exercise
The best way to get comfortable with measuring frequency is to practice. If you have a function generator and an oscilloscope, try this simple exercise. The Digilent Analog Discovery 3 is perfect for this, as it includes both tools.
- Set your function generator to output a 1 kHz sine wave with a known voltage, such as 4 Vpp.
- Connect the output to your oscilloscope.
- Adjust the Volts/Div and Time/Div settings to get a clear, stable display of 2-3 cycles.
- Perform a manual measurement: count the horizontal divisions for one cycle, multiply by the Time/Div setting to find the period, and then calculate f = 1/T.
- Now, use the automatic frequency measurement feature on your oscilloscope.
- Compare your manual result to the automatic one. They should be very close!
FAQs
Can an oscilloscope measure very low frequencies?
Yes. To measure very low frequencies (long periods), you need to set a large Time/Div value. This “zooms out” on the time axis, allowing the oscilloscope to capture a full cycle of a slow-moving signal.
How accurate are frequency measurements on an oscilloscope?
The accuracy depends on the oscilloscope’s timebase stability and how precisely you measure the period. Digital oscilloscopes are generally very accurate. For manual measurements, accuracy is improved by measuring across multiple cycles (5–10) and spreading the waveform across the screen to make counting divisions easier. Automatic measurements typically provide the most accurate results.
Can I measure the frequency of a PWM signal?
Yes. A Pulse-Width Modulation (PWM) signal is a periodic square wave where the duty cycle varies. You can measure its frequency just like any other periodic signal. Measure the time from one rising edge to the next to find the period, then calculate the frequency.
Conclusion
Knowing how to measure frequency on an oscilloscope is a vital skill that opens the door to deeper circuit analysis and troubleshooting. By understanding the relationship between period and frequency, you can perform accurate manual measurements. And with modern digital scopes, you have the added convenience of automatic measurements. The key steps are always the same: get a stable display, measure the timebase (period) of one cycle, and calculate the frequency using the formula f = 1/T.
Ready to put your skills to the test? Explore Digilent’s powerful and affordable mixed signal oscilloscopes, including the all-in-one Analog Discovery 3, and start turning signals into insights.