

Getting Started with the USRP B205mini-i & GNU Radio
Introduction
This tutorial presents how to get started with the USRP B205mini-i, an SDR (software-defined radio) platform designed by Ettus Research™. It provides a wide frequency range (70 MHz to 6 GHz) and a user-programmable, industrial-grade Xilinx Spartan-6 XC6SLX150 FPGA.
The USRP B205mini-i is based on the Spartan6 LX150 FPGA, which is used as a controller, and the AD9364 transceiver, used as an analog front end. The AD9364 is a transceiver that can acquire a frequency range from 70 MHz to 6 GHz with a sample rate of up to 61.4 MHz for both ADC and DAC with a maximum bandwidth of 56 MHz. This frequency range allows us to receive and send 3G (UMTS) and 4G (LTE) signals, wireless LAN, FM/AM Radio, and more. The board comes in a rectangular form factor with three SMA connectors: one for the transmitter, one for the receiver, and one for the frequency reference.
Installing UHD drivers
Windows
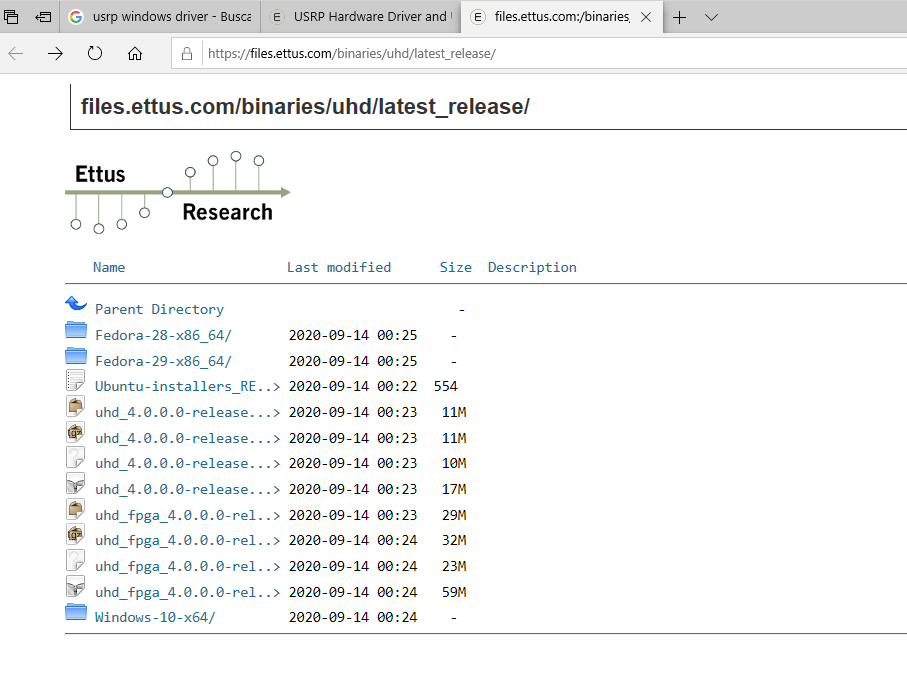
First, we need to download the installer for the drivers from USRP Hardware Driver and USRP Manual. Navigate to the latest releases page (under Installer Packages), select the Windows-10-x64 folder, and download the installer for your version of Visual Studio and bitness (Winx86 = 32-bit, Winx64 = 64-bit).
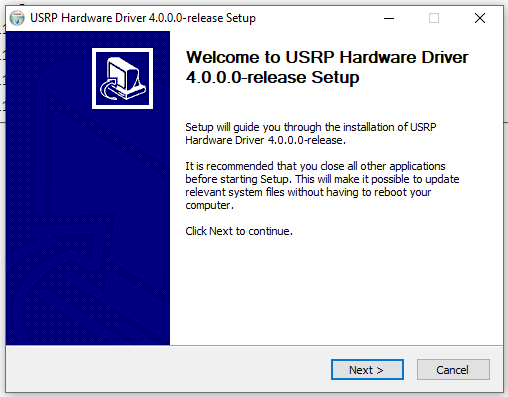
When the download is complete, run the executable file. The set-up wizard pops up.
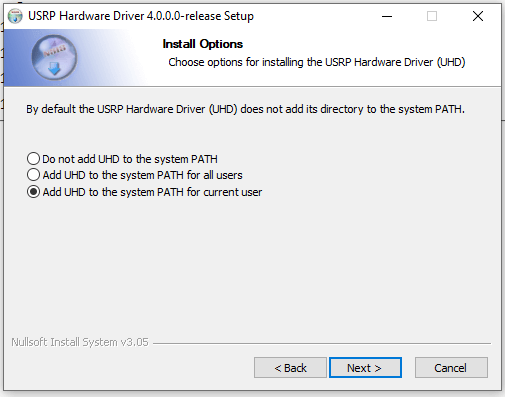
It is important to add UHD to the system PATH variable so that commands can be run in the Windows terminal. Next, download the USB driver for Windows and unzip the file into a known location. We will refer to this as the <directory>. Open the device manager and plug in the USRP device. You will see an unrecognized USB device in the device manager. Right-click on the unrecognized USB device and select update/install driver software (may vary for your OS). In the driver installation wizard, select “browse for driver”, browse to the <directory>, and select the .inf file. Continue through the installation wizard until the driver is installed.
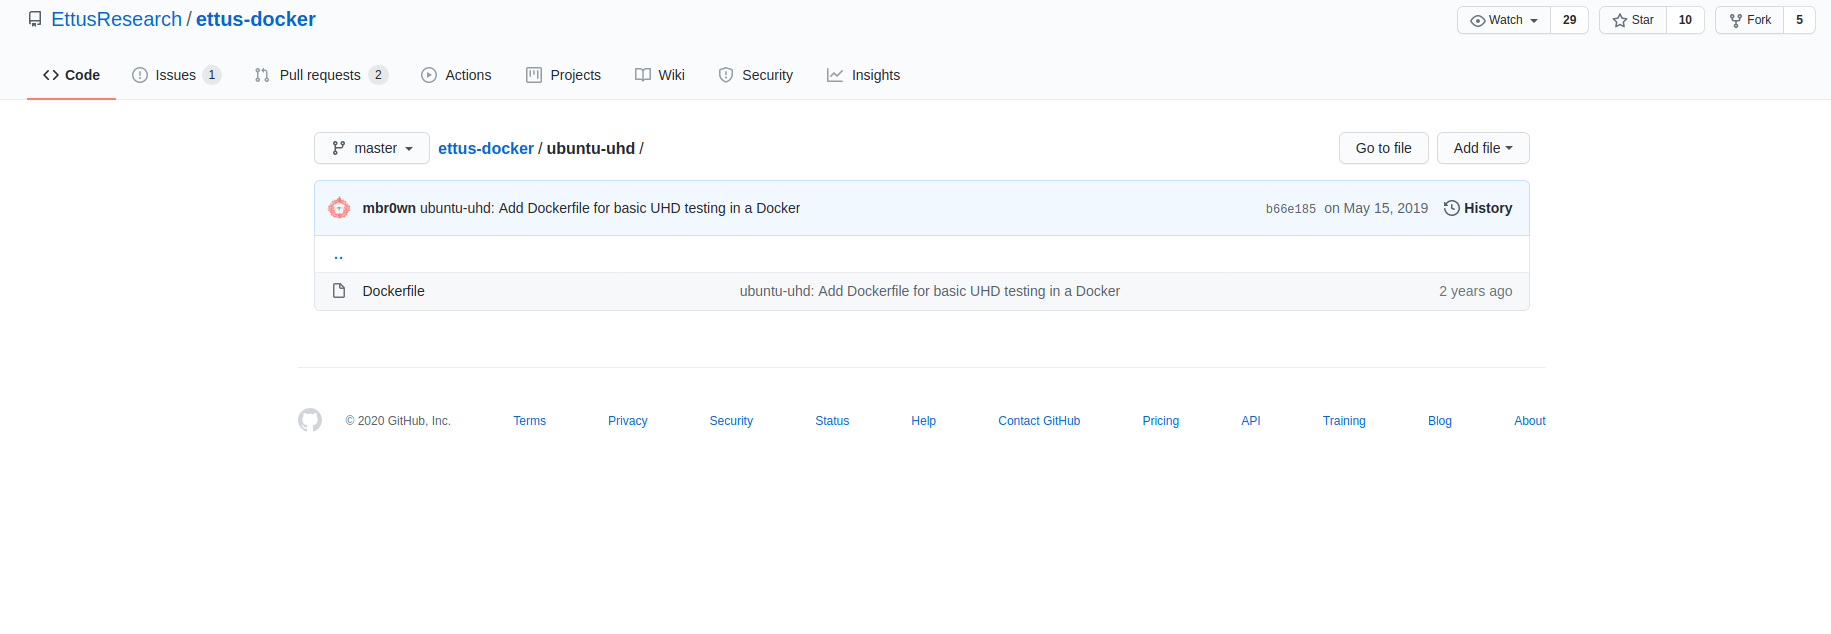
We can avoid installing onto a native machine by running a docker container with all the tools already installed. To do so, we have to install Docker – from the Docker Docs site – and then download the Dockerfile provided through Ettus Github. Then, we create a docker image and a container for this image to run a virtual Ubuntu machine with all tools installed.
Ubuntu
To install UHD drivers on Linux, first, we need to add the Ettus repository:
>>> sudo add-apt-repository ppa:ettusresearch/uhd
>>> sudo apt-get update
Once the repository is added, we need to install all drivers:
>>> sudo apt-get install libuhd-dev libuhd003 uhd-host
The terminal output will show something similar to the text found in the dropdown below:
Terminal Output
>>> sudo add-apt-repository ppa:ettusresearch/uhd
More info: https://launchpad.net/~ettusresearch/+archive/ubuntu/uhd
Press [ENTER] to continue or Ctrl-c to cancel adding it.
Get:1 http://ppa.launchpad.net/ettusresearch/uhd/ubuntu bionic InRelease [15.9 kB]
Hit:2 http://es.archive.ubuntu.com/ubuntu bionic InRelease
Get:3 http://security.ubuntu.com/ubuntu bionic-security InRelease [88.7 kB]
Get:4 https://download.docker.com/linux/ubuntu xenial InRelease [66.2 kB]
Hit:5 http://ppa.launchpad.net/js-reynaud/kicad-5/ubuntu bionic InRelease
Get:6 http://es.archive.ubuntu.com/ubuntu bionic-updates InRelease [88.7 kB]
Hit:8 http://ppa.launchpad.net/ubuntu-toolchain-r/ppa/ubuntu bionic InRelease
Get:7 http://ppa.launchpad.net/js-reynaud/kicad-5.1/ubuntu bionic InRelease [15.4 kB]
Get:9 http://es.archive.ubuntu.com/ubuntu bionic-backports InRelease [74.6 kB]
Get:10 http://ppa.launchpad.net/ettusresearch/uhd/ubuntu bionic/main amd64 Packages [1,480 B]
Get:11 http://security.ubuntu.com/ubuntu bionic-security/main amd64 DEP-11 Metadata [48.9 kB]
Get:12 http://ppa.launchpad.net/ettusresearch/uhd/ubuntu bionic/main i386 Packages [1,484 B]
Get:13 http://ppa.launchpad.net/ettusresearch/uhd/ubuntu bionic/main Translation-en [624 B]
Get:14 http://security.ubuntu.com/ubuntu bionic-security/universe amd64 DEP-11 Metadata [59.5 kB]
Get:15 http://es.archive.ubuntu.com/ubuntu bionic-updates/main i386 Packages [1,142 kB]
Get:16 http://security.ubuntu.com/ubuntu bionic-security/multiverse amd64 DEP-11 Metadata [2,464 B]
Get:17 http://es.archive.ubuntu.com/ubuntu bionic-updates/main amd64 Packages [1,727 kB]
Get:18 http://es.archive.ubuntu.com/ubuntu bionic-updates/main amd64 DEP-11 Metadata [295 kB]
Get:19 http://es.archive.ubuntu.com/ubuntu bionic-updates/universe amd64 Packages [1,684 kB]
Get:20 http://es.archive.ubuntu.com/ubuntu bionic-updates/universe i386 Packages [1,545 kB]
Get:21 http://es.archive.ubuntu.com/ubuntu bionic-updates/universe amd64 DEP-11 Metadata [288 kB]
Get:22 http://es.archive.ubuntu.com/ubuntu bionic-updates/multiverse amd64 DEP-11 Metadata [2,468 B]
Get:23 http://es.archive.ubuntu.com/ubuntu bionic-backports/universe amd64 DEP-11 Metadata [9,288 B]
Reading package lists… Done
E: Repository ‘http://ppa.launchpad.net/js-reynaud/kicad-5.1/ubuntu bionic InRelease’ changed its ‘Label’ valu
N: This must be accepted explicitly before updates for this repository can be applied. See apt-secure(8) manpa
>>> sudo apt-get update
Hit:1 http://security.ubuntu.com/ubuntu bionic-security InRelease
Hit:2 http://es.archive.ubuntu.com/ubuntu bionic InRelease
Hit:3 http://ppa.launchpad.net/ettusresearch/uhd/ubuntu bionic InRelease
Get:4 https://download.docker.com/linux/ubuntu xenial InRelease [66.2 kB]
Hit:5 http://es.archive.ubuntu.com/ubuntu bionic-updates InRelease
Hit:6 http://es.archive.ubuntu.com/ubuntu bionic-backports InRelease
Hit:7 http://ppa.launchpad.net/js-reynaud/kicad-5/ubuntu bionic InRelease
Hit:9 http://ppa.launchpad.net/ubuntu-toolchain-r/ppa/ubuntu bionic InRelease
Get:8 http://ppa.launchpad.net/js-reynaud/kicad-5.1/ubuntu bionic InRelease [15.4 kB]
Reading package lists… Done
E: Repository ‘http://ppa.launchpad.net/js-reynaud/kicad-5.1/ubuntu bionic InRelease’ changed its ‘Label’ valu
N: This must be accepted explicitly before updates for this repository can be applied. See apt-secure(8) manpa
>>> sudo apt-get install libuhd-dev libuhd003 uhd-host
Reading package lists… Done
Building dependency tree
Reading state information… Done
The following packages were automatically installed and are no longer required:
kicad-demo libboost-context1.65.1 libllvm7 libllvm9 libwxgtk3.0-0v5
linux-hwe-5.4-headers-5.4.0-42 linux-hwe-5.4-headers-5.4.0-45
linux-hwe-5.4-headers-5.4.0-47 linux-hwe-5.4-headers-5.4.0-48
python-wxgtk3.0 python-wxversion
.
.
.
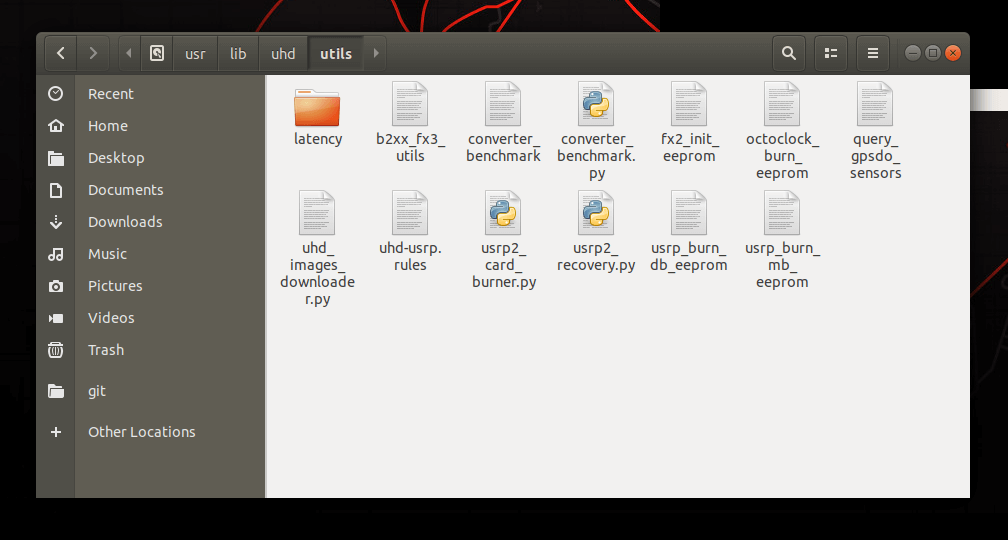
Next, we need to add the driver rules to the udev (userspace). To do that, first navigate to the repository where the UHD drivers are installed:
>>> cd <install-path>/lib/uhd/utils
In that folder, the rules.d directory can be found. Next, copy rules.d into udev folder. Reload the rules.
>>> sudo cp uhd-usrp.rules /etc/udev/rules.d/
>>> sudo udevadm control –reload-rules
>>> sudo udevadm trigger
The terminal output will look like this:
>>> cd /usr/lib/uhd/utils
>>> sudo cp uhd-usrp.rules /etc/udev/rules.d/
>>> sudo udevadm control –reload-rules
>>> sudo udevadm trigger
Docker on Linux Ubuntu
To avoid all the installation steps, we can download a docker image based on Ubuntu. To do that, first download the Dockerfile from Ettus Github.
Then, in the same folder that the Dockerfile was downloaded into, execute the command (sudo docker build -t uhd_container) to build the container. Example output below:
“docker build” output
>>> docker build -t uhd_container .
Sending build context to Docker daemon 1.097MB
Step 1/20 : FROM ubuntu:18.04
—> 56def654ec22
Step 2/20 : MAINTAINER Ettus Research
—> Using cache
—> 41e400e38bd5
Step 3/20 : ENV security_updates_as_of 2019-05-15
—> Using cache
—> 8691ab51cbce
Step 4/20 : ARG DEBIAN_FRONTEND=noninteractive
—> Using cache
—> d4f4ae5563b2
Step 5/20 : ARG UHD_TAG=v3.14.0.0
—> Using cache
—> 665f579eb940
Step 6/20 : ARG MAKEWIDTH=2
—> Using cache
—> e1f420d77a2a
Step 7/20 : RUN apt-get update
—> Using cache
—> 3e19b7e0724a
Step 8/20 : RUN apt-get -y install -q build-essential ccache
…
When the process is finished, we can check if the image was added to docker with the command docker image ls:
>>> sudo docker image ls
REPOSITORY TAG IMAGE ID CREATED SIZE
uhd_container latest 044eb9fbb9db 22 minutes ago 2.02GB
ubuntu 18.04 56def654ec22 6 weeks ago 63.2MB
hello-world latest fce289e99eb9 22 months ago 1.84kB
Once the image is created, we can create and run a new container. It is important to allow access to the /dev folder so that the container can communicate through USB:
>>> sudo docker run -it –privileged -v /dev:/dev -v /proc:/proc uhd_container
Now we can check if the container has access to the board through the command uhd_find_devices. Remember to run the command as administrator (root user):
uhd_device_find
bash: uhd_device_find: command not found
root@e2fe367a8881:/# uhd_find_devices
[INFO] [UHD] linux; GNU C++ version 7.5.0; Boost_106501; UHD_3.14.0.HEAD-release
————————————————–
— UHD Device 0
————————————————–
Device Address:
serial: 31DDAAD
name: B205i
product: B205mini
type: b200
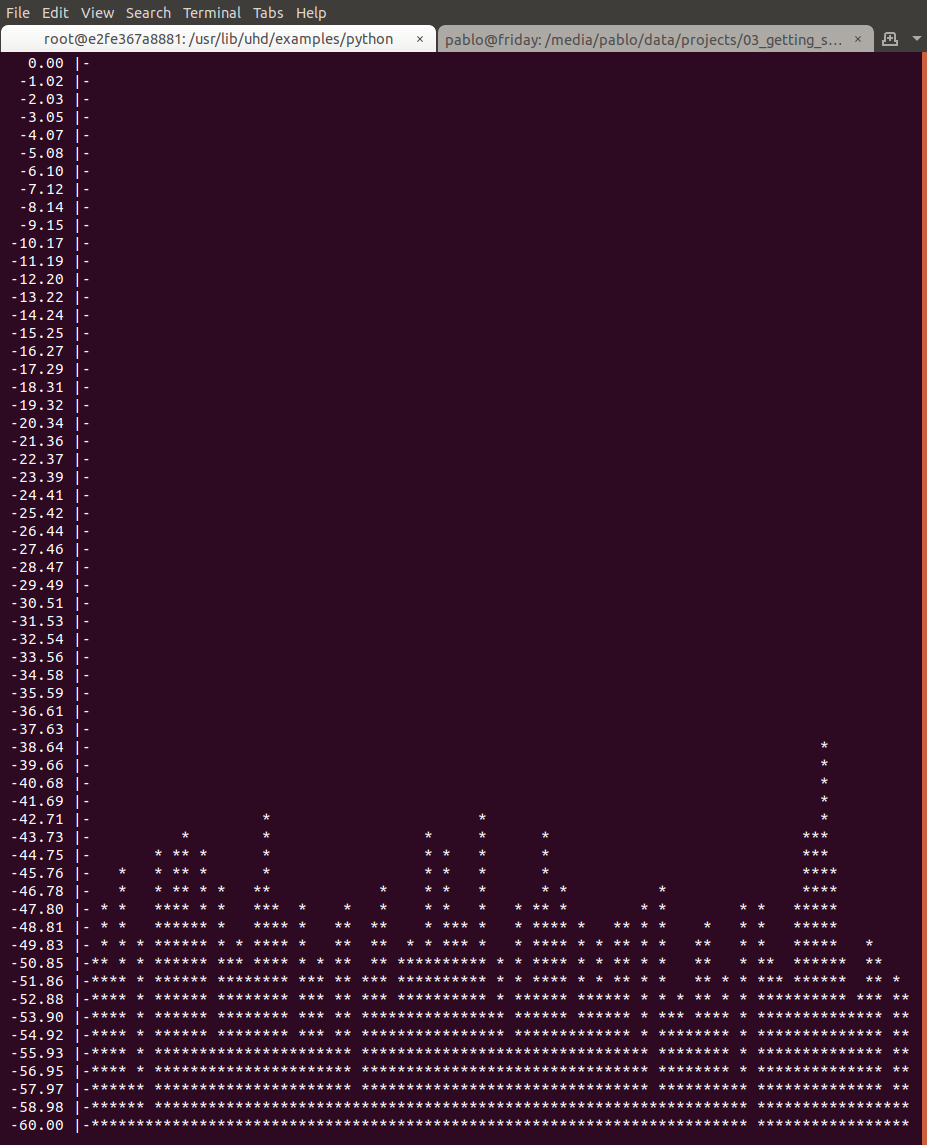
Now that we can use the device from within our container, we can execute a Python Fast Fourier Transform (FFT) example that can be found in /usr/lib/uhd/examples/python#:
/usr/lib/uhd/examples/python# python3 curses_fft.py -f 100e6
[INFO] [UHD] linux; GNU C++ version 7.5.0; Boost_106501; UHD_3.14.0.HEAD-release
[INFO] [B200] Loading firmware image: /usr/share/uhd/images/usrp_b200_fw.hex…
[INFO] [B200] Detected Device: B205mini
[INFO] [B200] Loading FPGA image: /usr/share/uhd/images/usrp_b205mini_fpga.bin…
[INFO] [B200] Operating over USB 3.
[INFO] [B200] Initialize CODEC control…
[INFO] [B200] Initialize Radio control…
[INFO] [B200] Performing register loopback test…
[INFO] [B200] Register loopback test passed
[INFO] [B200] Setting master clock rate selection to ‘automatic’.
[INFO] [B200] Asking for clock rate 16.000000 MHz…
[INFO] [B200] Actually got clock rate 16.000000 MHz.
[INFO] [B200] Asking for clock rate 32.000000 MHz…
[INFO] [B200] Actually got clock rate 32.000000 MHz.
Connecting to the Device
We can test the device by running the USRP Hardware Driver Peripheral Report Utility. Assuming that we connect the USRP B205mini-i to a Linux machine and run the utility (uhd_usrp_probe) in the terminal. If this is the first time that you are running the utility, you will get an error in the terminal:
>>> uhd_usrp_probe
[INFO] [UHD] linux; GNU C++ version 7.5.0; Boost_106501; UHD_3.15.0.0-release
[WARNING] [B200] EnvironmentError: IOError: Could not find path for image: usrp_b200_fw.hex
Using images directory: <no images directory located>
Set the environment variable ‘UHD_IMAGES_DIR’ appropriately or follow the below instructions to download the i
Please run:
“/usr/lib/uhd/utils/uhd_images_downloader.py”
Error: LookupError: KeyError: No devices found for —–>
Empty Device Address
This is caused by an empty image directory or by some images being missing from the directory. To fix that, we need to run the uhd_images_downloader.py script, which will download and copy the necessary images into the image directory. The script must be run as superuser.
>>> sudo python /usr/lib/uhd/utils/uhd_images_downloader.py
[INFO] Images destination: /usr/share/uhd/images
[INFO] No inventory file found at /usr/share/uhd/images/inventory.json. Creating an empty one.
19442 kB / 19442 kB (100%) x3xx_x310_fpga_default-gfde2a94e.zip
02757 kB / 02757 kB (100%) usrp2_n210_fpga_default-g6bea23d.zip
00006 kB / 00006 kB (100%) usrp1_b100_fw_default-g6bea23d.zip
02076 kB / 02076 kB (100%) n230_n230_fpga_default-gfde2a94e.zip
00522 kB / 00522 kB (100%) usrp1_b100_fpga_default-g6bea23d.zip
01534 kB / 01534 kB (100%) e3xx_e310_sg1_fpga_default-gfde2a94e.zip
00479 kB / 00479 kB (100%) b2xx_b200_fpga_default-gfde2a94e.zip
02415 kB / 02415 kB (100%) usrp2_n200_fpga_default-g6bea23d.zip
09070 kB / 09070 kB (100%) e3xx_e320_fpga_default-gfde2a94e.zip
23071 kB / 23071 kB (100%) n3xx_n310_fpga_default-gfde2a94e.zip
00523 kB / 00523 kB (100%) b2xx_b205mini_fpga_default-gfde2a94e.zip
18697 kB / 18697 kB (100%) x3xx_x300_fpga_default-gfde2a94e.zip
00464 kB / 00464 kB (100%) b2xx_b200mini_fpga_default-gfde2a94e.zip
00017 kB / 00017 kB (100%) octoclock_octoclock_fw_default-g14000041.zip
00007 kB / 00007 kB (100%) usrp2_usrp2_fw_default-g6bea23d.zip
00009 kB / 00009 kB (100%) usrp2_n200_fw_default-g6bea23d.zip
00450 kB / 00450 kB (100%) usrp2_usrp2_fpga_default-g6bea23d.zip
01522 kB / 01522 kB (100%) e3xx_e310_sg3_fpga_default-gfde2a94e.zip
00162 kB / 00162 kB (100%) b2xx_common_fw_default-g2bdad498.zip
24996 kB / 24996 kB (100%) n3xx_n320_fpga_default-gfde2a94e.zip
00319 kB / 00319 kB (100%) usrp1_usrp1_fpga_default-g6bea23d.zip
04839 kB / 04839 kB (100%) usb_common_windrv_default-g14000041.zip
00009 kB / 00009 kB (100%) usrp2_n210_fw_default-g6bea23d.zip
16072 kB / 16072 kB (100%) n3xx_n300_fpga_default-gfde2a94e.zip
00879 kB / 00879 kB (100%) b2xx_b210_fpga_default-gfde2a94e.zip
[INFO] Images download complete.
When the script has finished running, all images will be downloaded into the directory. The next step is to rerun the command to connect with the board, and if all is good, the board will be discovered. The output of the terminal will show the identifier of the board and the capabilities of the board, as seen in the dropdown below:
“uhd_usrp_probe” sample results
>>> uhd_usrp_probe
[INFO] [UHD] linux; GNU C++ version 7.5.0; Boost_106501; UHD_3.15.0.0-release
[INFO] [B200] Loading firmware image: /usr/share/uhd/images/usrp_b200_fw.hex…
[INFO] [B200] Detected Device: B205mini
[INFO] [B200] Loading FPGA image: /usr/share/uhd/images/usrp_b205mini_fpga.bin…
[INFO] [B200] Operating over USB 3.
[INFO] [B200] Initialize CODEC control…
[INFO] [B200] Initialize Radio control…
[INFO] [B200] Performing register loopback test…
[INFO] [B200] Register loopback test passed
[INFO] [B200] Setting master clock rate selection to ‘automatic’.
[INFO] [B200] Asking for clock rate 16.000000 MHz…
[INFO] [B200] Actually got clock rate 16.000000 MHz.
_____________________________________________________
/
| Device: B-Series Device
| _____________________________________________________
| /
| | Mboard: B205mini
| | serial: 31DDAAD
| | name: B205i
| | product: 30522
| | revision: 3
| | FW Version: 8.0
| | FPGA Version: 7.0
| |
| | Time sources: none, internal, external
| | Clock sources: internal, external
| | Sensors: ref_locked
| | _____________________________________________________
| | /
| | | RX DSP: 0
| | |
| | | Freq range: -8.000 to 8.000 MHz
| | _____________________________________________________
| | /
| | | RX Dboard: A
| | | _____________________________________________________
| | | /
| | | | RX Frontend: A
| | | | Name: FE-RX1
| | | | Antennas: TX/RX, RX2
| | | | Sensors: temp, rssi, lo_locked
| | | | Freq range: 50.000 to 6000.000 MHz
| | | | Gain range PGA: 0.0 to 76.0 step 1.0 dB
| | | | Bandwidth range: 200000.0 to 56000000.0 step 0.0 Hz
| | | | Connection Type: IQ
| | | | Uses LO offset: No
| | | _____________________________________________________
| | | /
| | | | RX Codec: A
| | | | Name: B205mini RX dual ADC
| | | | Gain Elements: None
| | _____________________________________________________
| | /
| | | TX DSP: 0
| | |
| | | Freq range: -8.000 to 8.000 MHz
| | _____________________________________________________
| | /
| | | TX Dboard: A
| | | _____________________________________________________
| | | /
| | | | TX Frontend: A
| | | | Name: FE-TX1
| | | | Antennas: TX/RX
| | | | Sensors: temp, lo_locked
| | | | Freq range: 50.000 to 6000.000 MHz
| | | | Gain range PGA: 0.0 to 89.8 step 0.2 dB
| | | | Bandwidth range: 200000.0 to 56000000.0 step 0.0 Hz
| | | | Connection Type: IQ
| | | | Uses LO offset: No
| | | _____________________________________________________
| | | /
| | | | TX Codec: A
| | | | Name: B205mini TX dual DAC
| | | | Gain Elements: None
If we only want to extract the board identifier, we can run the command below:
>>> uhd_find_devices
[INFO] [UHD] linux; GNU C++ version 7.5.0; Boost_106501; UHD_3.15.0.0-release
————————————————–
— UHD Device 0
————————————————–
Device Address:
serial: 31DDAAD
name: B205i
product: B205mini
type: b200
Now the device is connected and configured.
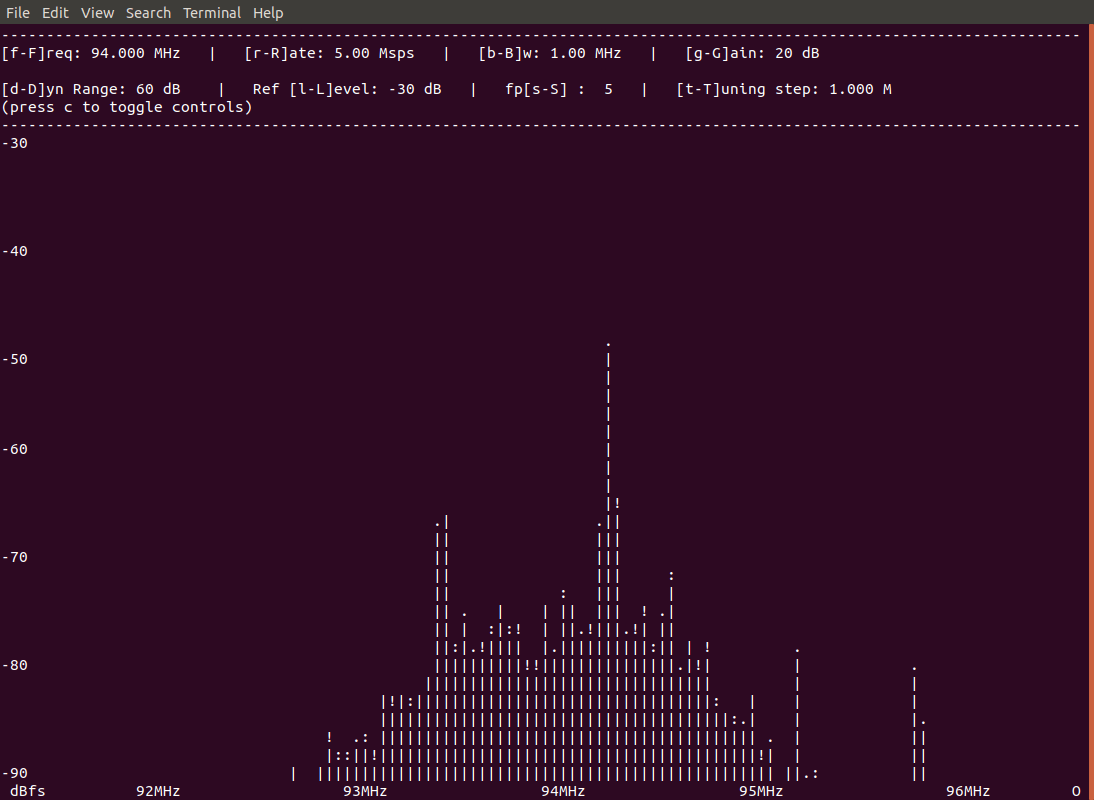
Running an Example DFT
There are some examples that come with the driver. For example, we can run the real-time Discrete Fourier Transform (DFT) example. The options for the executable (./rx_ascii_art_dft) are frequency (–freq), sampling rate (–rate), gain (–gain), bandwidth (–bw), and reference level (–ref-lvl). The terminal will show the flow of execution, list the parameters, and graph the result:
./rx_ascii_art_dft –freq 94e6 –rate 5e6 –gain 20 –bw 1e6 –ref-lvl -30
Creating the usrp device with: …
[INFO] [UHD] linux; GNU C++ version 7.5.0; Boost_106501; UHD_3.15.0.0-release
[INFO] [B200] Detected Device: B205mini
[INFO] [B200] Operating over USB 3.
[INFO] [B200] Initialize CODEC control…
[INFO] [B200] Initialize Radio control…
[INFO] [B200] Performing register loopback test…
[INFO] [B200] Register loopback test passed
[INFO] [B200] Setting master clock rate selection to ‘automatic’.
[INFO] [B200] Asking for clock rate 16.000000 MHz…
[INFO] [B200] Actually got clock rate 16.000000 MHz.
Using Device: Single USRP:
Device: B-Series Device
Mboard 0: B205mini
RX Channel: 0
RX DSP: 0
RX Dboard: A
RX Subdev: FE-RX1
TX Channel: 0
TX DSP: 0
TX Dboard: A
TX Subdev: FE-TX1
Setting RX Rate: 5.000000 Msps…
[INFO] [B200] Asking for clock rate 40.000000 MHz…
[INFO] [B200] Actually got clock rate 40.000000 MHz.
Actual RX Rate: 5.000000 Msps…
Setting RX Freq: 94.000000 MHz…
Actual RX Freq: 94.000000 MHz…
Setting RX Gain: 20.000000 dB…
Actual RX Gain: 20.000000 dB…
Setting RX Bandwidth: 1.000000 MHz…
Actual RX Bandwidth: 1.000000 MHz…
Getting Started with GNU Radio on the Ettus USRP B205mini-i
First, install GNU Radio on the Linux machine using the command add-apt-repository ppa:gnuradio/gnuradio-releases. See the dropdown below for the expected results in the terminal:
GNU Radio Installation Results
sudo add-apt-repository ppa:gnuradio/gnuradio-releases
[sudo]password for root:
PPA for GNU Radio Tagged Releases
More info: https://launchpad.net/~gnuradio/+archive/ubuntu/gnuradio-releases
Press [ENTER] to continue or Ctrl-c to cancel adding it.
Hit:1 http://es.archive.ubuntu.com/ubuntu bionic InRelease
Get:2 https://download.docker.com/linux/ubuntu xenial InRelease [66.2 kB]
Hit:3 http://es.archive.ubuntu.com/ubuntu bionic-updates InRelease
Hit:4 http://security.ubuntu.com/ubuntu bionic-security InRelease
Hit:5 http://es.archive.ubuntu.com/ubuntu bionic-backports InRelease
Hit:6 http://ppa.launchpad.net/ettusresearch/uhd/ubuntu bionic InRelease
Get:7 http://ppa.launchpad.net/gnuradio/gnuradio-releases/ubuntu bionic InRelease [15.9 kB]
Hit:8 http://ppa.launchpad.net/js-reynaud/kicad-5/ubuntu bionic InRelease
Hit:10 http://ppa.launchpad.net/ubuntu-toolchain-r/ppa/ubuntu bionic InRelease
Get:9 http://ppa.launchpad.net/js-reynaud/kicad-5.1/ubuntu bionic InRelease [15.4 kB]
Get:11 http://ppa.launchpad.net/gnuradio/gnuradio-releases/ubuntu bionic/main i386 Packages [7,348 B]
Get:12 http://ppa.launchpad.net/gnuradio/gnuradio-releases/ubuntu bionic/main amd64 Packages [7,336 B]
Get:13 http://ppa.launchpad.net/gnuradio/gnuradio-releases/ubuntu bionic/main Translation-en [4,044 B]
Reading package lists… Done
>>> sudo apt-get update
Hit:1 http://ppa.launchpad.net/ettusresearch/uhd/ubuntu bionic InRelease
Hit:2 http://security.ubuntu.com/ubuntu bionic-security InRelease
Hit:3 http://ppa.launchpad.net/gnuradio/gnuradio-releases/ubuntu bionic InRelease
Hit:4 http://es.archive.ubuntu.com/ubuntu bionic InRelease
Hit:5 http://ppa.launchpad.net/js-reynaud/kicad-5/ubuntu bionic InRelease
Get:6 https://download.docker.com/linux/ubuntu xenial InRelease [66.2 kB]
Hit:7 http://es.archive.ubuntu.com/ubuntu bionic-updates InRelease
Hit:9 http://es.archive.ubuntu.com/ubuntu bionic-backports InRelease
Hit:10 http://ppa.launchpad.net/ubuntu-toolchain-r/ppa/ubuntu bionic InRelease
Get:8 http://ppa.launchpad.net/js-reynaud/kicad-5.1/ubuntu bionic InRelease [15.4 kB]
Reading package lists… Done
E: Repository ‘http://ppa.launchpad.net/js-reynaud/kicad-5.1/ubuntu bionic InRelease’ changed its ‘Label’ valu
N: This must be accepted explicitly before updates for this repository can be applied. See apt-secure(8) manpa
>>> sudo apt install gnuradio
Reading package lists… Done
Building dependency tree
Reading state information… Done
The following packages were automatically installed and are no longer required:
kicad-demo libboost-context1.65.1 libllvm7 libllvm9 libwxgtk3.0-0v5 linux-hwe-5.4-headers-5.4.0-42
linux-hwe-5.4-headers-5.4.0-45 linux-hwe-5.4-headers-5.4.0-47 linux-hwe-5.4-headers-5.4.0-48 python-wxgtk3.0
python-wxversion
Use ‘sudo apt autoremove’ to remove them.
The following additional packages will be installed:
blt fonts-lyx freeglut3 gnuradio-dev libboost-atomic1.65-dev libboost-atomic1.65.1 libboost-chrono1.65-dev
…
Note: You may encounter a compatibility error because the UHD driver version installed in the Linux machine is different from the version that comes with GNU. For instance, the version of UHD driver in GNU Radio is UHD_003.010.003.000-0 while the one we installed is 3.15.0.0-1-1ubuntu1~bionic1. To fix the error, first download the correct UHD FPGA Image from Ettus Resources Hub (Direct download: uhd-images_003.010.003.000-release.tar.xz). Then, copy the downloaded image to the directory where all images are saved. In this case, we save all images under /usr/share/uhd/images. You can also follow the Building and Installing the USRP Open-Source Toolchain to install GNU Radio. This may take longer.
Now we can open GNU Radio and start to work with it.
Using GNU Radio to Design a Frequency Modulation (FM) Receiver
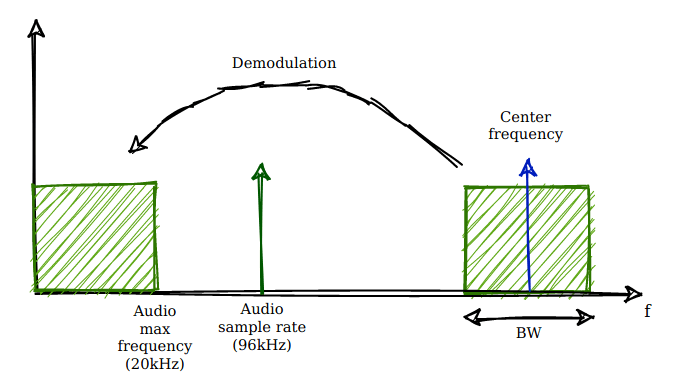
The FM receiver takes the modulated signal (i.e. radio waves under the VHF band) as input and produces the original audio signal ranging from 20 Hz to 20 kHz.
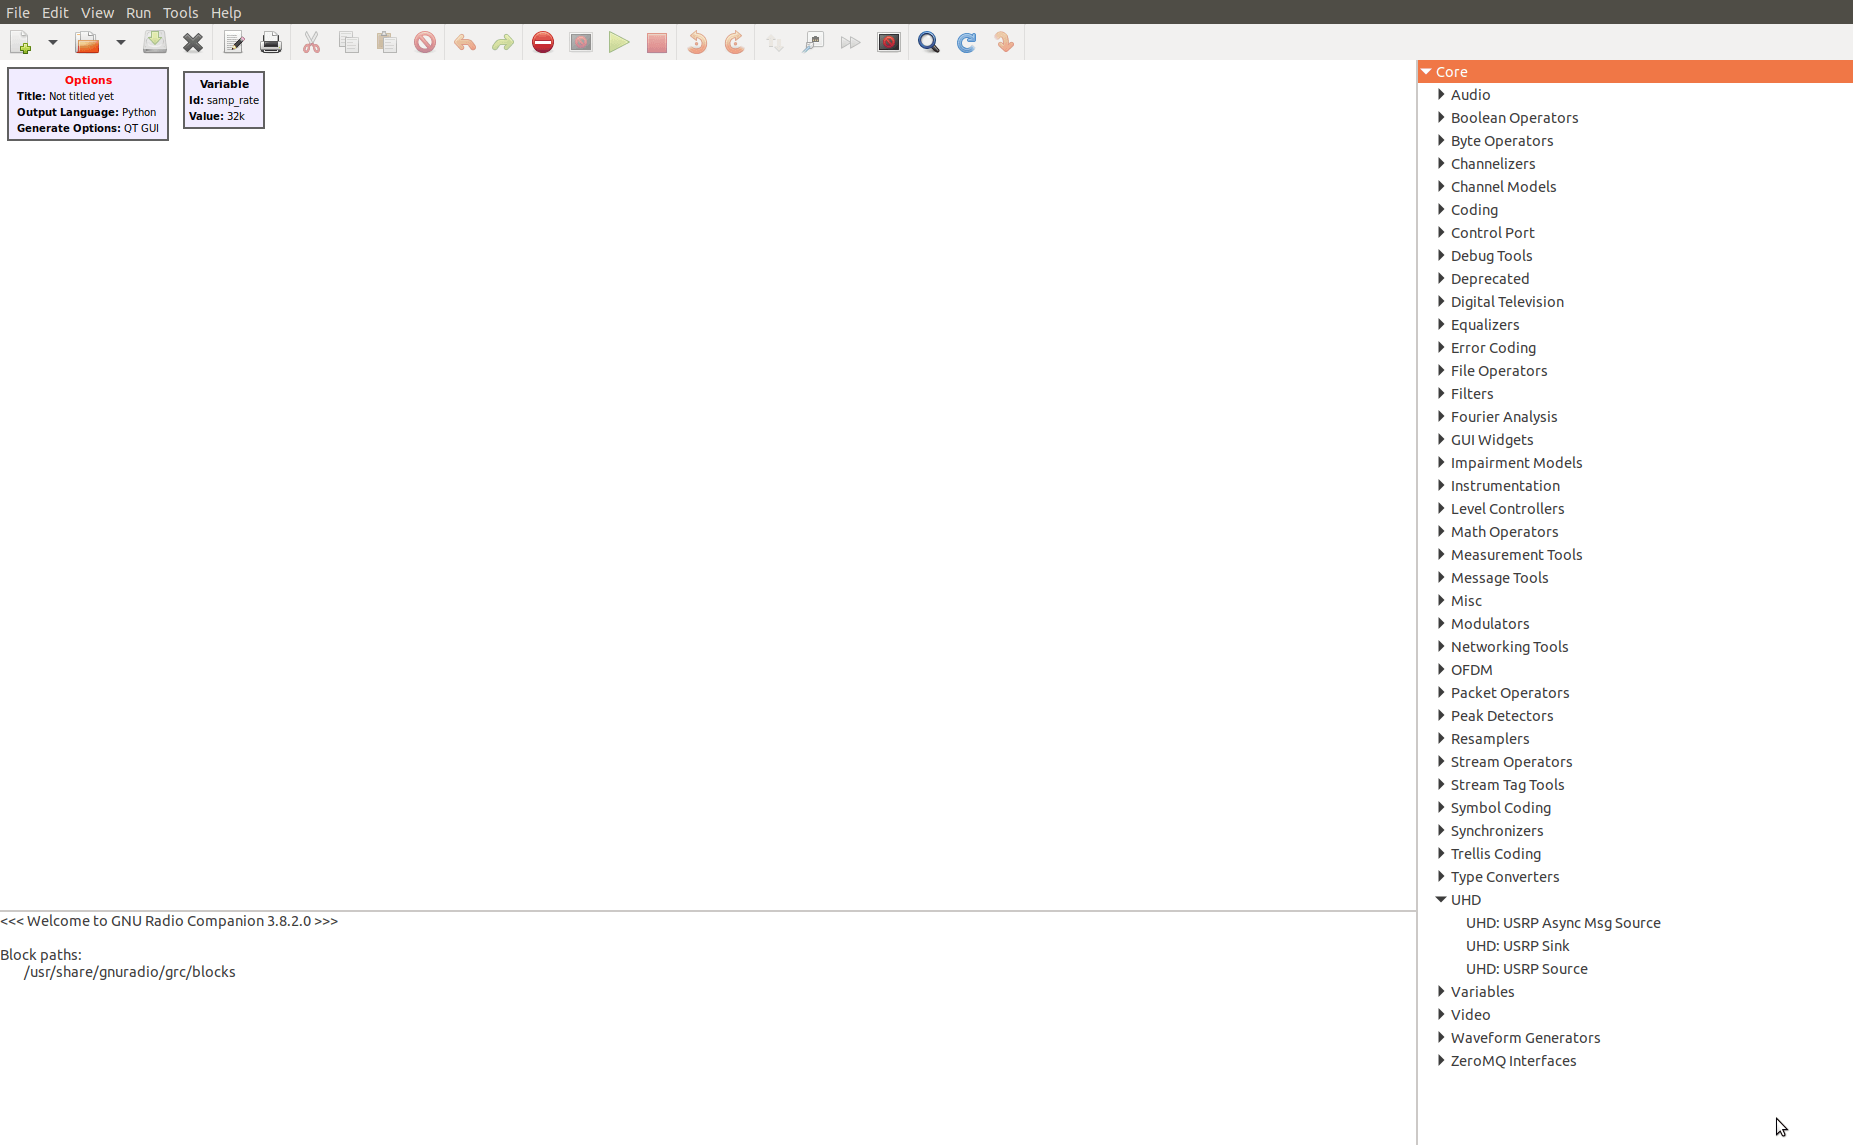
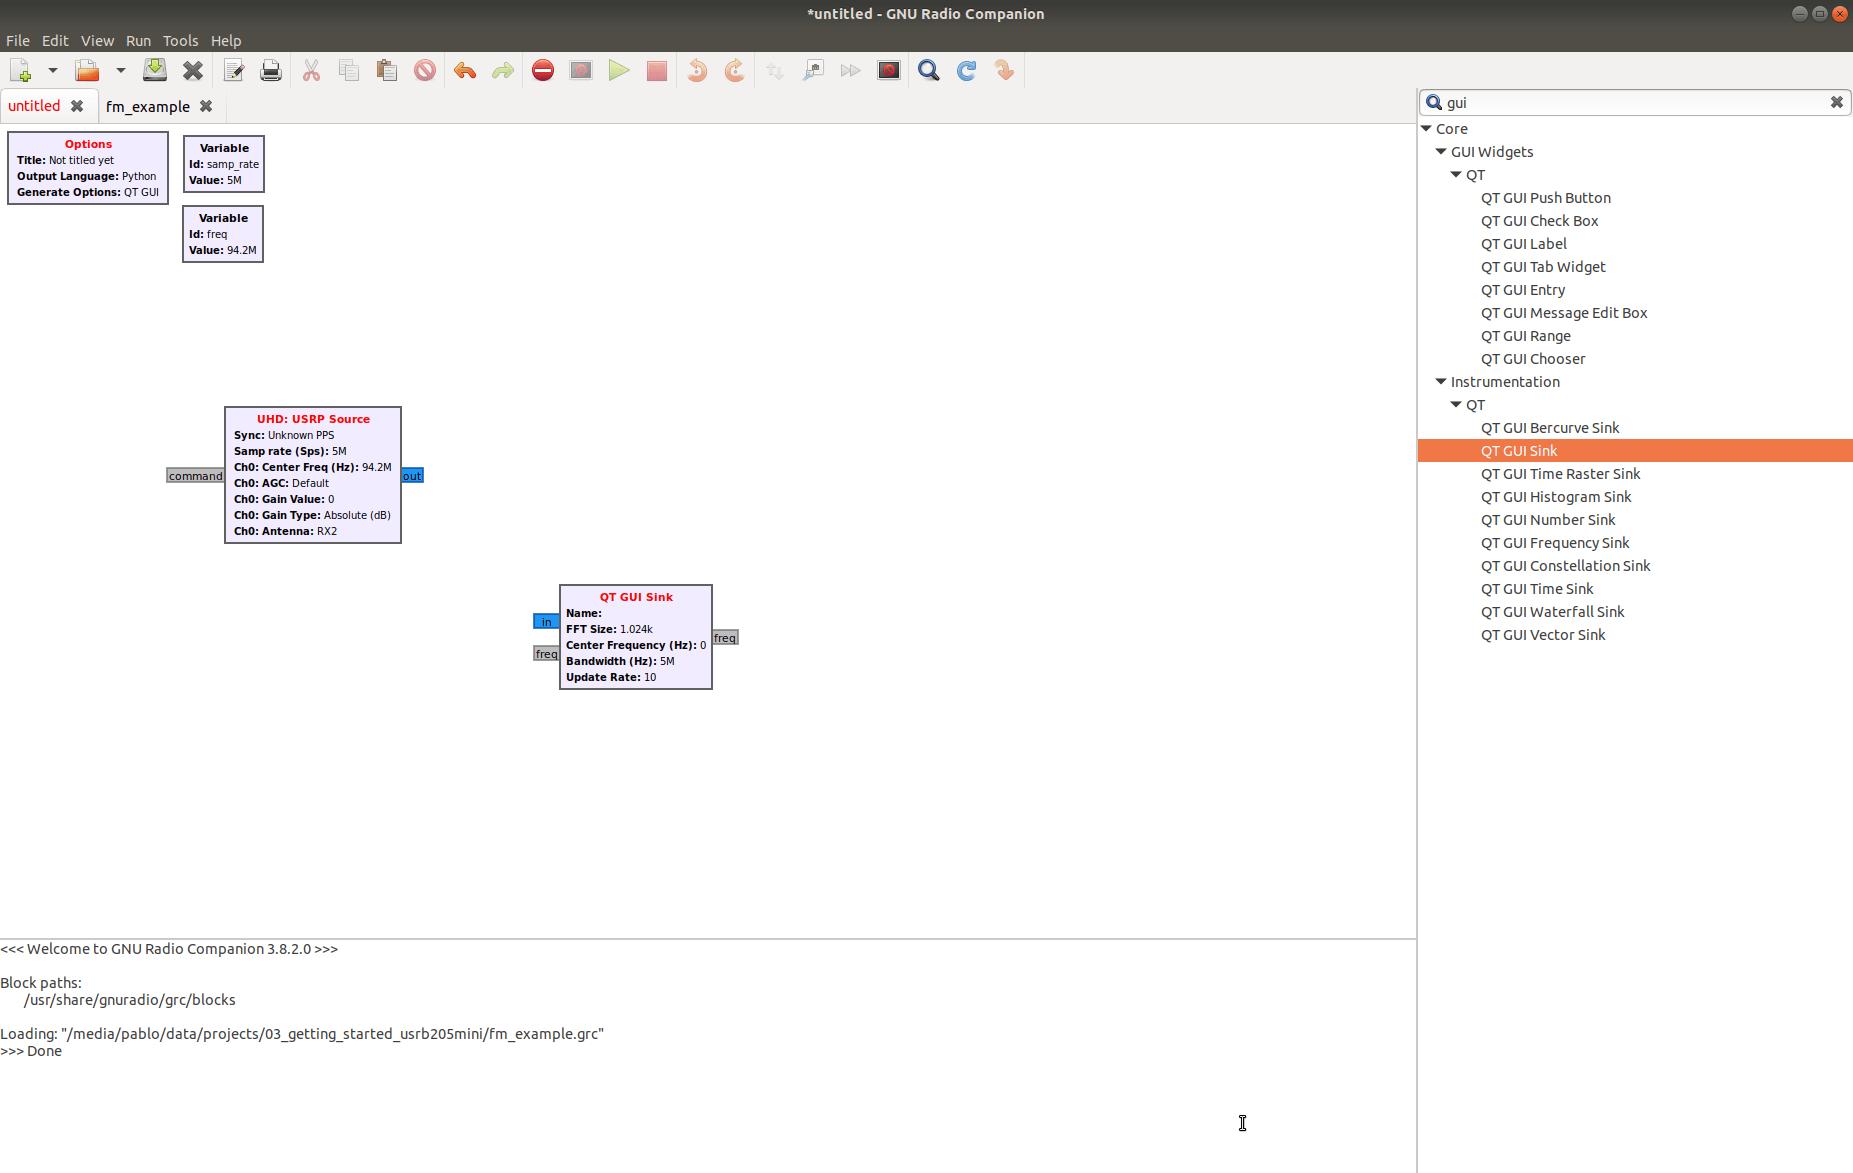
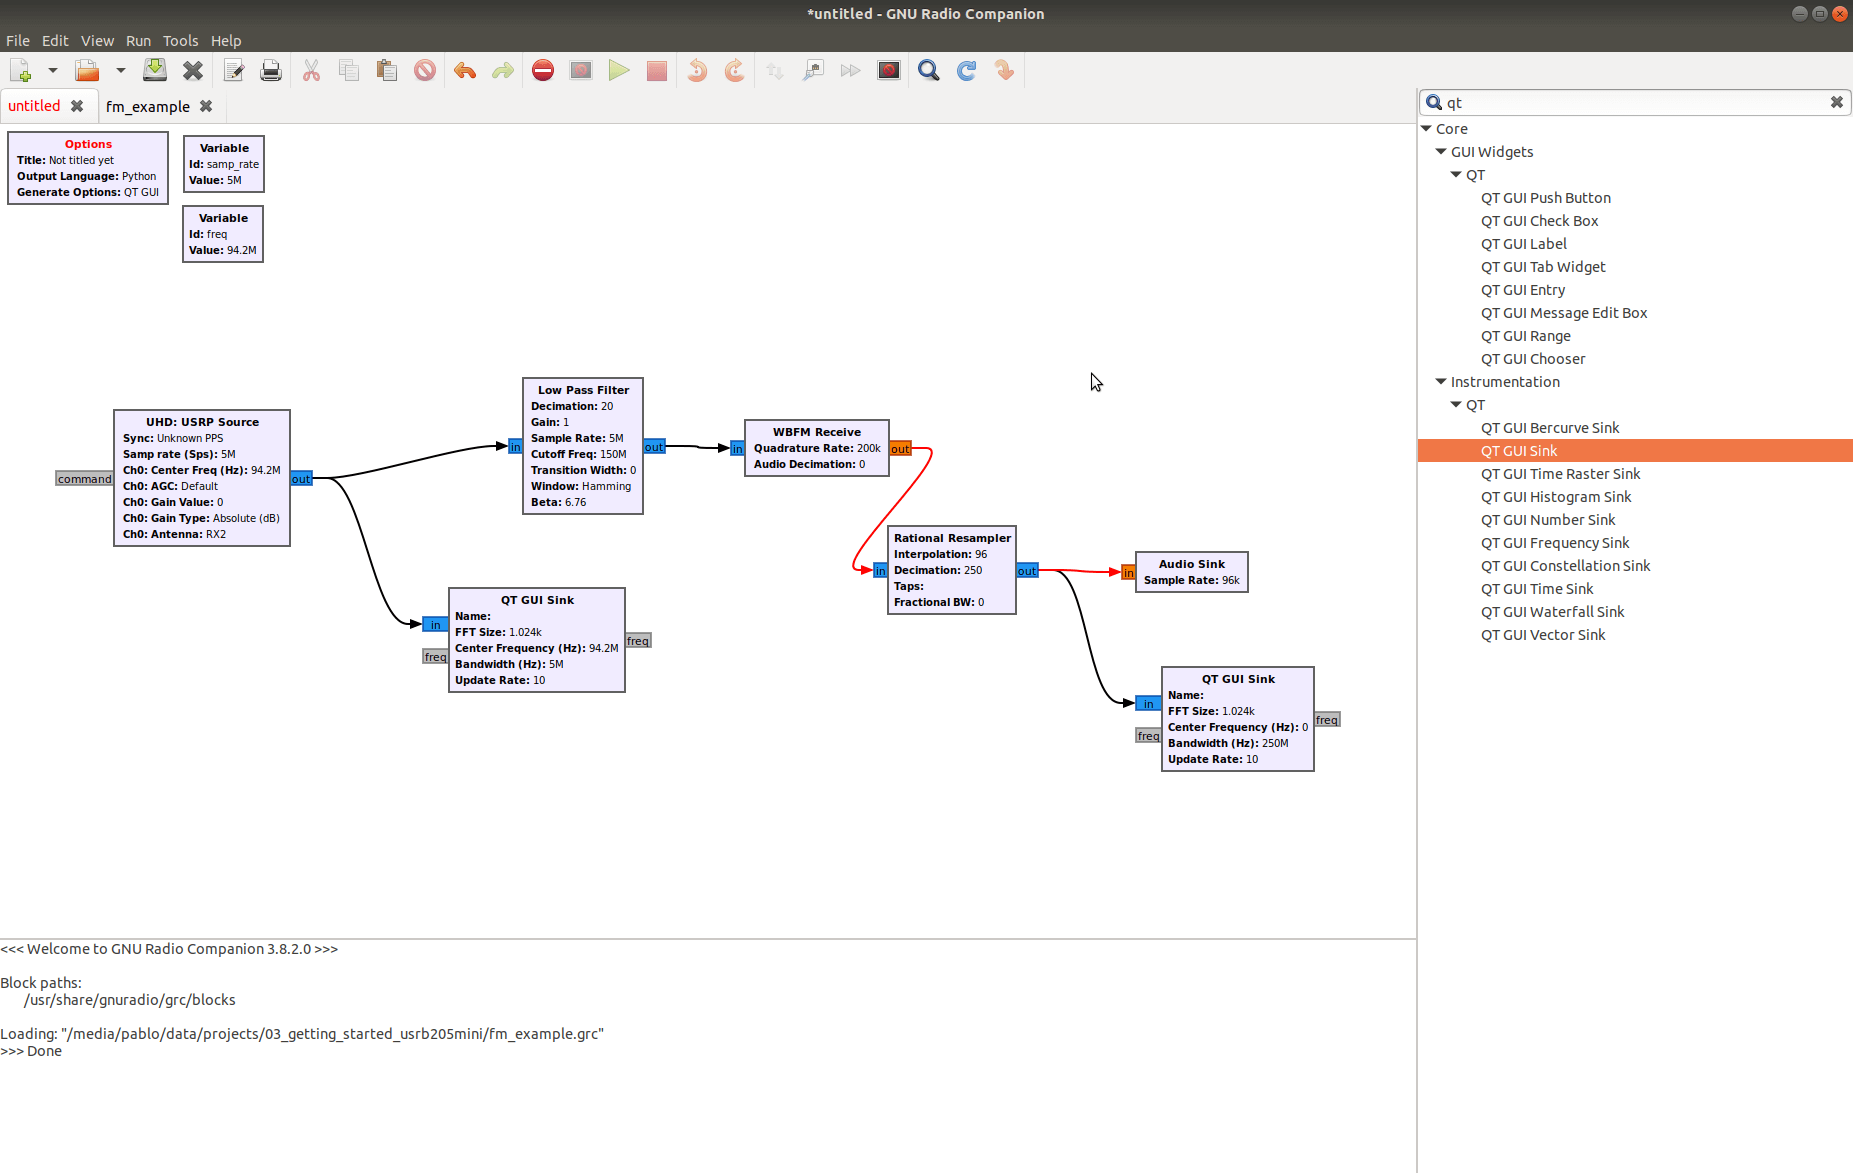
First of all, run ‘gnuradio-companion‘ in the terminal to open GNU Radio Companion. Then, add the following blocks:
- Two Variables, samp_rate and freq:
- samp_rate is the sampling rate, which we set to 5 MHz (Hint: We can copy the existing variable block and paste that in Canvas. Then, we can open the copied variable and change the id and value).
- freq is the frequency bandwidth which we set to 94.2 MHz.
- UHD: USRP Source – The USRP Source block will produce baseband samples by sampling RF on a selected antenna at a particular frequency, sample rate, and gain. We will configure the sample rate as 5 MHz (samp_rate) and the center frequency as 94.2 MHz (freq) and keep the default value for the rest of the parameters.
- QT GUI Sink – The QT GUI frequency sink displays multiple signals in frequency. We set the FFT size to 1024 samples, bandwidth to 5 MHz and update rate to 10.
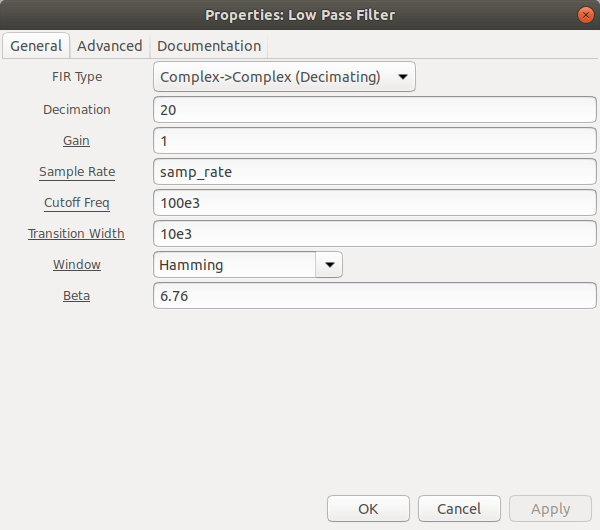
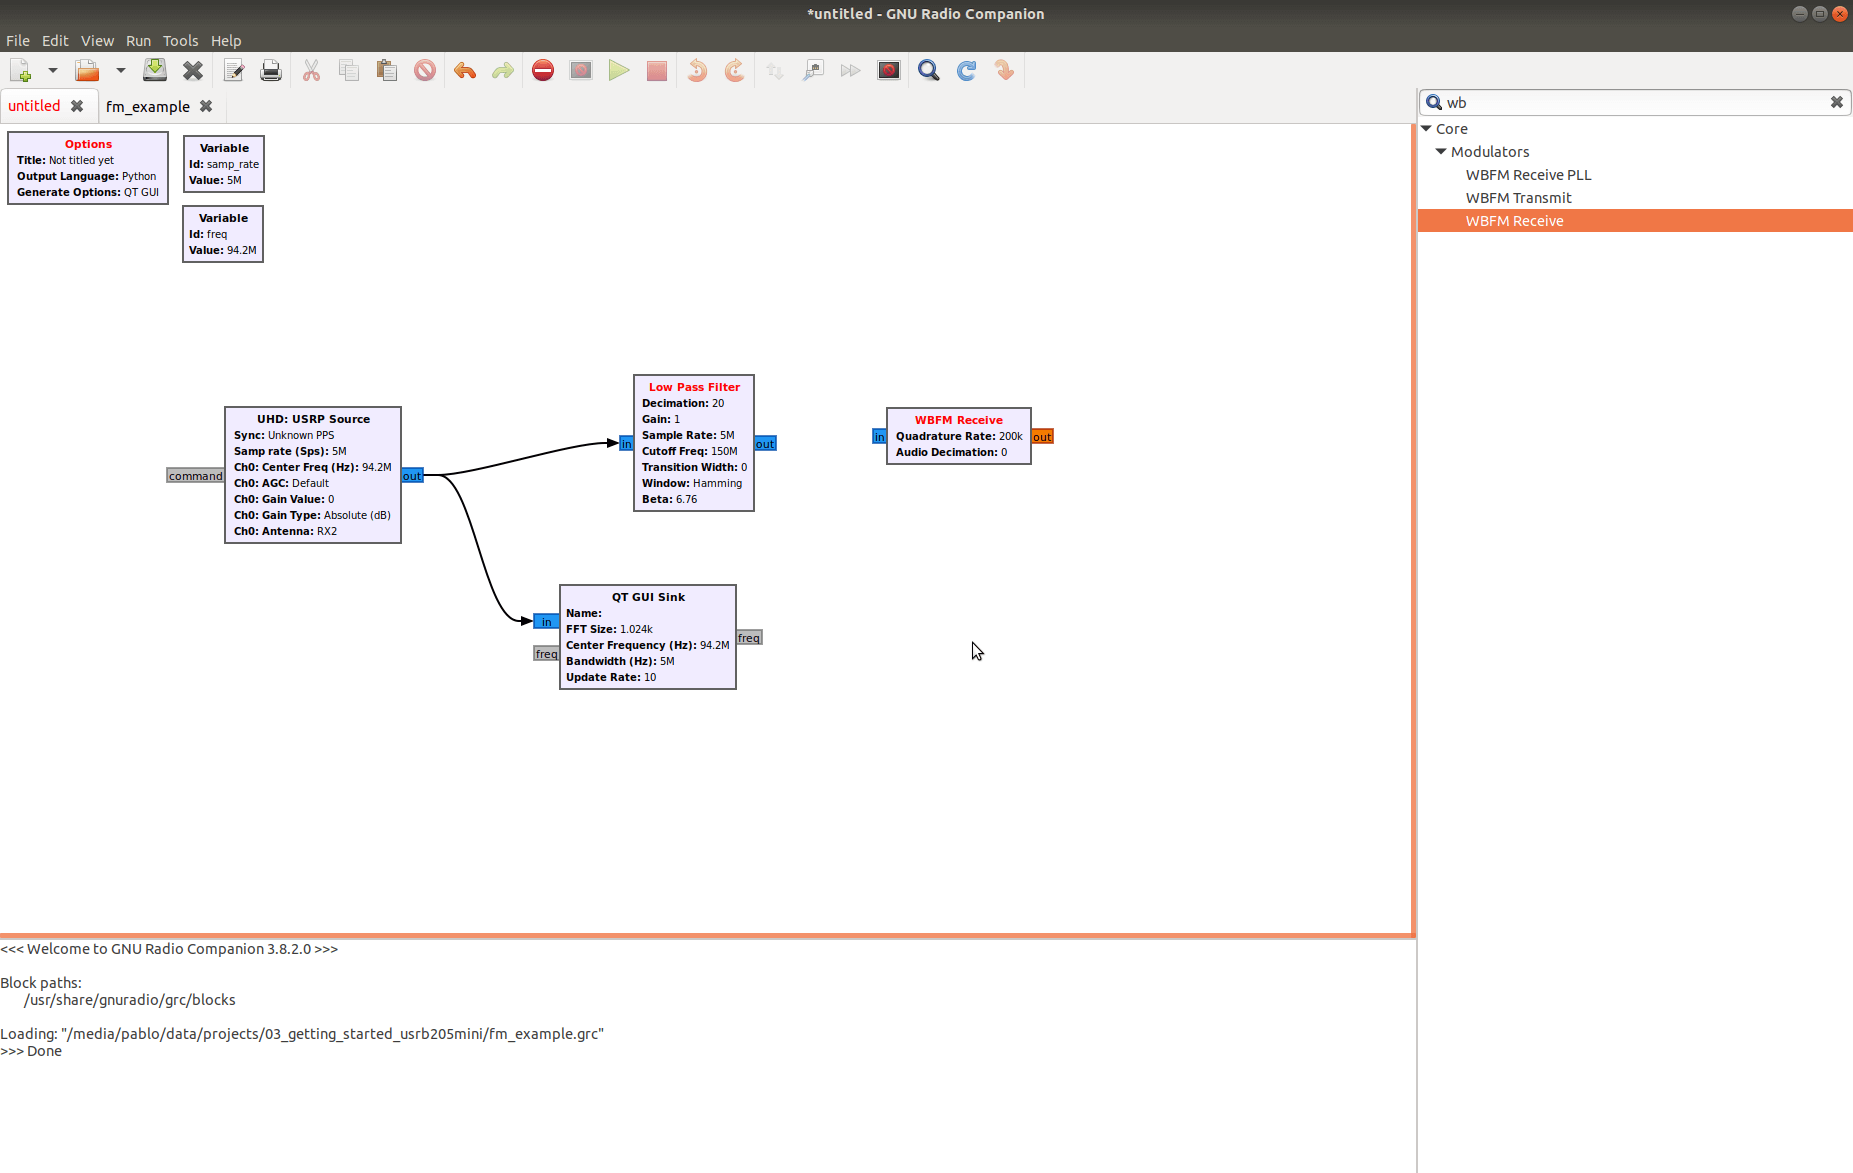
Next, we will add a low pass filter. Notice that the audio signal bandwidth ranges from 200 Hz to 20 kHz. We can set the cutoff frequency to 50 kHz with a transition band down to 10 kHz and have soft filtering. The transition width will determine the number of taps. We also use this low pass filter to decimate the signal. By doing so, we can discard some samples and make the processing easier. In this case, we will perform a decimation of 20, which means the output sampling frequency will be 5 MHz / 20 ~ 250 KHz.
Once the lowpass filter has been added, the next step is to perform the FM demodulation. To do that, add a WBFM receive block and set the quadrature rate to the input sampling frequency, 250 kHz.
Since the output signal is audible, we can send this signal to the sound card – which is actually a digital to analog converter with a sample rate of, in general, 96 kHz. Thus, we need to decimate the output signal to obtain the 96 kHz sample rate. To do that, add a Rational resamples block that performs an x/y operation, where x (interpolation) is the output frequency, and y (decimation), is the input frequency. Finally, add an Audio sink block, so that the output signal will be played through speakers. We also add 2 QT GUI Sink blocks to visualize the input and the output signals.
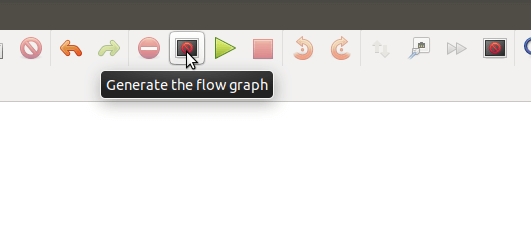
Finally, generate the python script by pushing the ‘Generate the flow graph’ button.
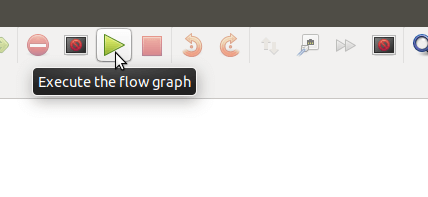
Then, we send the design to the USRP B205mini-i by pushing the ‘Execute the flow graph’ button.
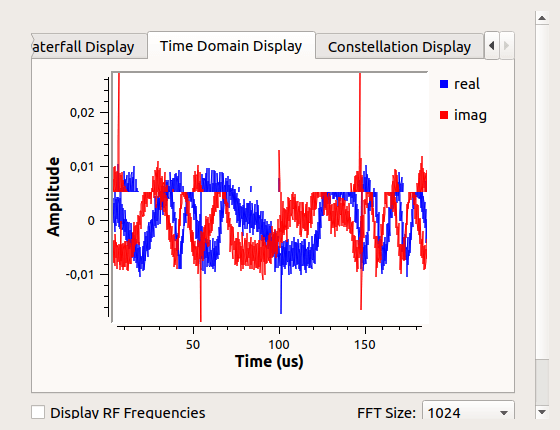
The Python script will be executed. The output signal is displayed in time and frequency domain, as seen below. You can also hear the radio station selected.

References
USRP B205mini-i Reference Manual
For technical support, please visit Ettus’ Support page.
Hi Sir. I hope you are doing well.
So, I have installed Gnu Radio Companion 3.7.11 on my Linux Mint 19.3 Cinnamon. And when I connect it to the USRP-2920 (Hardware) with Ethernet cable…. It doesn’t connect and the ethernet led on my PC didn’t light up.
I followed your commands one by one. And when I run the command: “uhd_find_devices”, it says: “No UHD Devices Found”. I search for this issue on the internet but unfortunetly nothing working. I would like also to inform you that I have checked my Ethernet cable and it’s working normally (I connect my laptop to another PC and the ping arrived normally).
I hope that you understand me well! Happy to hear from you soon.
Have a nice day.
Interesting! Have you posted to the Digilent Forum yet?