

I always wished that I could play the piano, without (of course) having to try too hard or having to undergo all those tedious lessons. A few years ago I decided to act on it and try to learn, mostly to impress the opposite gender. I had never played an instrument before, but I was fairly confident that I would be able to figure it out. I played a few times on my friends keyboard and decided that I needed to buy my own. I went with one of the best rated beginner keyboards out at the time… which is the same thing as saying that it was way too expensive.
After a few weeks of trying and failing to teach myself the piano I accepted my failure and returned it. I recently saw a few piano projects online and I realized that this was my chance to redeem myself. So it seemed the choice was clear, it was time to break out the BeagleBone Black and D.I.Y. up my own piano at home!

Materials
Hardware
- BeagleBone Black
- Wi-Pi WiFi dongle
- 7 – 1 MΩ resistors
- Gator Clips
- Copper tape
(Everything except the chipKIT WF32 is included in the LabVIEW Interactions Part Kit)
Software
Building the piano
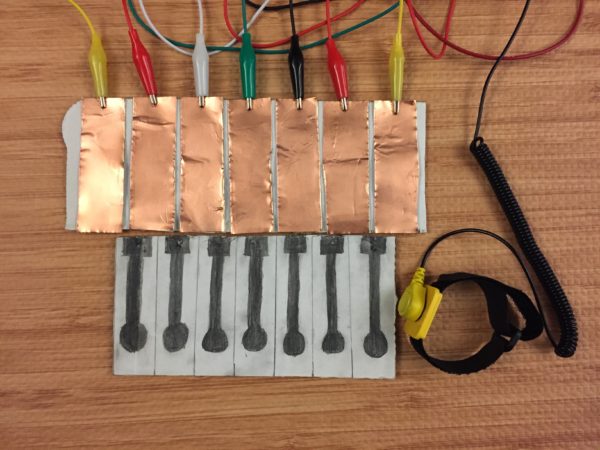
I made two versions of this piano. In the first version, I used a pencil to draw in the keys. To do this, draw seven evenly spaced keys and then fill them in, providing a thick layer of graphite. At the end, make a square at the top where the gator clips can attach.

While this first method worked, it had a few drawbacks. I got graphite all over my fingers when I used it, and I had to constantly fill it in when it starts to fade. A better method is using copper tape, you just have to cut out seven identical pieces of copper tape and place them on a piece of cardboard.
LabVIEW Code
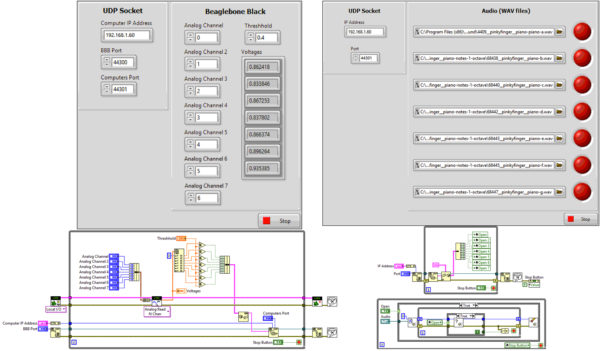
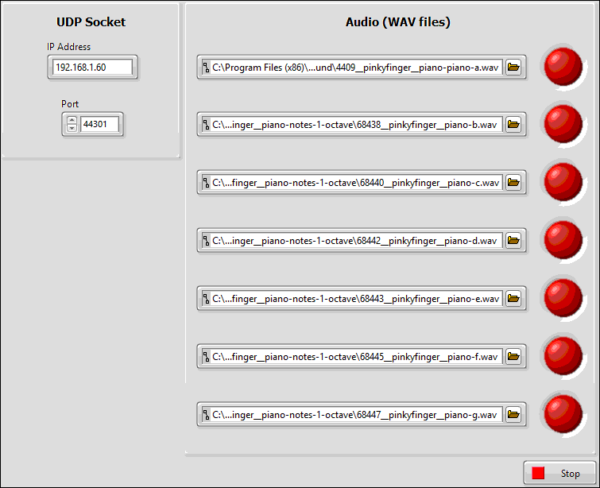
This code is split into two VI’s, the VI on the right runs on your computer and the one on the left runs on the BeagleBone Black. The VI on the left monitors the voltage change associated with one of the keys being touched, it is constantly sending the status of each of the keys to your computer over Wi-Fi using UDP. The VI running on your computer uses this information to determine whether or not it should play a sound. The front panel of the VI running on your computer allows you to enter a different wav file for each of the piano keys. This makes it easy to customize the code and create any type of instrument you want.
Thank you for reading my blog post, check out my Instructable where I give step by step instructions. if you are interested in making this project yourself but don’t have the right supplies you can purchase the LabVIEW computing kit for the BeagleBone Black. This kit includes a copy of LabVIEW 2014 home edition and everything you will need to run LINX 3.0 and start making projects. Please comment with any questions or comments you may have.