

How You Can Add Buttons to Vivado
These step-by-step instructions will add a button to the Vivado application that changes the working directory of the TCL console to the directory containing whatever project you currently have open. The same steps can be used to add buttons that essentially do any task you want them to in Vivado. Every action you take in the GUI is translated into TCL commands which can be added to a script and turned into a button. This means that your most commonly replicated tasks can be turned into a single button click or even a hotkey.
Before we continue on: you’re welcome.
Follow These Steps to Add a Button
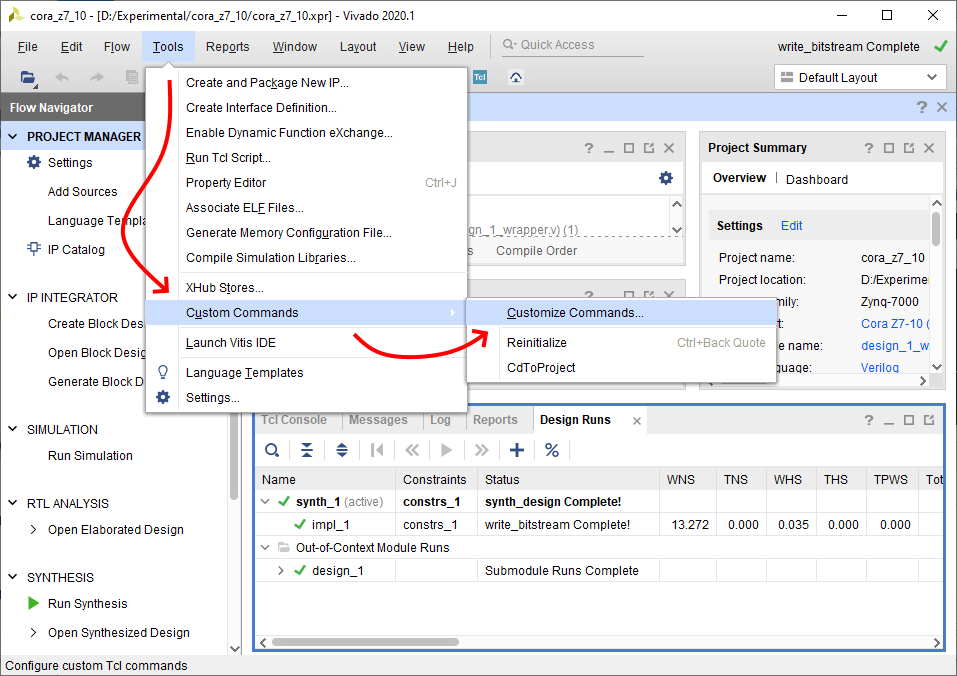
First, make sure you have a project open. Select Tools -> Custom Commands -> Customize Commands from the menu at the top of the screen.
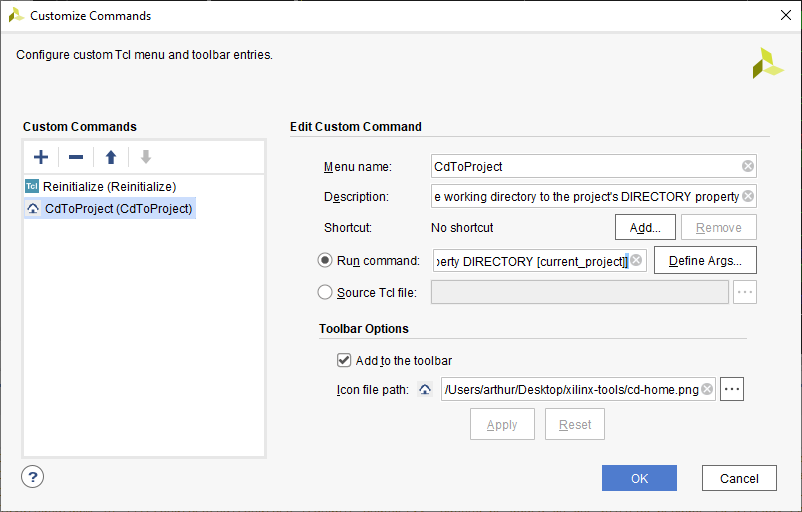
Next, click the “Add” (+) button in the list to the left, give your command a name (CdToProject here), then press Enter.
On the right, there are a bunch of options to configure the button. In the screenshot below, we can see that the button has been given a name and a description.
No shortcut (hotkey combination) is given since this button will only really need to be used once per session in Vivado.
The following text is placed in the “Run command” text field, which is the TCL command that will be run when the button is pressed. This is where you would substitute in your own command, whatever it happens to be.
`cd [get_property DIRECTORY [current_project]]`
Alternatively, we could provide a path to a TCL script (a file containing a sequence of these commands) in the “Source Tcl file” field, if we needed to run more than the single command at a time.
No arguments were defined (“Definte Args”) in this case either. This option can be used to pass typed strings from a popup dialog to the command you are running with the button.
The “Add to the toolbar” box needs to be checked, in order to actually put a button in the UI.
Lastly, the “Icon file path” just lists the image file used for the button, which in this case was snipped out of Vivado’s file system navigator UI.
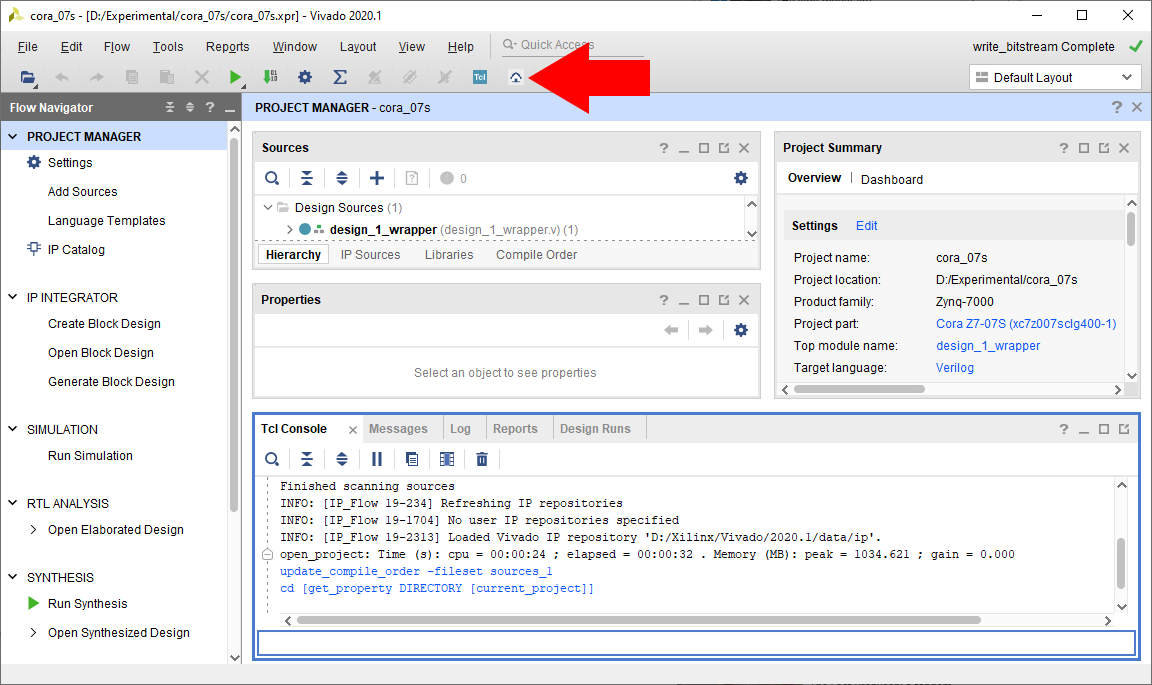
After clicking OK, we can see the button in the UI, and after clicking on it, see that the command is performed.
This is somewhat of a simplified example, but having the button can save some time over typing the full path to whatever project you are working in in each session.
In conclusion, Vivado can be modified extensively to fit your needs, so take advantage of its customizability. Learn how the TCL engine under the hood works, and you can do whatever you want through a couple of button clicks or console commands.
Happy designing!