Automated Testing in Linux Mode with the Analog Discovery Pro (ADP3450/ADP3250)
Overview
This guide demonstrates using the Analog Discovery Pro in Linux mode to automate testing the PmodAD5, a SPI-enabled ADC. Automation is accomplished using WaveForms SDK to measure analog signals going into the Pmod and SPI controls to read data out, comparing the two results.
Note that while the setup and script presented here were created with the Pmod AD5, they can be adapted for your own tests of your own projects.
Inventory
- Analog Discovery Pro
- 1 12×2 MTE cable
- 1 BNC-terminated oscilloscope probe
- A FAT/FAT32 USB drive
- Pmod AD5, a module using an AD7193 analog-to-digital converter chip
- K-Type Thermocouple
- Breadboard
- Breadboard jumper wires and male-to-male pin headers for ease of accessibility
- ZIP download with a test script to be run on the Analog Discovery Pro
- A computer with the following software:
- Digilent WaveForms, used here only to place your Analog Discovery Pro into Linux mode
- A terminal emulator, such as PuTTY or TeraTerm
Note: TeraTerm is recommended for users not familiar with serial terminals.
Demo Setup
Hardware Setup
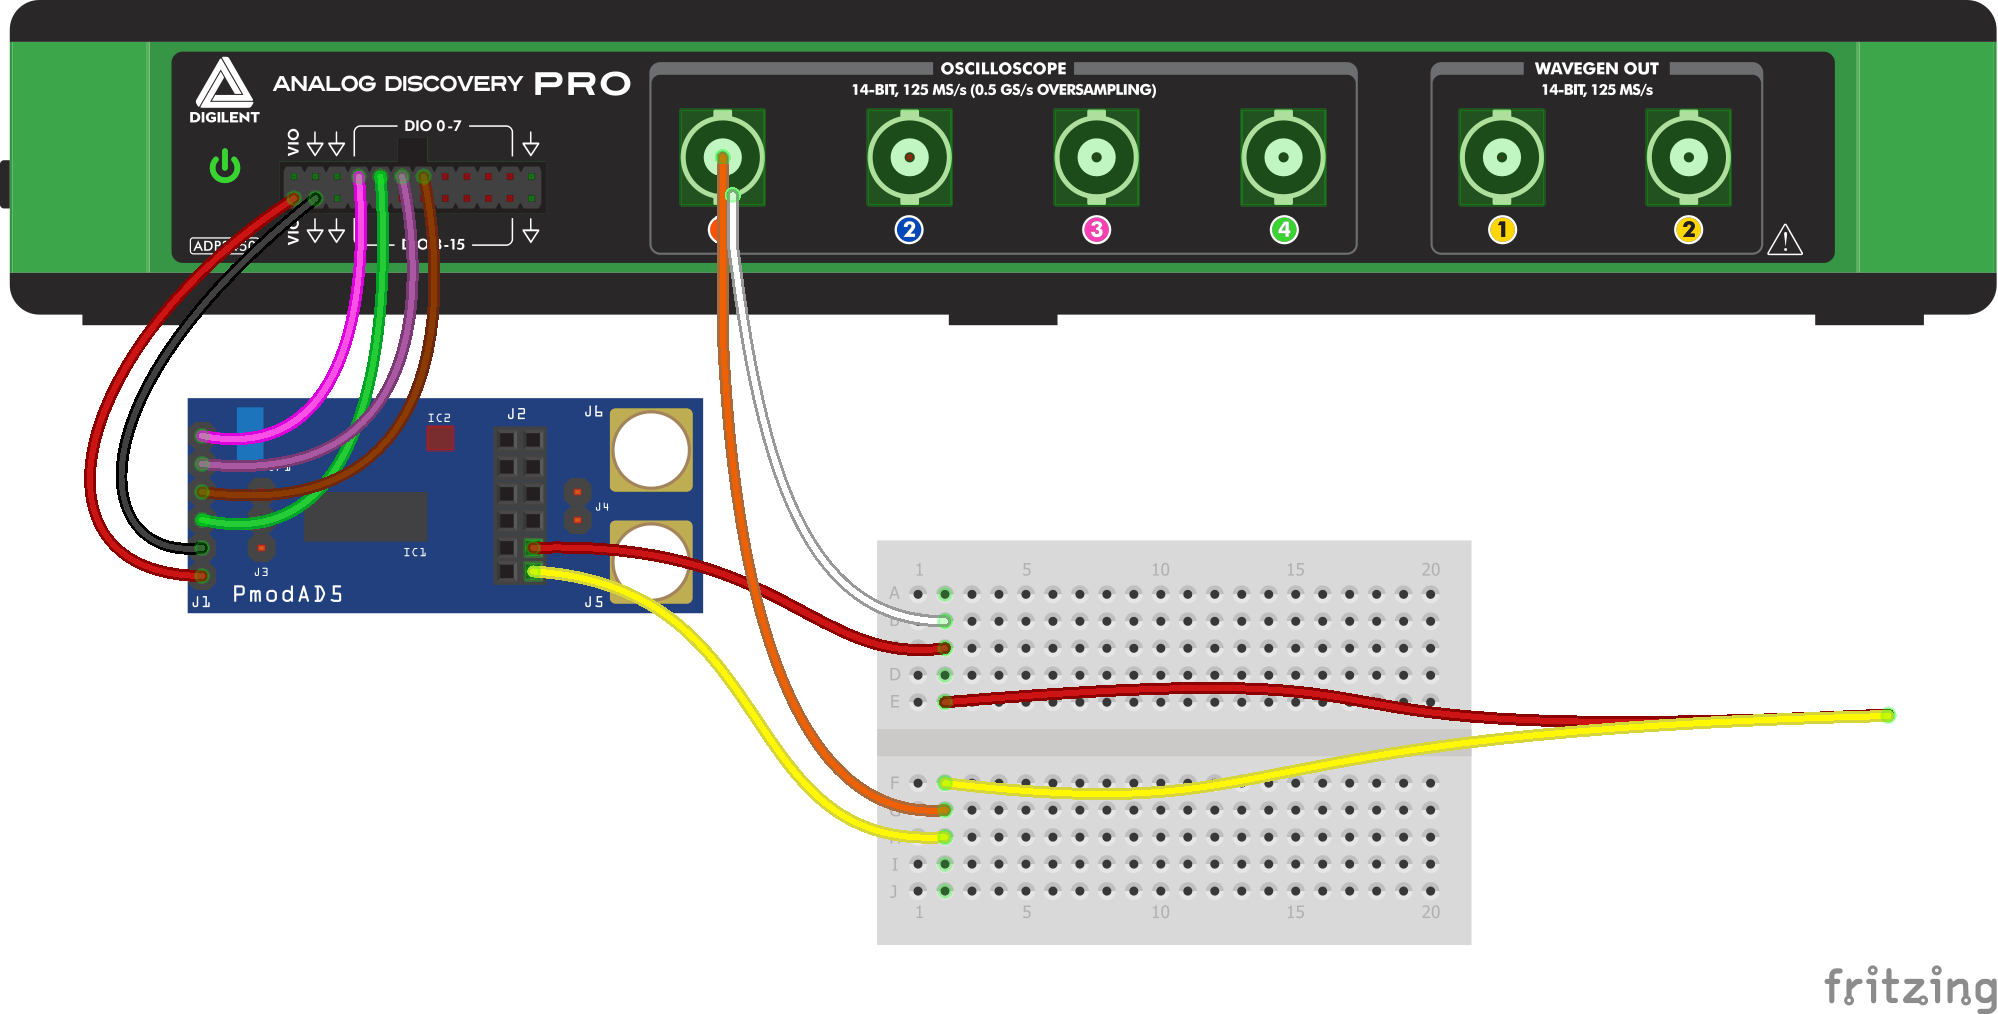
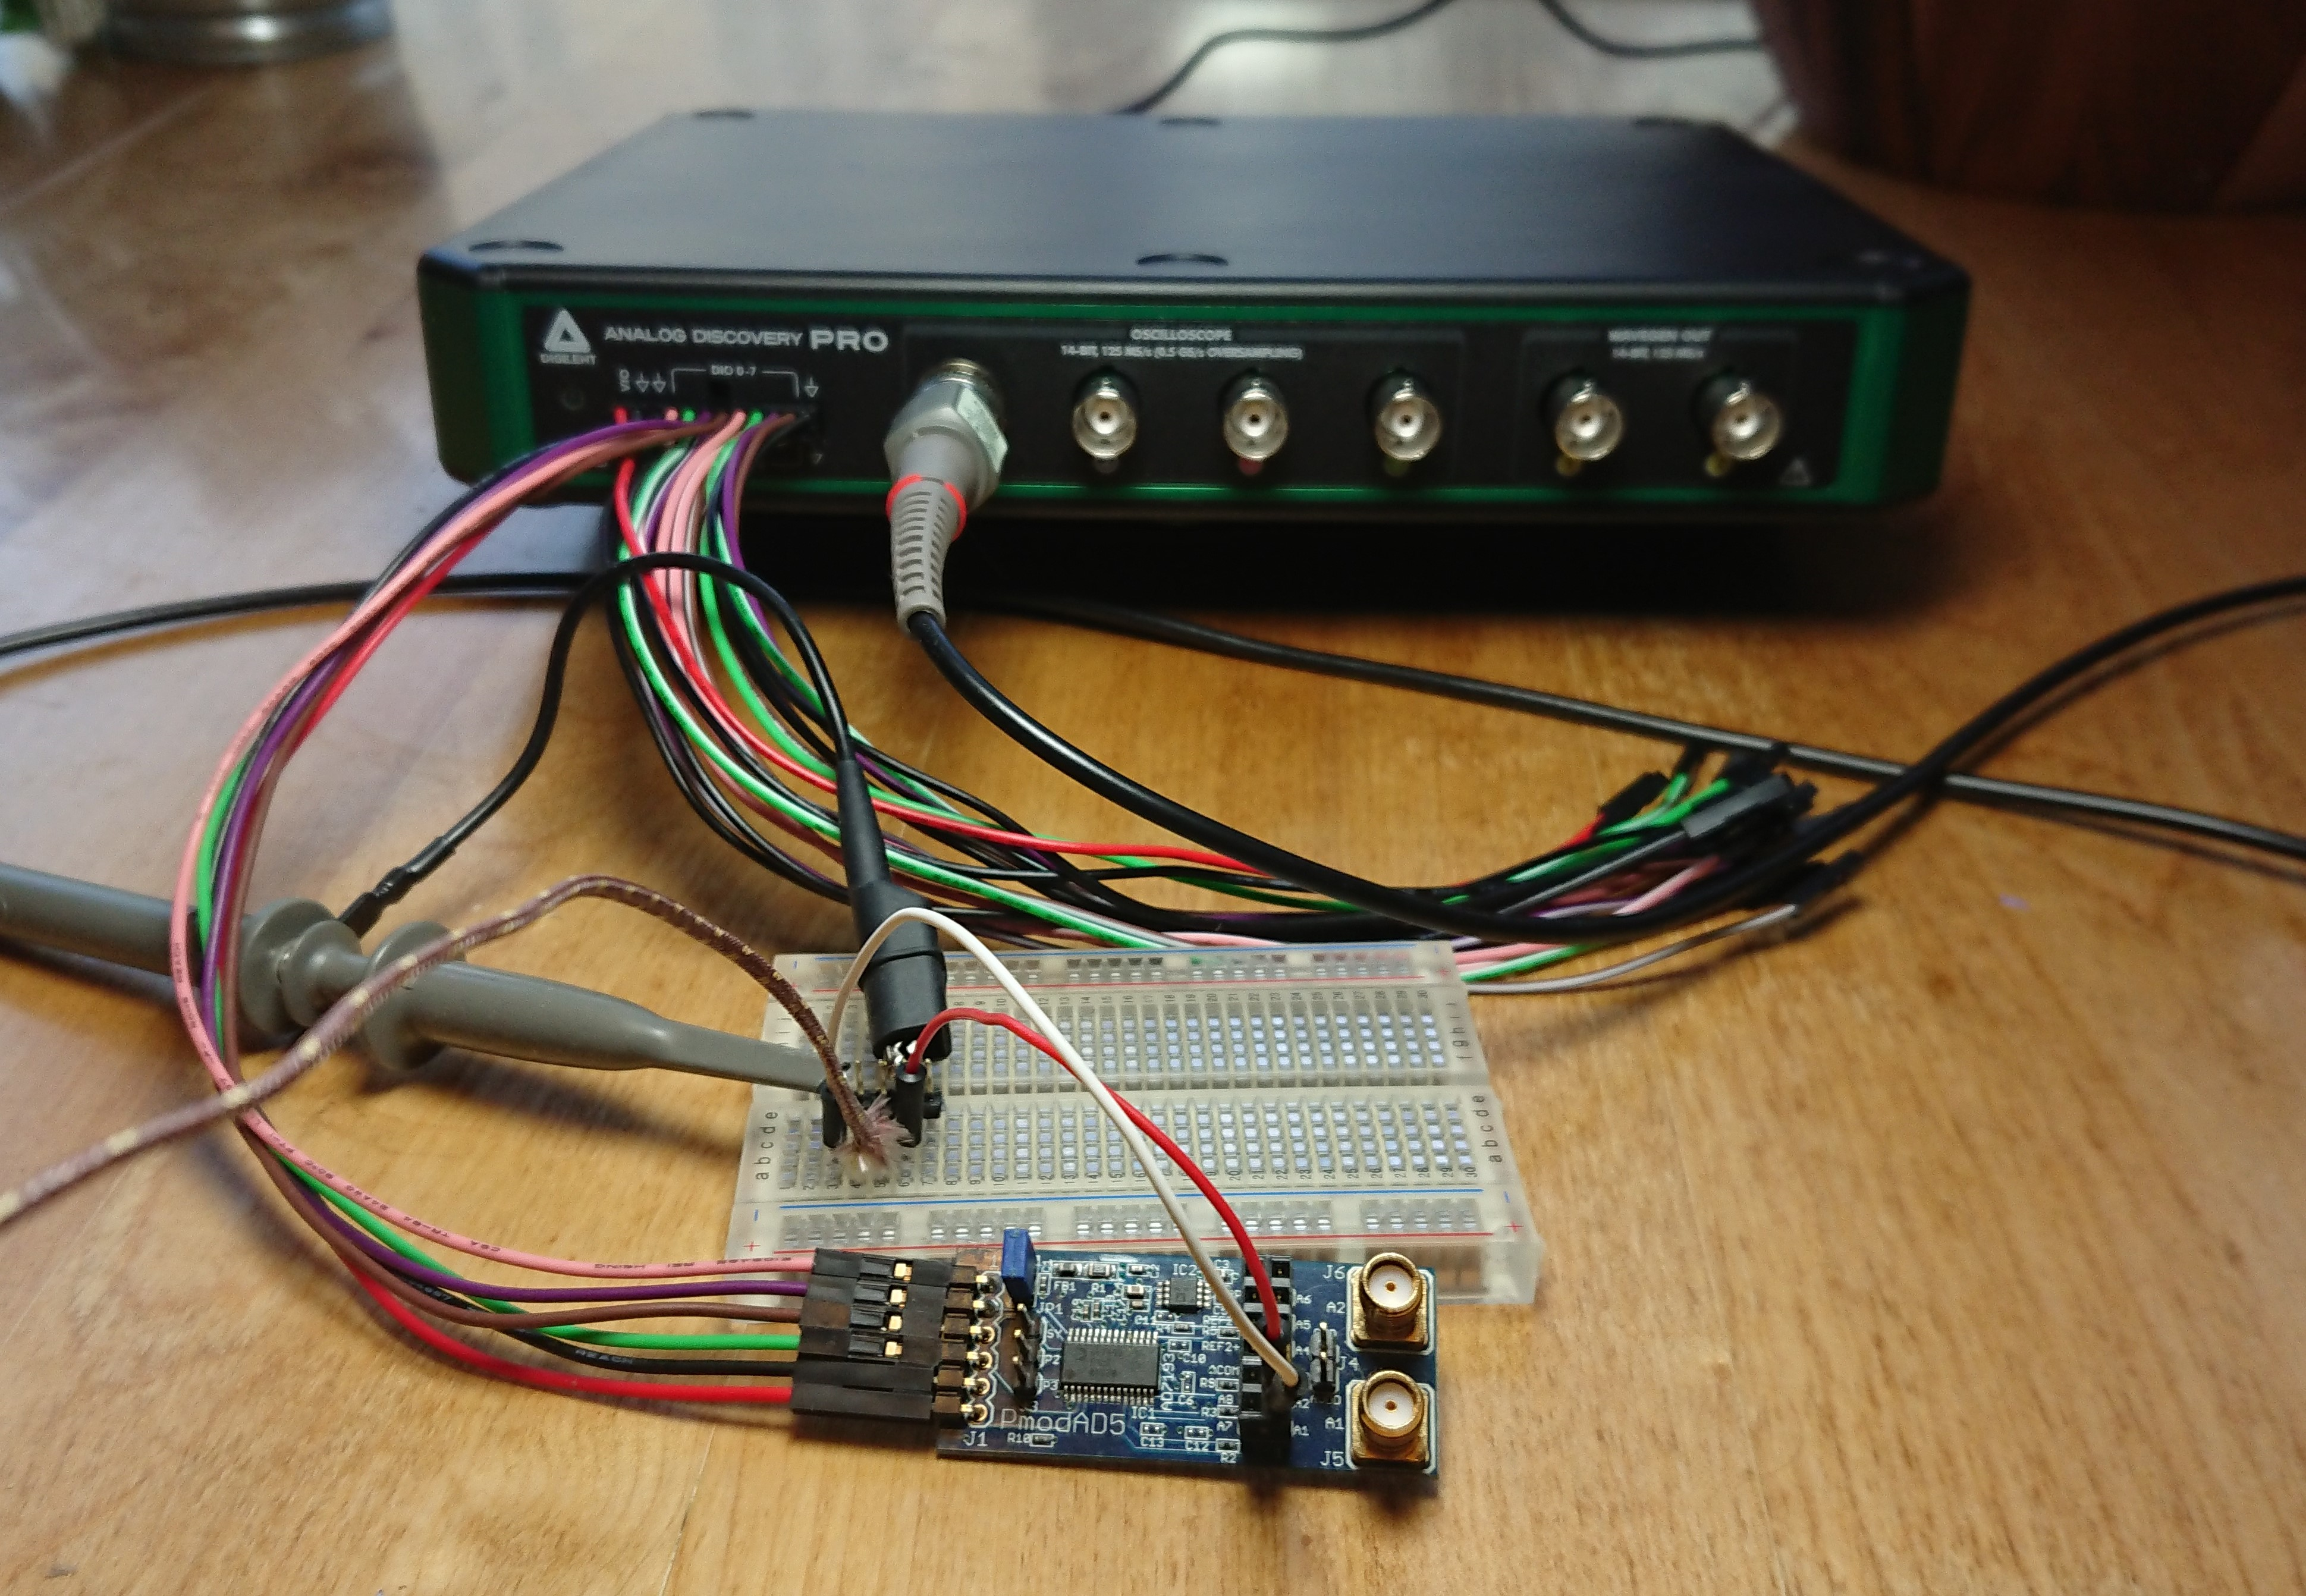
Plug the BNC-connector of the scope probe into Oscilloscope Channel 1 and the MTE cable into the digital MTE connector. Connect the DIO channels, ground, and VIO from the Analog Discovery Pro to the PmodAD5 as shown in the image to the right. The DIO channel connections are provided for reference below.
- DIO0 connected to pin 1 on the Pmod AD5
- DIO1 connected to pin 4 on the Pmod AD5
- DIO2 connected to pin 2 on the Pmod AD5
- DIO3 connected to pin 3 on the Pmod AD5
Connect the yellow thermocouple lead into Pin 1 on header J2 of the PmodAD5 and the red thermocouple lead to Pin 2 on header J2. Then connect the BNC probe lead to the yellow thermocouple lead and the probe ground clip to the red thermocouple lead.
Software Setup
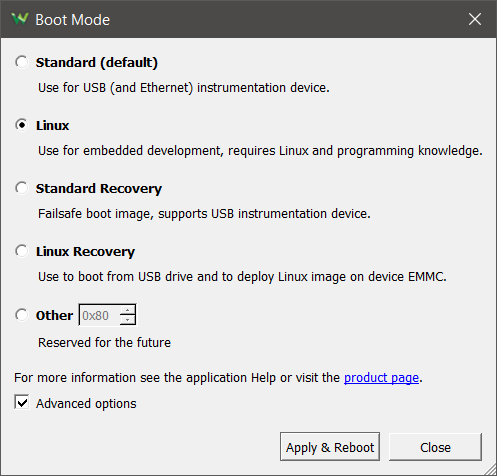
Connect the Analog Discovery Pro to a host computer via USB, open WaveForms, and enter Linux mode. Detailed instructions on how to boot into Linux mode can be found in this guide.
Find what serial port the Analog Discovery Pro is connected to and note it.
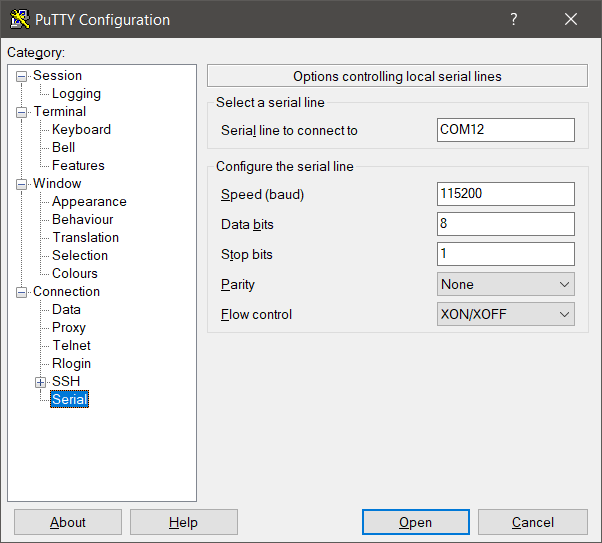
Open a terminal emulator such as PuTTY or TeraTerm and connect to the noted serial port using 115200 Baud, 8 data, 1 stop, and no parity bits.
Download the project ZIP linked in the Inventory section and extract the contents onto the USB drive.
Plug the USB into the back of the Analog Discovery Pro. In the terminal, type
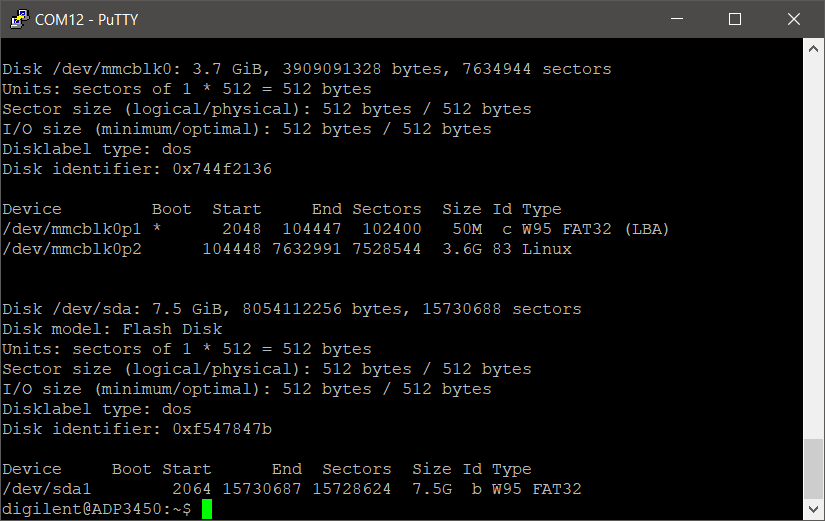
sudo fdisk -l
to find the USB device path. It should look like /dev/sd<drive letter><partition number>. This guide will use /dev/sda1 in its text and images, and care must be taken to match the drive letter and partition number of your USB drive.
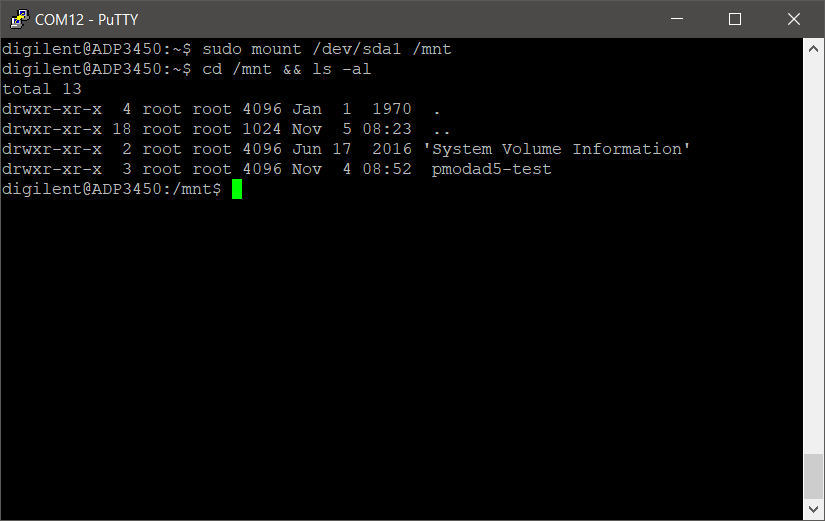
Make the drive contents accessible by entering the command
sudo mount /dev/sda1 /mnt
and then
cd /mnt
to navigate into the USB's directory.
The following dropdown describes the contents of the test script in detail. Run through it to find the information needed to adapt the script for your own projects.
- Script Overview
-
At the beginning of the script the necessary modules are imported and the WaveForms dynamic library is loaded.
"""
   DWF Python Example
   Author:  Digilent, Inc.
   Revision:  2021-02-11

   Requires:
       Python 2.7, 3
"""

from ctypes import (c_int, c_byte, c_ubyte,
    cdll, byref, c_double, create_string_buffer, c_bool)
import math
import sys
import time
from dwfconstants import (filterDecimate,
    AnalogOutNodeCarrier,funcDC,DwfStateDone)
import random

if sys.platform.startswith("win"):
    dwf = cdll.LoadLibrary("dwf.dll")
elif sys.platform.startswith("darwin"):
    dwf = cdll.LoadLibrary("/Library/Frameworks/dwf.framework/dwf")
else:
    dwf = cdll.LoadLibrary("libdwf.so")
Before using a Test and Measurement Device, it needs to be connected to the host. If the device is being used by some other software or is not available for some other reason, this is communicated to the user and script execution halts.
hdwf = c_int()

print("Opening first device")
dwf.FDwfDeviceConfigOpen(c_int(-1), c_int(0), byref(hdwf))

if hdwf.value == 0:
    print("failed to open device")
    szerr = create_string_buffer(512)
    dwf.FDwfGetLastErrorMsg(szerr)
    print(str(szerr.value))
    quit()
The Digital IO, Analog Input, and Voltage supply, are initialized one after the other.
print("Configuring the instrument")

print("Configuring SPI...")
# set the SPI frequency to 6000000 Hz
dwf.FDwfDigitalSpiFrequencySet(hdwf, c_double(6e6))

# set DIO channel 1 as the SPI clock
dwf.FDwfDigitalSpiClockSet(hdwf, c_int(1))

# set DIO channel 2 as the SPI MOSI pin
dwf.FDwfDigitalSpiDataSet(hdwf, c_int(0), c_int(2))

# set DIO channel 3 as the SPI MISO pin
dwf.FDwfDigitalSpiDataSet(hdwf, c_int(1), c_int(3))

# set the SPI mode to 3, where CPOL = 1 and CPHA = 1
dwf.FDwfDigitalSpiModeSet(hdwf, c_int(3))

# set the bit order for SPI data to MSB
dwf.FDwfDigitalSpiOrderSet(hdwf, c_int(1))

# set the value of DIO channel 0, connected as SPI chip select, to high
dwf.FDwfDigitalSpiSelect(hdwf, c_int(0), c_int(1))

time.sleep(1)

print("Configuring Analog In...")

# set the sampling frequency to 20 MHz
dwf.FDwfAnalogInFrequencySet(hdwf, c_double(20000000.0))

# set buffer size to 4000 samples
dwf.FDwfAnalogInBufferSizeSet(hdwf, c_int(4000))

# enable Analog channel 1
dwf.FDwfAnalogInChannelEnableSet(hdwf, c_int(-1), c_bool(True))

# set channel 1 input range to 5 volts
dwf.FDwfAnalogInChannelRangeSet(hdwf, c_int(-1), c_double(5))

# enable decimation on analog in channel 1
dwf.FDwfAnalogInChannelFilterSet(hdwf, c_int(-1), filterDecimate)
time.sleep(2) # wait for the offset to stabalize.

print("Configuring Power Supply....")

# enable positive supply
dwf.FDwfAnalogIOChannelNodeSet(hdwf, c_int(0), c_int(0), c_double(True))

# set voltage to 3.3V
dwf.FDwfAnalogIOChannelNodeSet(hdwf, c_int(0), c_int(1), c_double(3.3))

# master enable
dwf.FDwfAnalogIOEnableSet(hdwf, c_int(True))
time.sleep(5)
The ADC is put into single conversion mode and configured to have a gain of 100, then it is calibrated.
print("Configuring the ADC")
print("Writing config...")

# write to the config register, setting the gain to 8, the active channel to 0
b = (c_ubyte*4)(0x10,0x00,0x01,0x13)

# set DIO channel 0, operating as SPI CS to low (0)
dwf.FDwfDigitalSpiSelect(hdwf, c_int(0), c_int(0))

# perform a SPI write operation over DQ line 0, with 8 bits per word, sending the above buffer (b)
dwf.FDwfDigitalSpiWrite(hdwf, c_int(0), c_int(8), b, c_int(len(b)))

# set DIO channel 0, operating as SPI CS to high (1)
dwf.FDwfDigitalSpiSelect(hdwf, c_int(0), c_int(1))

time.sleep(.05)

# write to the mode register, setting averaging to 100
b = (c_byte*4)(0x08, 0x08, 0x00, 0x64)

# set DIO channel 0, operating as SPI CS to low (0)
dwf.FDwfDigitalSpiSelect(hdwf, c_int(0), c_int(0))

# perform a SPI write operation over DQ line 0, with 8 bits per word, sending the above buffer (b)
dwf.FDwfDigitalSpiWrite(hdwf, c_int(0), c_int(8), b, c_int(len(b)))

# set DIO channel 0, operating as SPI CS to high (1)
dwf.FDwfDigitalSpiSelect(hdwf, c_int(0), c_int(1))
time.sleep(.05)
The test is started by beginning an analog acquisition to measure the voltage at the thermocouple junction.
With the acquisition under way, the ADC is instructed to perform a conversion.
try:
    while True:
        dwf.FDwfAnalogInConfigure(hdwf, c_int(1), c_int(1))

        # issue a read and calculate the temperature from the data
        b = (c_ubyte*4)(0x58,0x00,0x00,0x00)
        r = (c_ubyte*4)()

        # set DIO channel 0, operating as SPI CS to low (0)
        dwf.FDwfDigitalSpiSelect(hdwf, c_int(0), c_int(0))

        # perform a SPI write/read operation using MOSI/MISO with 8 bit words, using b to send and r to receive
        dwf.FDwfDigitalSpiWriteRead(hdwf, c_int(1), c_int(8), b, c_int(len(b)), r, c_int(len(b)))

        # set DIO channel 0, operating as SPI CS to high (1)
        dwf.FDwfDigitalSpiSelect(hdwf, c_int(0), c_int(1))

        # convert byte array into numeric value
        ch0Data = 0
        for i in range(1, 4):
            ch0Data = ch0Data << 8 | r[i]
The acquisition is allowed to finish if it hasn't, and the data is retrieved.
# complete the acquisition
while True:
    dwf.FDwfAnalogInStatus(hdwf, c_int(1), byref(sts))
    if sts.value == DwfStateDone.value :
        break
    time.sleep(0.1)

print("Acquisiton Done")
samples = (c_double*4000)()
# read the acquired samples into samples
dwf.FDwfAnalogInStatusData(hdwf, 0, samples, 4000)
The data given by the PmodAD5 is converted into proper voltage values and the average of the acquired samples is calculated before the result is displayed on stdout.
mVref = 2.5
PGAGain = 8

# convert the data into a numeric voltage value
thermoVoltage = (((ch0Data / 8388608) - 1.0) * (mVref / PGAGain))

# find the average of the samples
avg = sum(samples)/len(samples)
The test runs continuously until Ctrl+C is pressed and the device is closed.
except KeyboardInterrupt:
    pass

print("\ncleaning up...")
dwf.FDwfDeviceCloseAll()
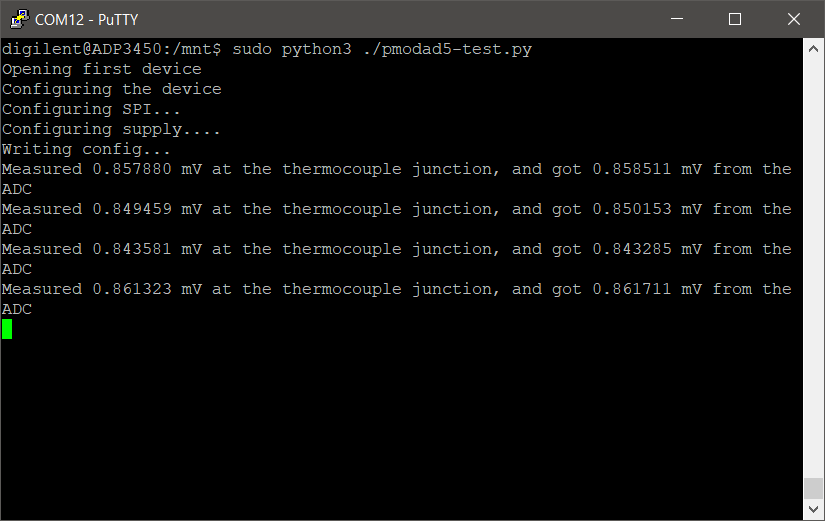
Run the script by entering
sudo python3 ./pmodad5-test.py
in the terminal. This script configures the PmodAD5 via SPI and iterates over a list of voltages used to set a DC signal from the Wavegen. It then issues a read command over SPI, records the results, and continues to the next voltage until there are none left. The results are output to the terminal upon completion.
Other Resources
For more guides and example projects for the Analog Discovery Pro, check out its Resource Center.
For technical support, please visit the Digilent Forum.

