Zybo Z7 Migration Guide
This guide is intended to assist in the migration from the recently retired ZYBO to the new and improved Zybo Z7. It will be useful for those who currently own or are familiar with the ZYBO and will need to port existing materials over to the new platform. If you are simply looking for complete documentation on the Zybo Z7, please refer to the Zybo Z7 Reference Manual.
What Happened to the ZYBO?
We realized that with several minor updates to the ZYBO's design, we could greatly improve its capabilities as a video platform while adding only little cost. We decided to move forward with these changes, also making some additional improvements along the way. Whenever possible, we left the design unchanged in order to help make the migration from the ZYBO to this new platform, the Zybo Z7, easy for our customers. Here is a summary of the changes that were made:
- Replaced VGA output port with HDMI input
- Converted bidirectional HDMI port to output only for simplicity
- Fixed HDMI monitor back-powering issue
- Added a MIPI CSI-2 capable Pcam port for attaching camera sensor modules
- Increased processor speed to 667 MHz and DDR speed to 1066 MHz
- Increased DDR capacity from 512 MB to 1 GB
- Changed DDR3 to DDR3L for lower power consumption
- Added RGB LEDs
- Option to purchase with larger Zynq-7000 loaded
- reVISION capable SDSoC platform provided by Digilent
Hardware Comparison
The figure below shows the ZYBO next to the two new Zybo Z7 product variants, the Zybo Z7-10 and the Zybo Z7-20.
The complete feature lists of these three products are arranged in the table below so that they can be easily compared.
| ZYBO | Zybo Z7-10 | Zybo Z7-20 | ||
|---|---|---|---|---|
| Product Information | Status | Discontinued | Active | |
| Zynq Specifications | Zynq Part | XC7Z010-1CLG400C | XC7Z020-1CLG400C | |
| Processor | 650 MHz dual-core Cortex-A9 | 667 MHz dual-core Cortex-A9 | ||
| Programming Options | JTAG, Quad-SPI Flash, microSD | |||
| 1 MSPS On-chip ADC | Yes | |||
| Look-up Tables (LUTs) | 17,600 | 53,200 | ||
| Flip-Flops | 35,200 | 106,400 | ||
| Block RAM | 270 KB | 630 KB | ||
| Clock Management Tiles | 2 | 4 | ||
| Memory | DDR | 512 MB DDR3 with 32-bit bus @ 1050 MHz | 1 GB DDR3L with 32-bit bus @ 1066 MHz | |
| Quad SPI Flash | 16 MB | |||
| microSD Slot | Yes | |||
| Power | Input Options | USB or any 5V external power source | ||
| Fan Connector | No | Yes | ||
| USB and Ethernet | Gigabit Ethernet | Yes | ||
| USB-JTAG Circuitry | Yes | |||
| USB-UART bridge | Yes | |||
| USB 2.0 OTG | Host and Device | |||
| Audio and Video | Audio Codec | SSM2603 | ||
| VGA Output | Yes | No | ||
| Bidirectional HDMI | Yes | No | ||
| HDMI Output | No | Yes | ||
| HDMI Input | No | Yes | ||
| Pcam MIPI CSI-2 Camera Port | No | Yes | ||
| GPIO Devices | Push buttons | 6 | ||
| Switches | 4 | |||
| LEDs | 5 | |||
| RGB LEDs | 0 | 1 | 2 | |
| Expansion Connectors | Pmod ports | 6 | 5 | 6 |
| Form Factor | Width | 3.3 inches (88 mm) | ||
| Length | 4.8 inches (122 mm) | |||
Migration Considerations
The following must be considered when migrating from the ZYBO to the Zybo Z7:
Zynq Pin-out Changes
The pin mappings of many components have changed. This is true even for some components that are present on both the Zybo Z7 and ZYBO. Any IP cores that are using board file interfaces will need to be re-targeted to the Zybo Z7. Also, any pin constraints found in XDC files will need to be replaced with updated pin constraints that take into account the new pin-out of the Zybo Z7. See section “Project Migration Tutorial” for instructions on how to do this with an existing ZYBO project.
For this reason, most pre-built bitstream files that target the ZYBO will not work on the Zybo Z7.
Zynq PS Configuration Changes
The input oscillator has changed from 50 MHz to 33.3333 MHz. Also, the Zybo Z7 uses different DDR memory. Both of these changes require the Zynq Processing System IP Core in Vivado to be reconfigured with different settings than were used on the ZYBO. See the section “Project Migration Tutorial” for an easy way to update an existing ZYBO block diagram to use the new Zybo Z7 settings.
For this reason, any binary files that target the ZYBO and make use of the processors (such as a BOOT.bin file) will not work on the Zybo Z7.
Pmod Port Changes
The Pmod ports found on the ZYBO and Zybo Z7-20 are equivalent, however the Zybo Z7-10 has one fewer high-speed Pmod port attached to the Zynq-7000's programmable logic. Specifically, it does not include Pmod JB. To migrate a design to the Zybo Z7-10 that uses Pmod JB, modify it to use Pmod JC or Pmod JD instead, which are also high-speed Pmod ports. If a design must use Pmod JB, it should be migrated to the Zybo Z7-20.
VGA Removed
The VGA port was removed to make room for the dedicated HDMI ports and Pcam port. If a project was using VGA output, there are a couple options for porting it to the Zybo Z7.
- Modify the design to output video on the HDMI TX port instead. The easiest way to do this is to use the rgb2dvi IP core available in Digilent's vivado-library IP Repo. That IP core will convert the signals the project was using to drive the VGA port into DVI signals that can be connected to the HDMI TX port. As a bonus, this will improve the color depth to 24-bits.
- Purchase a Pmod VGA and attach it to two of the Pmod ports found on the Zybo Z7. This will provide VGA output port on the Zybo Z7 much like the one found on the ZYBO. The downside to this is that the Pmod VGA has only 12-bits of color depth compared to the 16-bit VGA found on the ZYBO, so the project will need to be modified to truncate the additional color signals. For an example of how to use the Pmod VGA with the Zybo Z7, see the “Zybo Z7 Pmod VGA Demo” available from the Zybo Z7 Resource Center.
HDMI Port Changes
Projects that were using the bidirectional HDMI port on the ZYBO as an output to a display should be modified to use the pins attached to the HDMI TX port on the Zybo Z7. The HDMI TX port will function identically to the bidirectional port, except that the HDMI_OUT_EN signal is no longer needed to indicate the port direction.
As an additional improvement, you no longer need to disconnect any attached displays in order to power cycle the Zybo Z7. The display back powering issue present on the ZYBO has been fixed.
Projects that were using the bidirectional HDMI port on the ZYBO as an input should be modified to use the pins attached to the HDMI RX port on the Zybo Z7. The HDMI RX port will function identically to the bidirectional port, except that the HDMI_OUT_EN signal is no longer needed to indicate the port direction.
Those who need to use the optional CEC pin on the HDMI RX port must migrate to the Zybo Z7-20. The CEC pin on the HDMI RX port is not connected to the Zynq on the Zybo Z7-10.
Driving Dual Displays
Designs that were using the ZYBO to simultaneously drive two displays with the HDMI port and VGA port will no longer be able to do so using the video ports found on the Zybo Z7 (there is only one output). Digilent recommends using the HDMI TX port and a Pmod VGA with the Zybo Z7 if your design requires dual displays. See the “HDMI Port Changes” section and “VGA Removed” section for more information.
Pcam Port Added
The Pcam connector can be used to attach MIPI CSI-2 based camera sensor modules to the Zybo Z7. This interface supports much lower latency and higher bandwidth than the onboard USB 2.0 connector. If your design uses a USB 2.0 camera, modifying it to use the Pcam port instead will improve performance.
reVISION SDSoC Platform
SDSoC and the reVISION libraries make it possible to do FPGA accelerated video processing using openCV functions in an all C/C++ development environment. Digilent will be enabling this design flow on the Zybo Z7-20 by providing a reVISION capable SDSoC platform for it in the future. Those using the ZYBO for video processing (or that are interested in doing so) should consider if migrating a project into SDSoC will enable improvements. For more information on reVISION, see Xilinx's reVISION Zone.
Those interested in using reVISION should migrate to the Zybo Z7-20. The Zybo Z7-10 does not have enough programmable logic resources to properly implement a reVISION platform.
Larger FPGA Option
If you would benefit from having more FPGA resources, you have the option to migrate to the Zybo Z7-20, which includes a much larger ZC7020 Zynq part. The process of migrating to the Zybo Z7-20 is no more difficult than migrating to the Zybo Z7-10, which has the same ZC7010 Zynq part as the ZYBO.
Basic video processing applications designed on the ZYBO or Zybo Z7-10 will often use most of the available resources in the programmable logic. For this reason the Zybo Z7-20 is recommended for those interested in video processing.
DDR Memory Improvements
The Zybo Z7 doubles the memory capacity of the ZYBO to 1 GB. Some designs may be able to benefit from this additional memory. This can often be useful in designs built on Embedded Linux (Petalinux).
Other improvements to the DDR will slightly increase available bandwidth and decrease power consumption.
Project Migration Tutorial
The following procedure describes an easy method for porting an existing Vivado project from the ZYBO to the Zybo Z7. It was tested in Vivado 2017.2 and will likely work for other versions, though the steps and images may differ slightly. Note this guide expects previous experience with Vivado and Xilinx SDK.
1.
Install the latest version of the Digilent Vivado board files
2.
Download the latest version of the Digilent XDC repo
3.
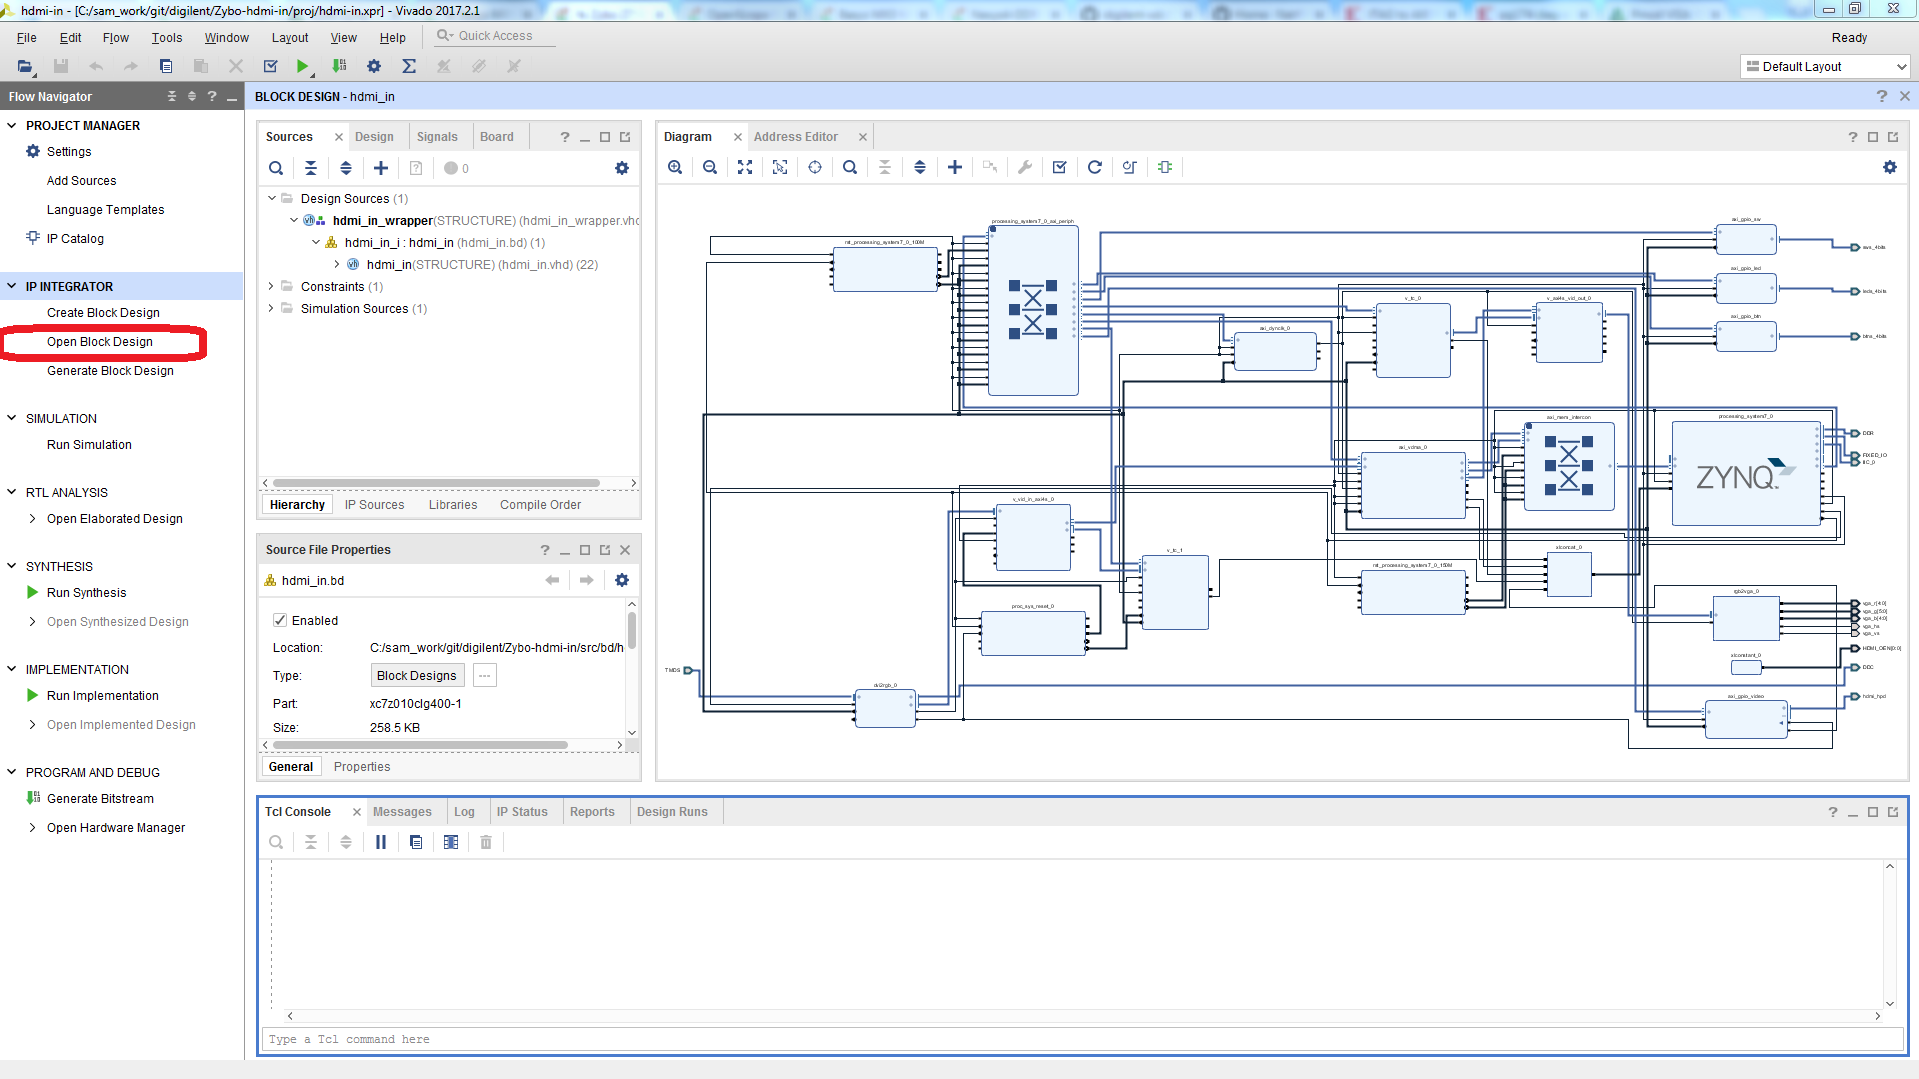
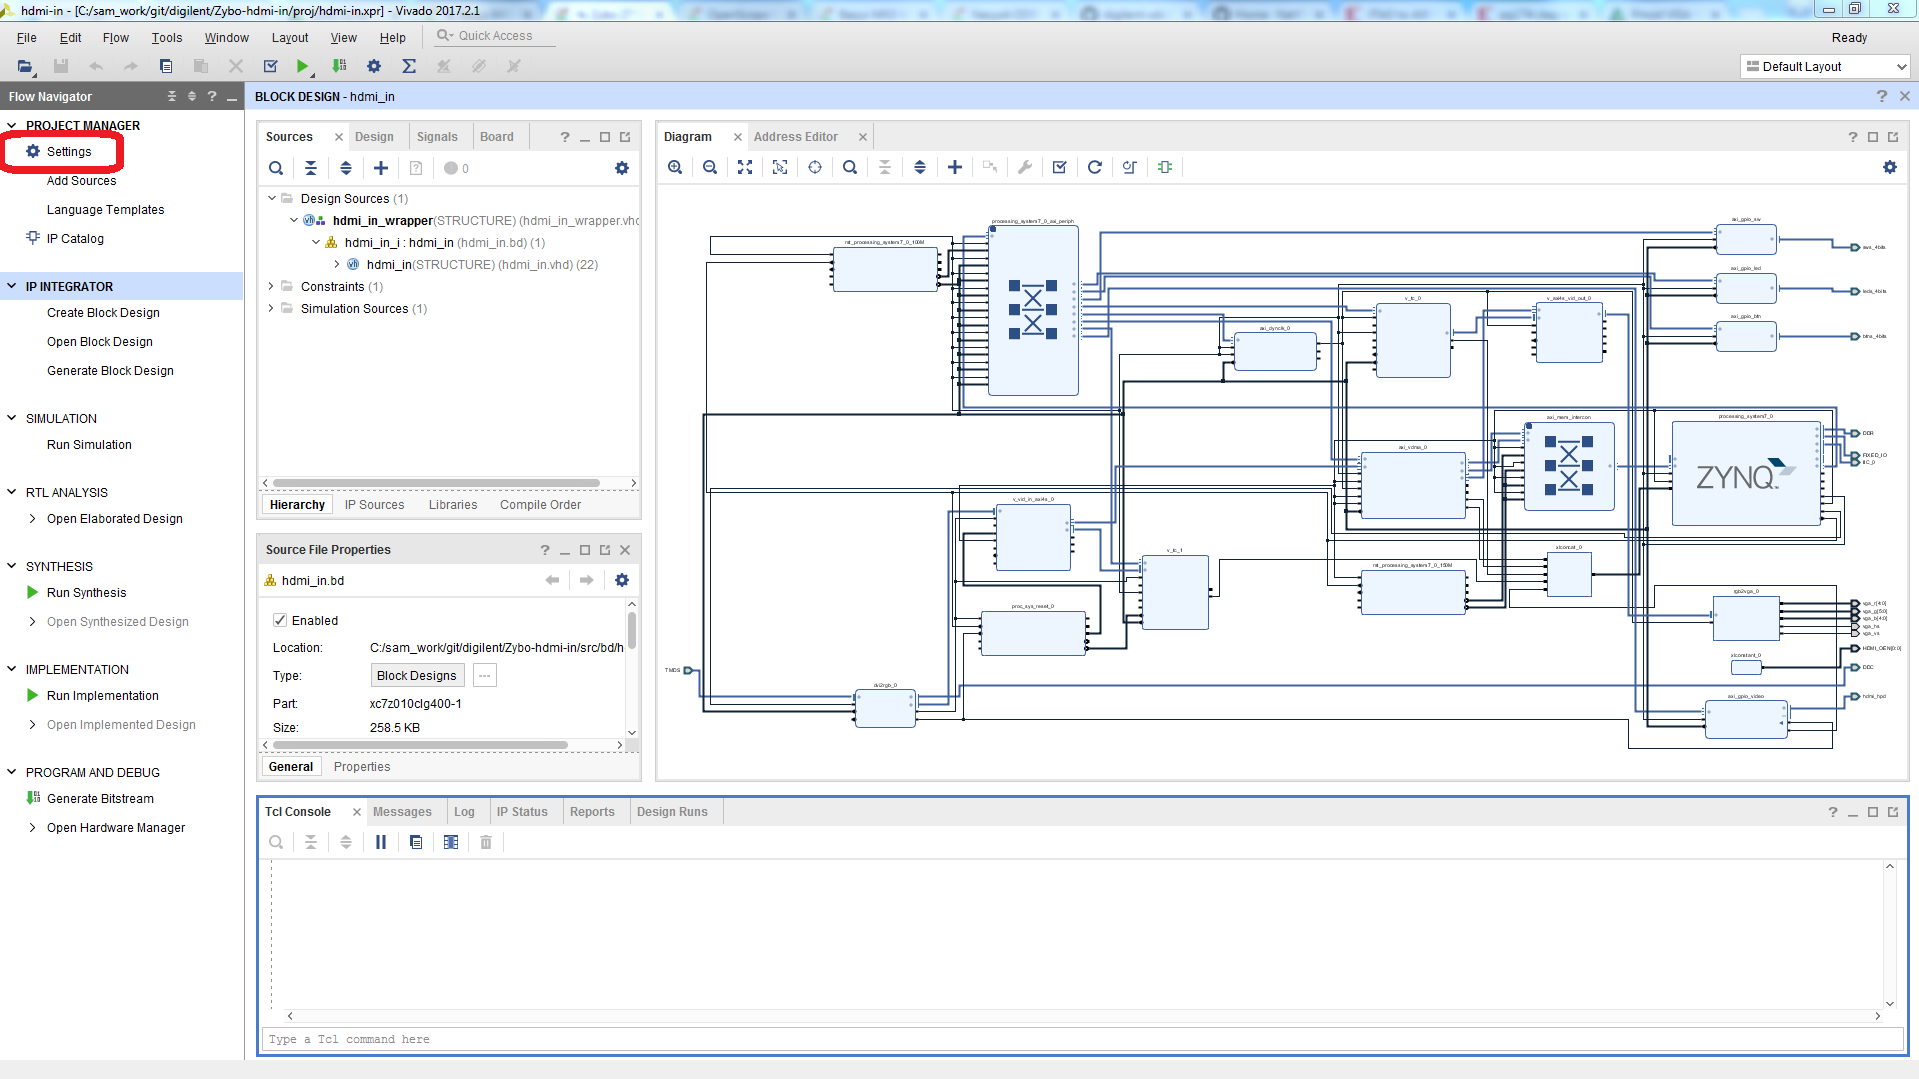
Open the Vivado project you wish to migrate to the Zybo Z7
7.
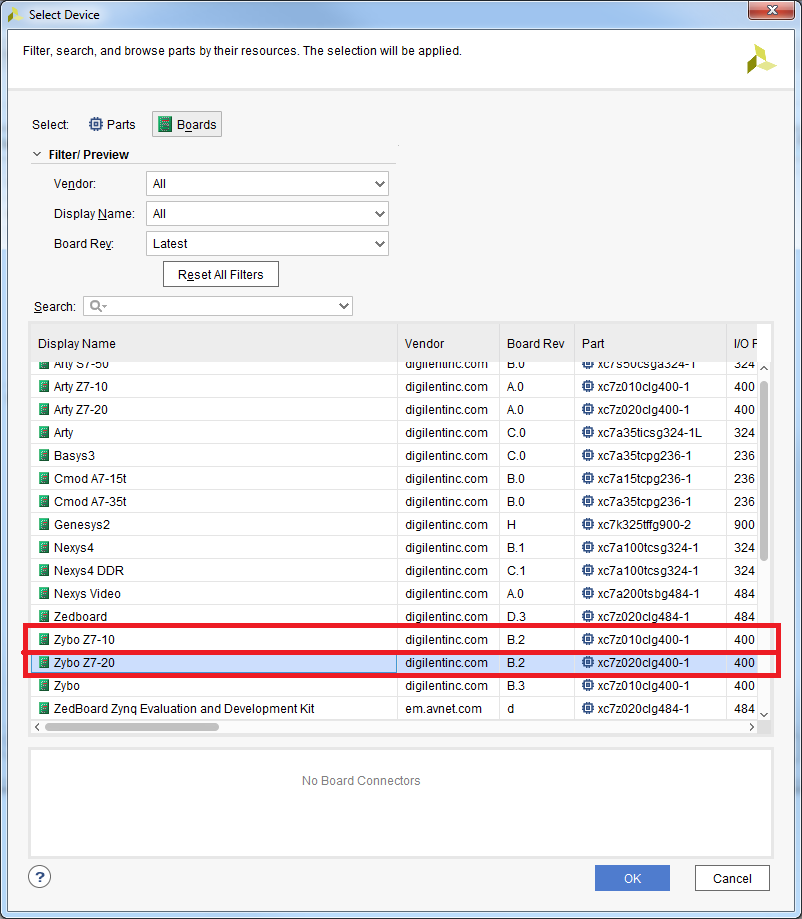
Select the Zybo Z7-10 or Zybo Z7-20 to retarget your project to the new platform. Click OK to apply the settings
9.
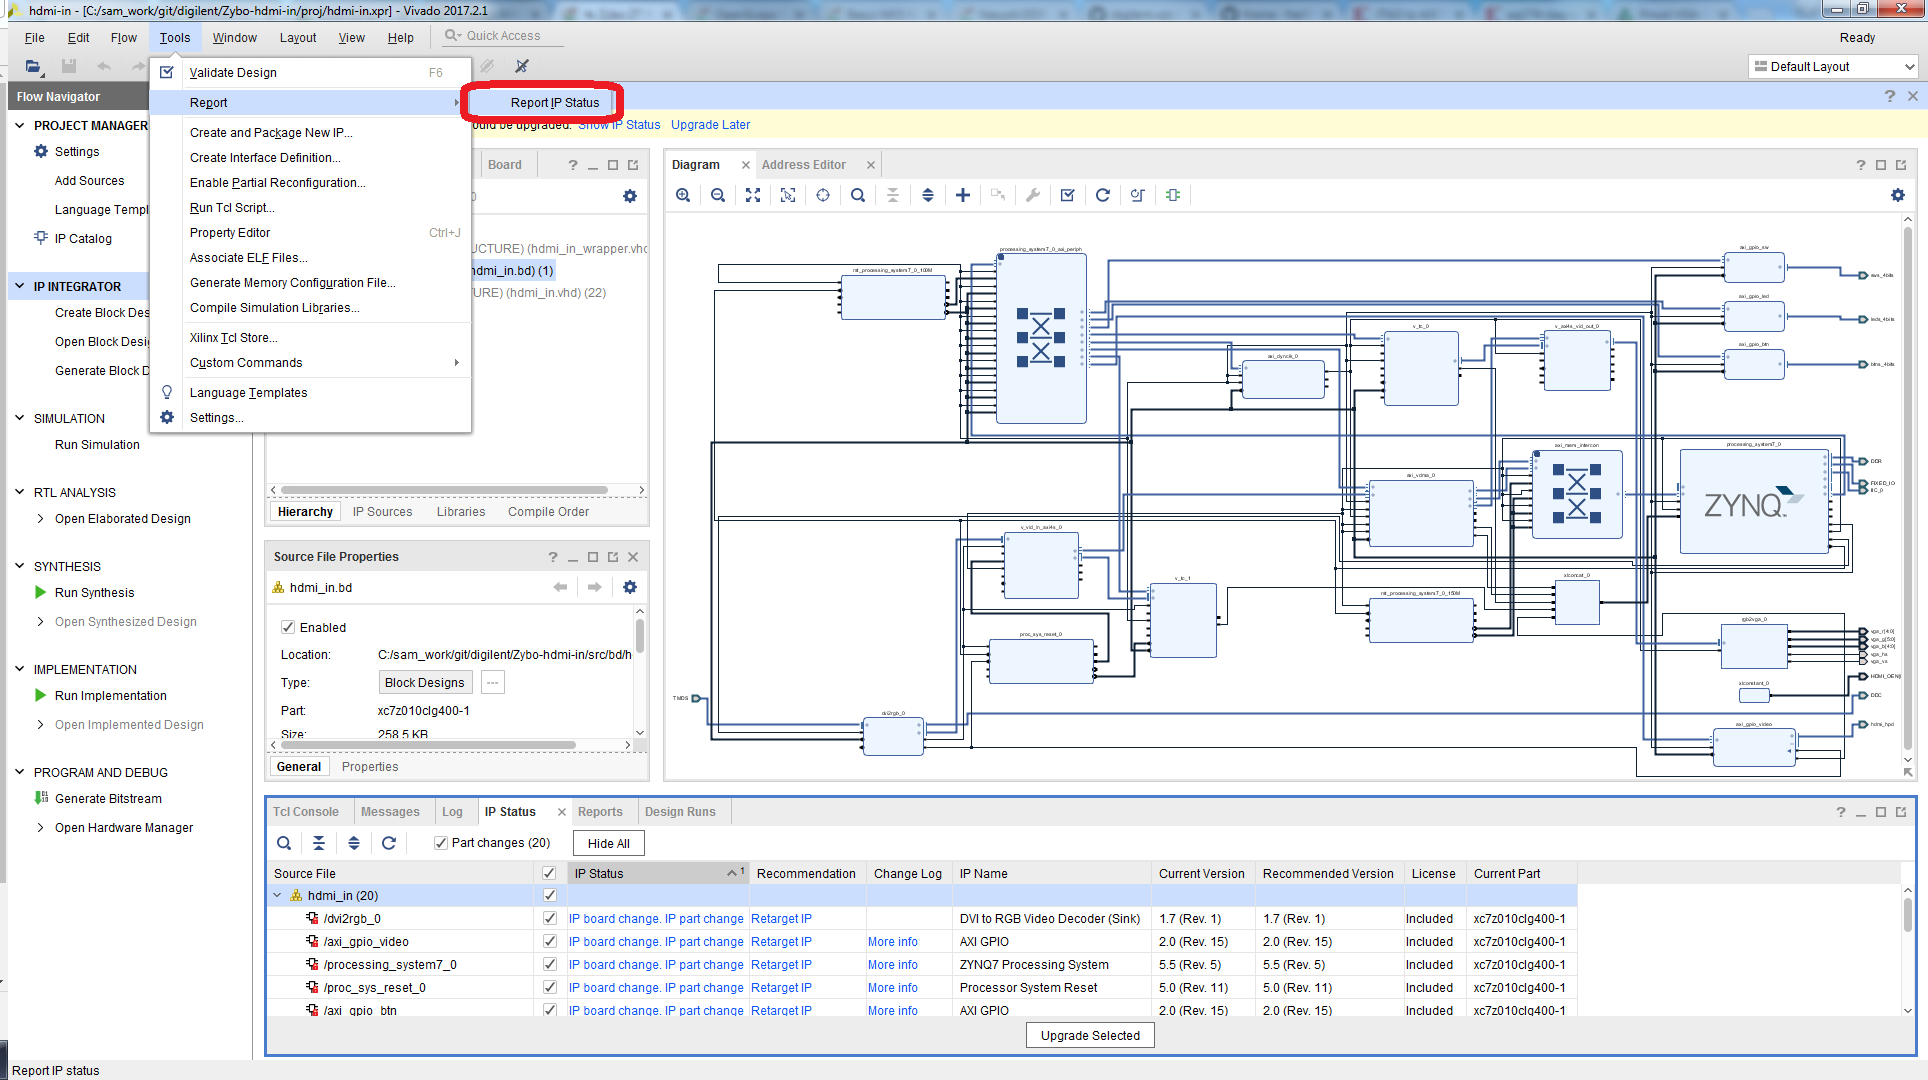
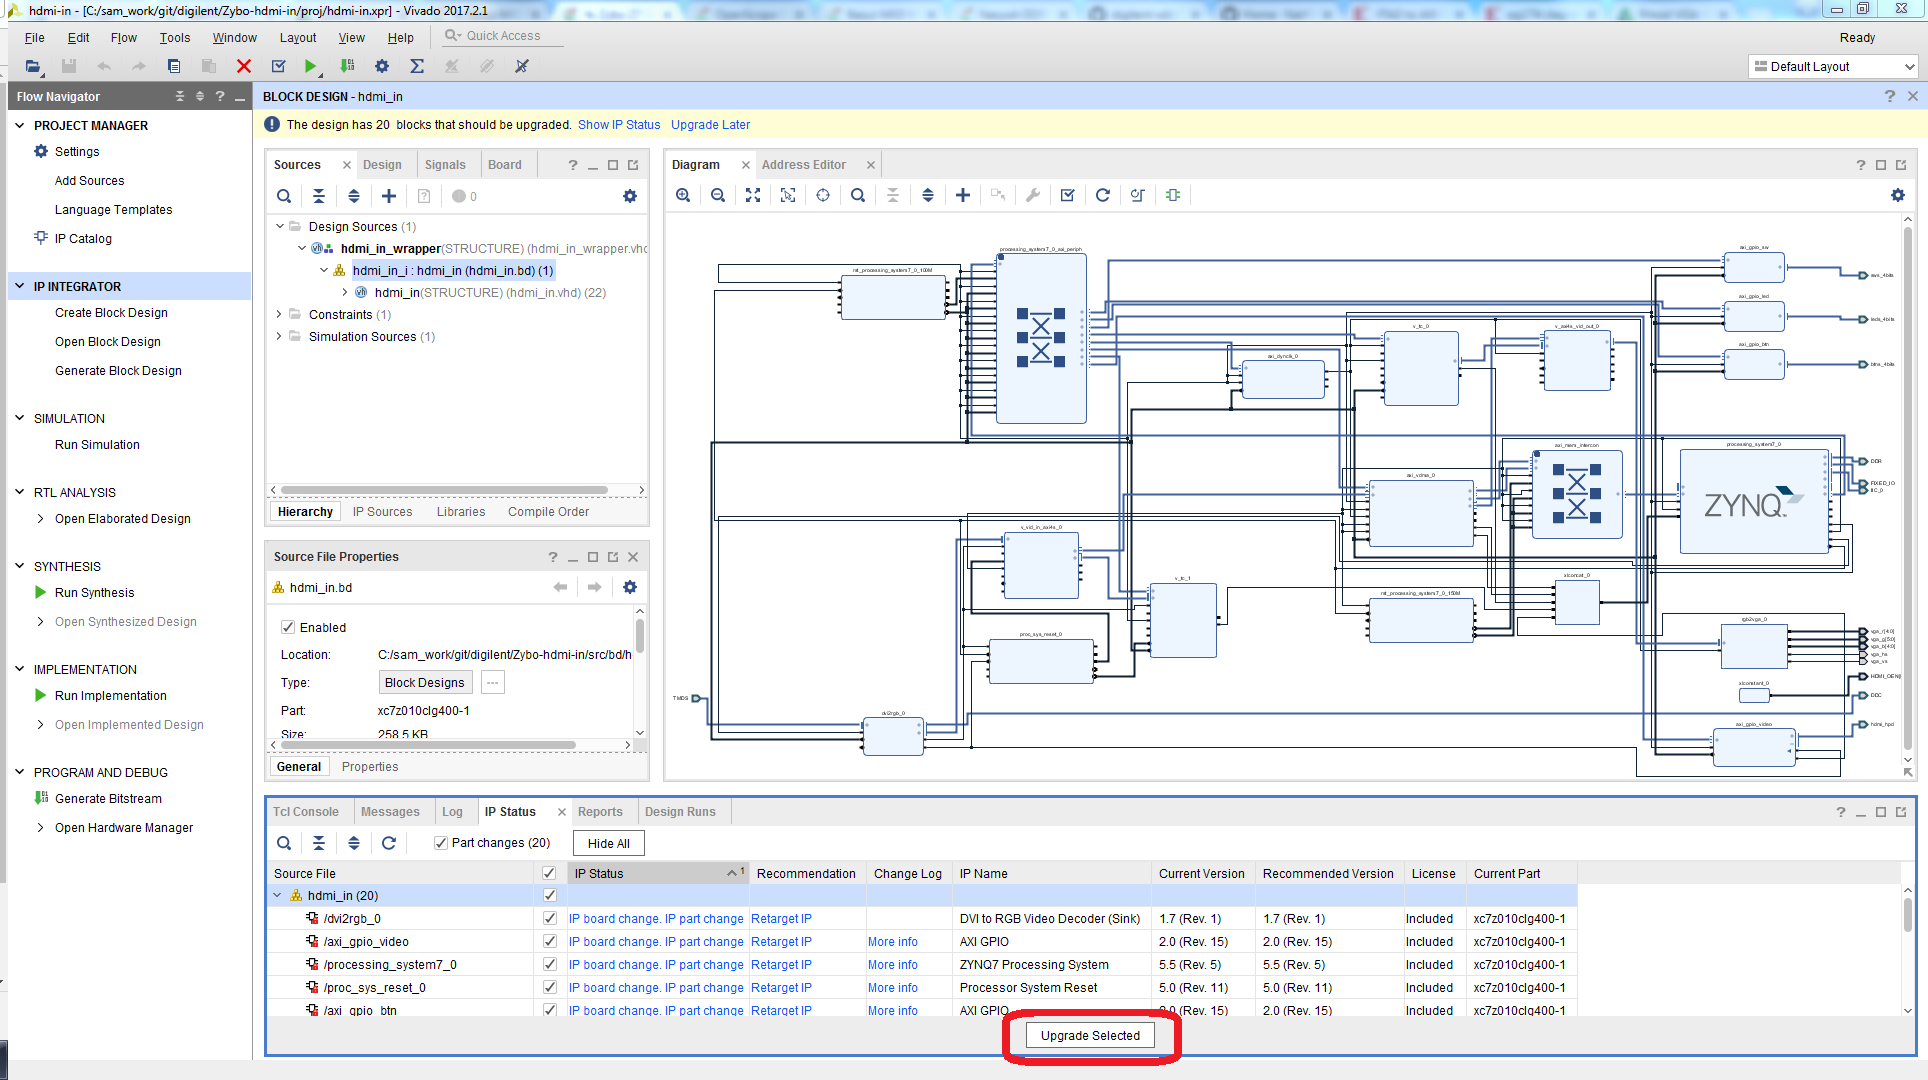
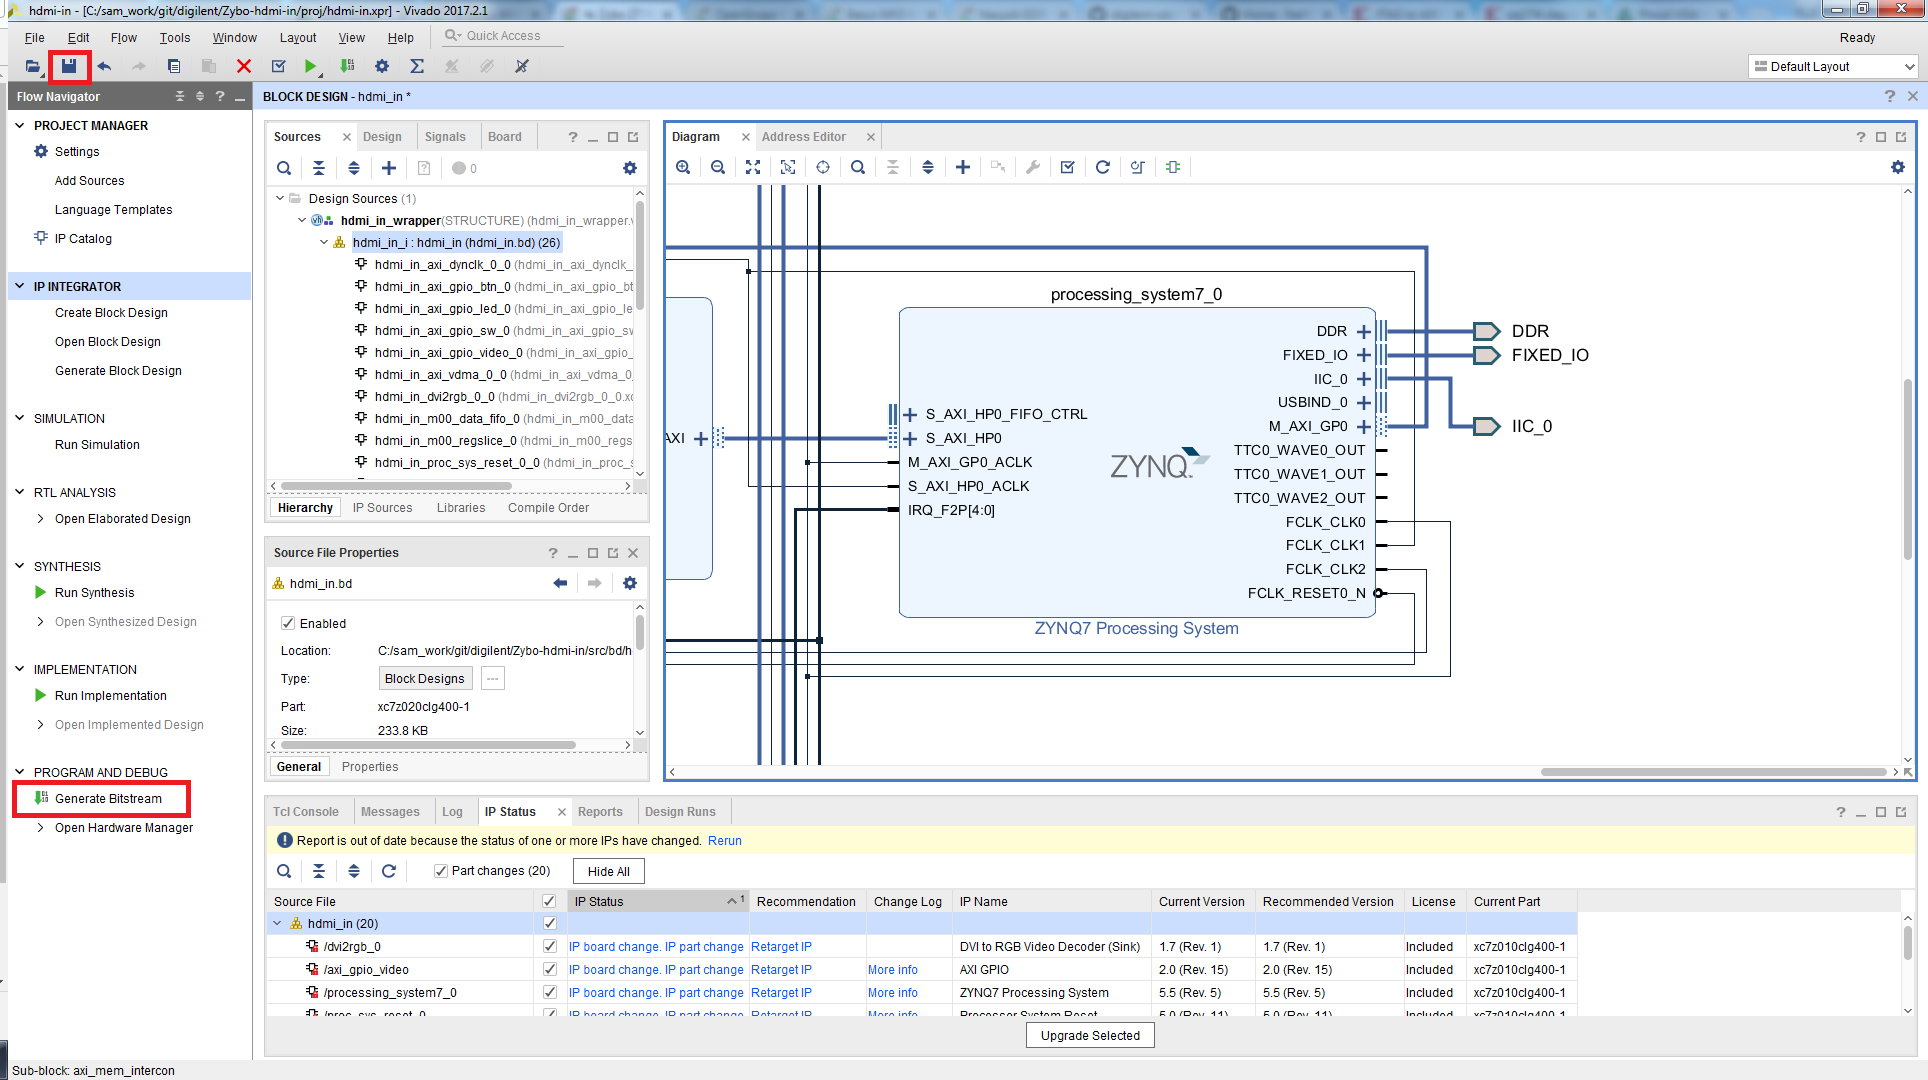
Click Upgrade Selected. After complete, if asked to Generate Output Products, click Skip. Critical warnings regarding negative DDR DELAY values can be ignored.
10.
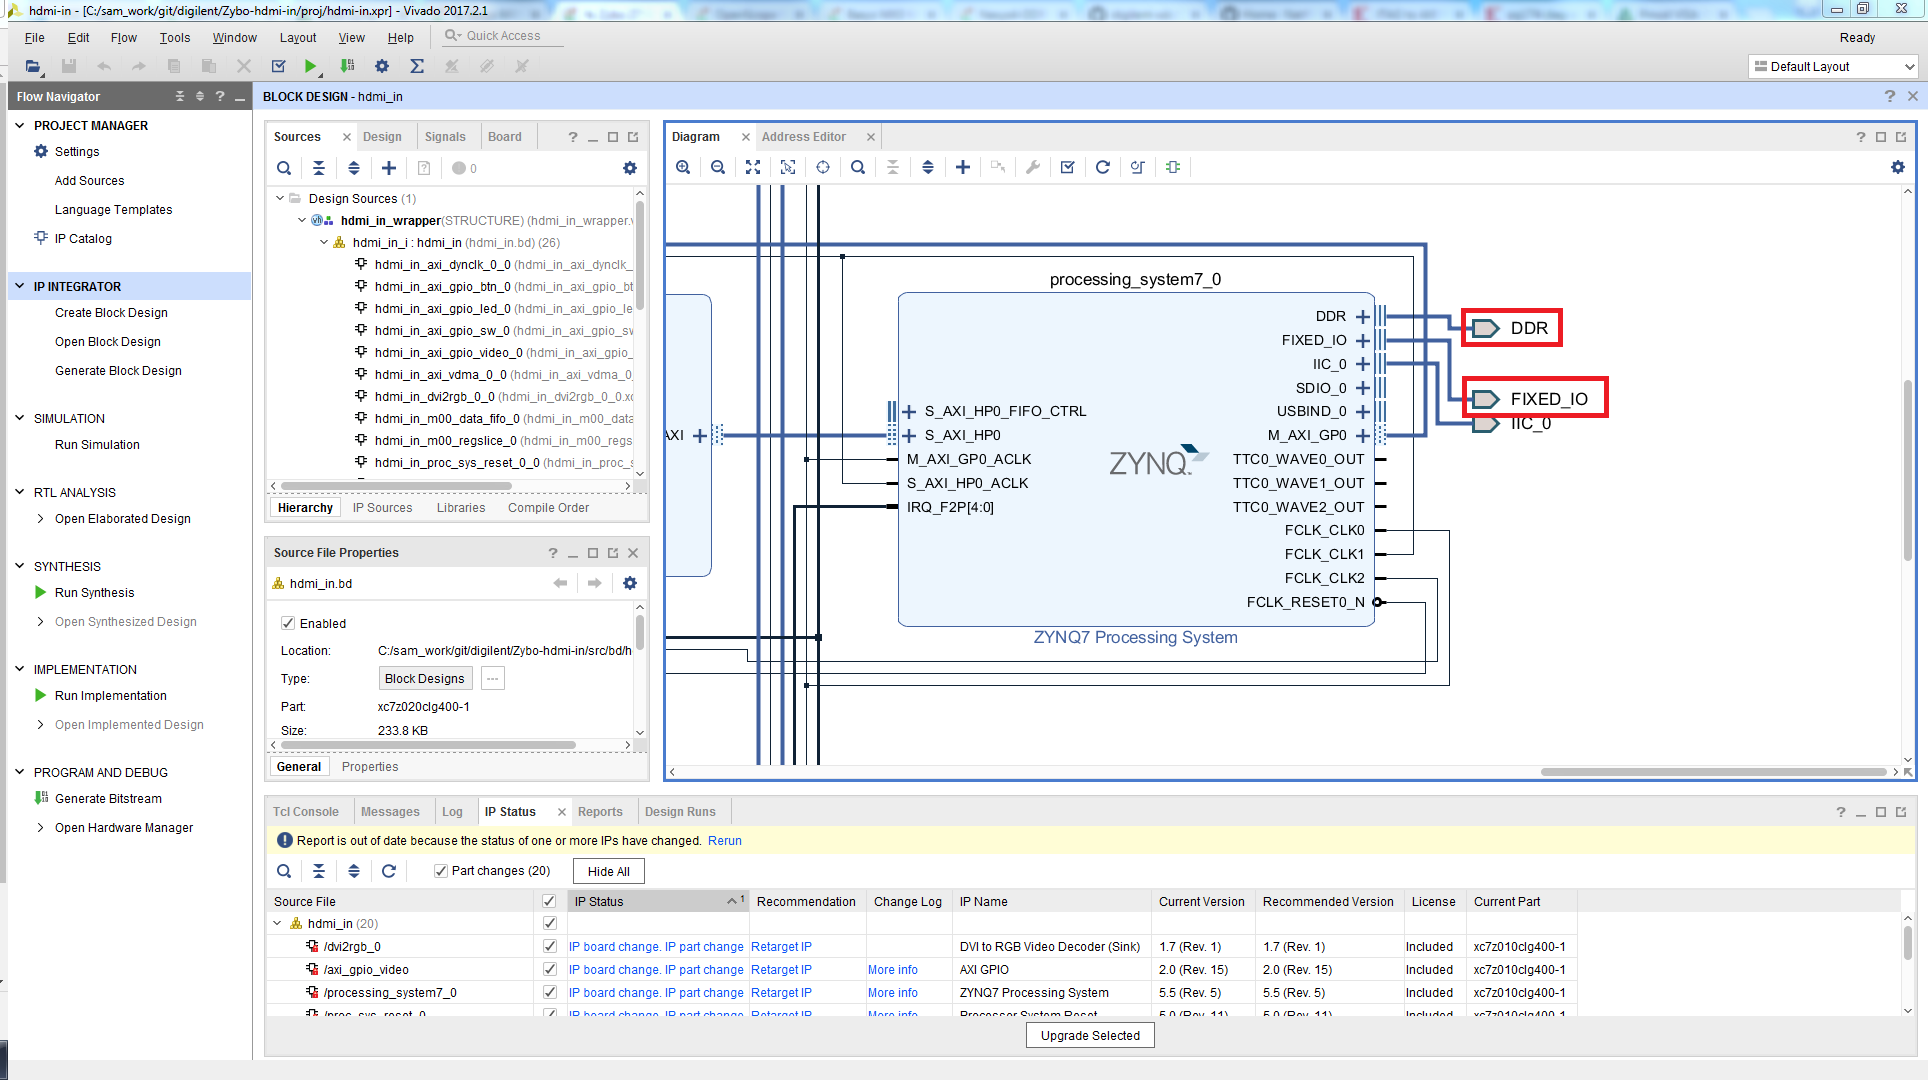
The Zynq PS IP core will not automatically take in the new settings, this must be done by triggering block automation for it. To do this, first delete the DDR and FIXED_IO ports from your design.
11.
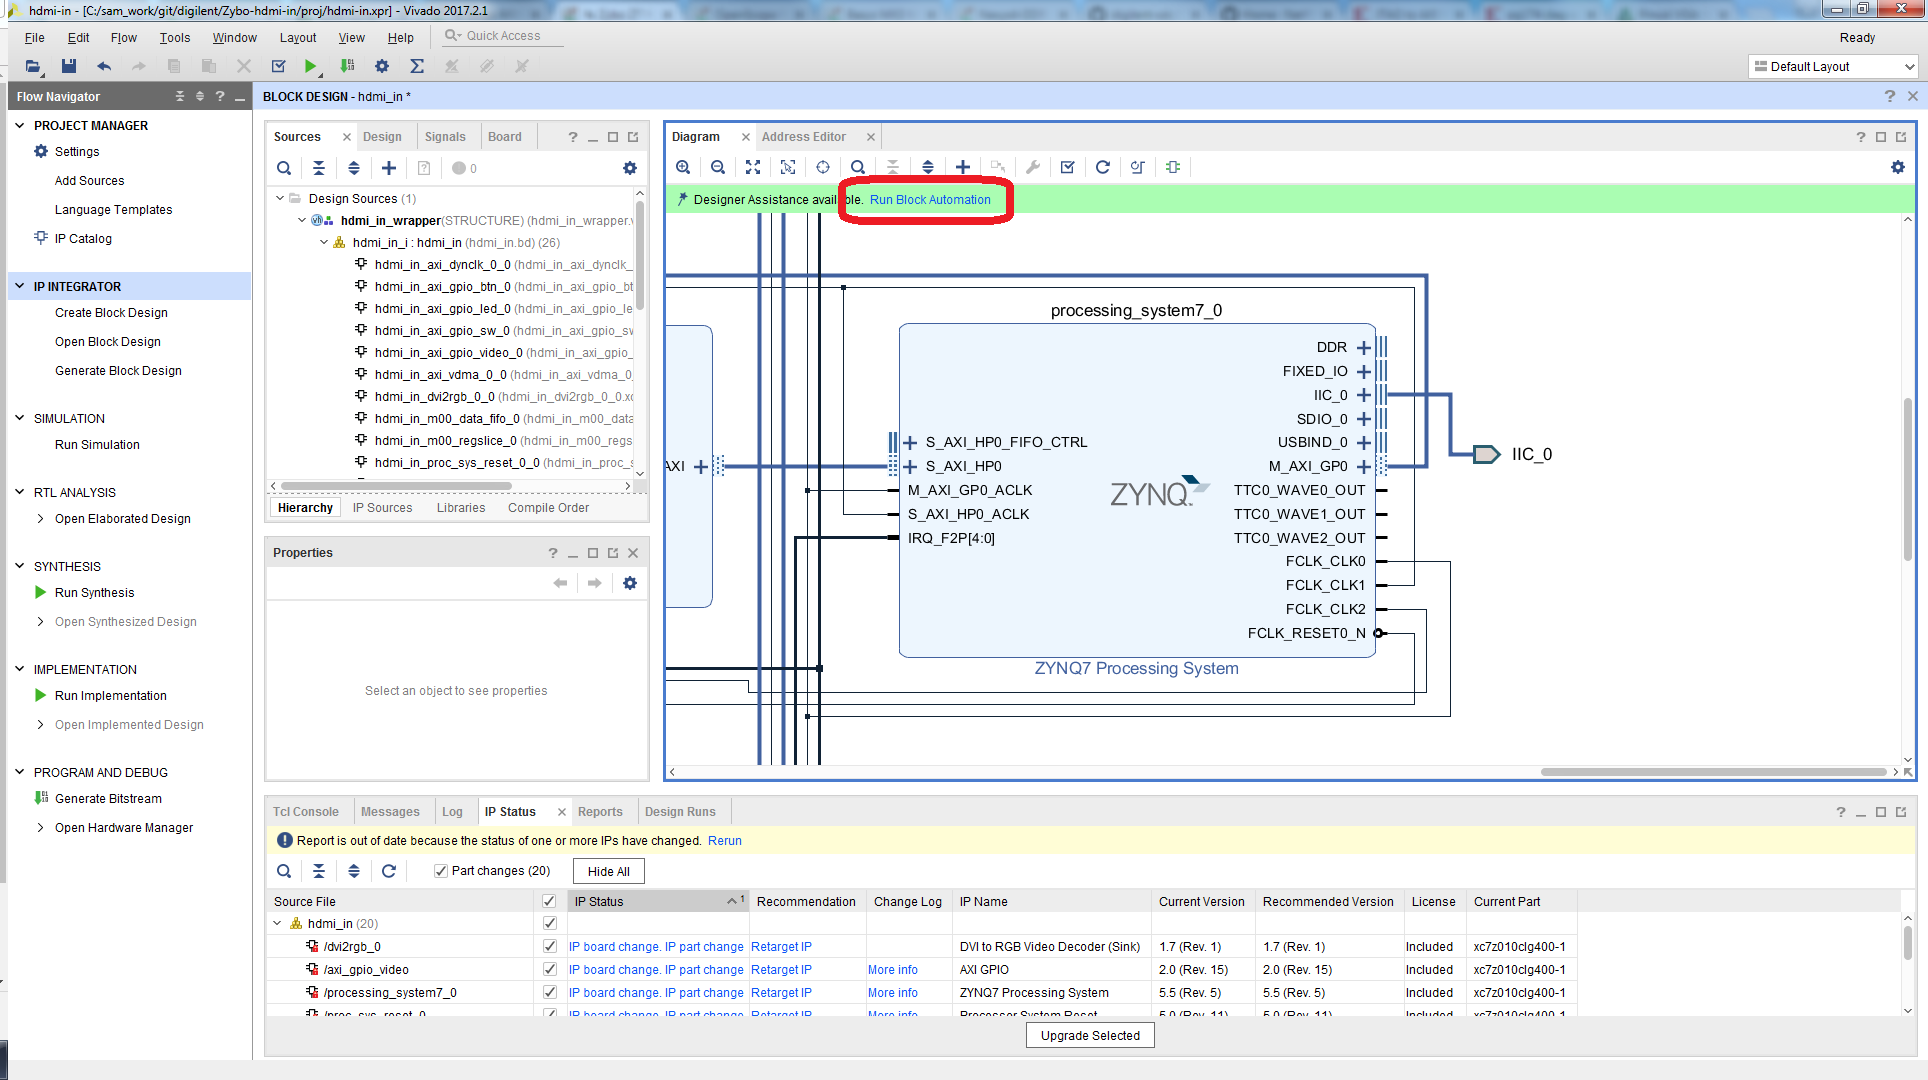
A green stripe should appear above the block diagram that says “Run Block Automation”. Click it.
12.
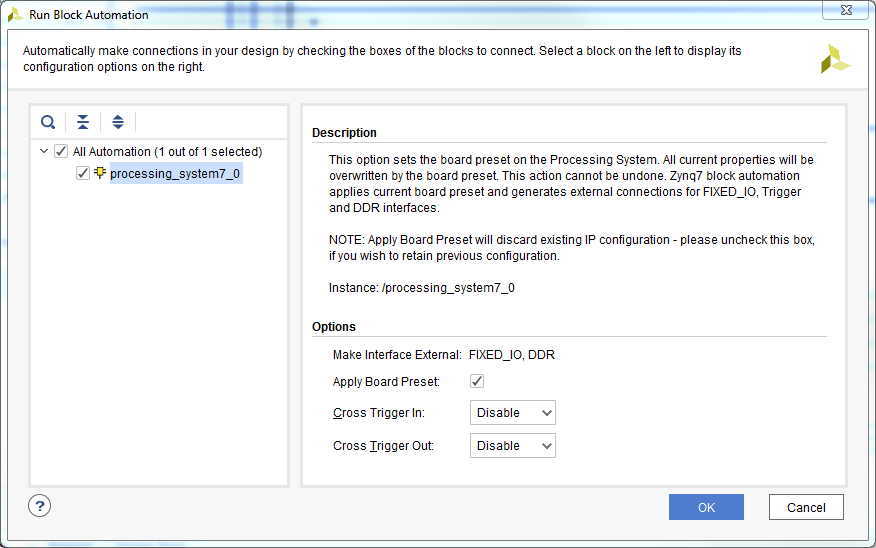
In the new wizard that comes up, accept the defaults and click OK. The Zynq PS should now be configured to properly work on the Zybo Z7.
The previous step may cause some settings you have manually set in the Zynq PS IP core to be overridden. If you think this has occurred, you can undo the last step by pressing Ctrl-Z, and then make note of any unwanted differences it triggered. Then redo the block automation, and manually make the desired changes again. Most options that are commonly changed in the Zynq PS IP core (such as FCLK, HP, GP, and interrupt settings) should not be affected by this.
13.
If your design specifies any pin constraints in XDC files, replace them with the equivalent pin constraints found in the Zybo-Z7-Master.xdc file of the digilent-xdc repo.
14.
Implement any functional changes you may need to make to your design based on the situations pointed out in the “Migration Considerations” section.
16.
Export the project to Xilinx SDK to run and test your project on the Zybo Z7.


