Using the Eclypse Z7 with WaveForms

Overview
This guide will get you started with your new Eclypse Z7, from getting it out of the box to taking your first measurements. Featuring high-speed Zmod ports for modular expansion and a Xilinx Zynq®-7020 SoC, the Eclypse Z7 is fast and flexible, reducing the time it takes for engineers and researchers to develop innovative and powerful new high-speed instrumentation, control, and measurement systems for edge-computing, medical, and communications applications.
Inventory
- Eclypse Z7 with microUSB and power supply cables
- Supported Digilent Zmods
- All variants of the Zmod Scope (formerly Zmod ADC), Zmod AWG (formerly Zmod DAC), and Zmod Digitizer are supported
- microSD Card
- Most microSD cards will work. ≤32 GB is recommended
- If no SD card is available, QSPI can be used to boot instead. A larger SDXC card can also be used. Instructions for these alternate boot methods can be found in the WaveForms Help menu.
- A computer and the WaveForms application installer (version 3.18.50 or later)
- The installer can be found here: WaveForms installers.
- If using a Linux host computer, the Adept Runtime must be installed separately.
- Installers for Adept can be found here: Adept 2
- Download and installation instructions can be found below
- Cabling for connecting the Zmods to external circuitry and/or each other: SMA cables, BNC-to-SMA adapters, BNC probes, etc.
Supported Combinations of Zmods
Note that, while most combinations of Zmods loaded onto an Eclypse are supported by WaveForms, there are a few that are not, and system specifications can be affected in some cases.
Zmods can be loaded into any Zmod Port of the Eclypse, with no restriction - in the table below, Zmod #1 and Zmod #2 might be loaded into either Zmod Port of the Eclypse (A or B).
| Zmod #1 / Zmod #2 | Combination is Supported |
|---|---|
| Scope / Scope | Yes |
| Scope / nope | Yes |
| Scope / Digitizer | No |
| Scope / AWG | Yes |
| AWG / AWG | Yes |
| AWG / nope | Yes |
| AWG / Digitizer | Yes |
| Digitizer / Digitizer | Yes |
| Digitizer / nope | Yes |
When multiple variants of the Zmod Scope are used together (for example, simultaneously using a 1410-105 and a 1010-125), the sample rate is by default set to the lesser of the two. Multiple Zmods in a system share the same sampling rate. Resolution is not affected - all acquisitions from the Zmod Scope and Digitizer use padded 16-bit representations internally and the average sampling mode at lower rates will make use of the additional storage bits.
To change the sample rate, the Settings → Options → Device menu in WaveForms should be used. Higher sample rates than the maximums listed for each Zmod Scope and Digitizer can potentially be used - functionally overclocking them - however, this is not recommended as they may not function correcly.
Guide
1. Unboxing
- Unboxing
-
The Eclypse Z7 arrives in a large box as shown.

The Eclypse Z7 can be seen in the ESD bag protected by the cardboard support structure inside the box.

What Comes in the Box?
- Eclypse Z7, contained in anti-static bag
- 12V 5A Power Supply with adapters for US and EU
- USB A to Micro B programming cable
- USB A to Micro A cable (for connector “USB”)


2. Download and Install WaveForms
Digilent's WaveForms application provides an easy-to-use user interface to the Eclypse Z7. Please download the appropriate installer for WaveForms. If WaveForms is already installed, please make sure that it is up to date (version 3.18.50 or later).
Check the Inventory section, above, for the download link.
- Installing WaveForms : Windows
-
Open the Executable File
Open the executable file that you downloaded.

Welcome
Launch the WaveForms installer, by clicking on it in the Downloads folder. Upon launching the WaveForms installer, the welcome page will be seen. Click Next.

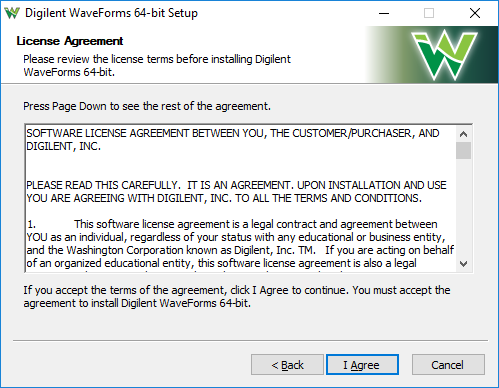
License Agreement
Read the license agreement on this screen, then, if in agreement to it, click I Agree to continue.
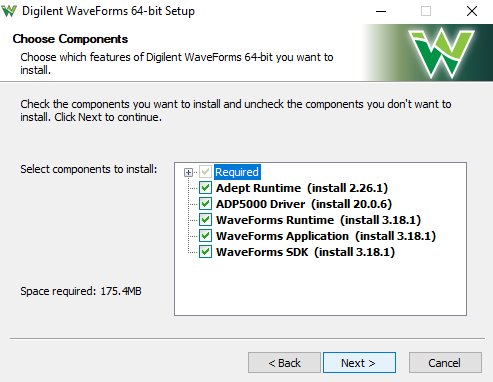
Choose Components
In the “Choose Components” screen, a list is presented of each of the things that can be installed. In order to use the Eclypse with the WaveForms application, the Adept Runtime, WaveForms Runtime, and WaveForms Application are required.
- The Adept Runtime allows WaveForms to communicate with the Analog Discovery 2, Analog Discovery, Analog Discovery Studio, Digital Discovery, and Electronics Explorer Board.
- The WaveForms Runtime contains a library and device support files needed to run custom applications.
- The WaveForms Application is the Digilent virtual instrumentation interface.
- The WaveForms SDK is the software development kit for creating custom applications.
- If you happen to have an ADP5250, make sure to check the box for its driver installation, to ensure that your PC will be able to communicate with the device.
Note: Even with all components selected, the WaveForms install does not take much hard drive space (<200MB). Digilent recommends that all components are installed.
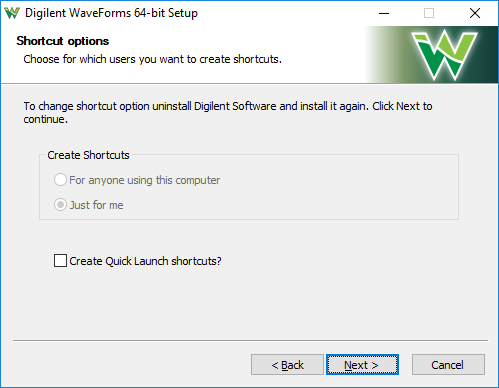
Shortcut Options
Click Next.
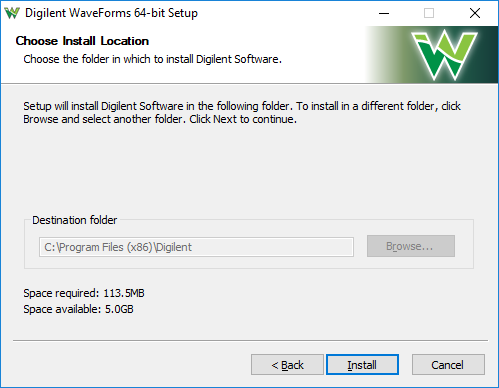
Choose Install Location
- You'll need to choose an installation destination or just leave it at the default.
- Click “Install”.
Installing / Installation Complete
- WaveForms will be installed as indicated by the progress bar.
- Click “Next”.
Complete
- Check or uncheck the boxes to open WaveForms and the readme.
- Click “Finish”.


- Installing WaveForms : Linux
-
Download WaveForms
This tutorial will guide you through the steps involved in the installation process on Windows after downloading it.
First, download the package for the Adept Runtime. This program is required for WaveForms to connect to the Analog Discovery 2 and must be installed prior to installing WaveForms.
For systems using .deb packages, (Ubuntu, Fedora, etc), use the built-in package manager to install the Adept Runtime and then WaveForms - typically, a package manager can be opened by double-clicking on the file in question.
Download Adept Runtime
- Download the correct version of Adept. The link for Adept downloads is located here.
- Make sure the version of the Adept install file is the same as WaveForms. I used the 64 bit RPM for WaveForms so I will use the 64 bit RPM for Adept.

- Install Files using built-in Package Manager
-
Open the Adept File
Open the file you downloaded for Adept in the previous step.

Click Install
Click “Install” on the window that pops up.

Open the WaveForms File
Open the file you downloaded to install WaveForms.

Click Install
Click Install in the window that pops up.
This will install the following components:- WaveForms Runtime contains a library and device support files needed to run custom applications.
- WaveForms Application is the Digilent virtual instrumentation interface.
- WaveForms SDK is the software development kit for creating custom applications

- Install Files using Command Line
-
Alternatively, use the following set of commands in the terminal to install the Adept Runtime and WaveForms from the downloaded packages:
sudo dpkg -i <path to Adept Runtime .deb file>
sudo dpkg -i <path to WaveForms .deb file>
sudo apt-get install -f
For systems using .rpm packages, (Red Hat Linux, etc), use the following set of commands in the terminal to install the Adept Runtime and WaveForms from the downloaded packages:
sudo rpm -i <path to Adept Runtime .rpm file>
sudo rpm -i <path to WaveForms .rpm file>
If WaveForms has already been installed on the system, replace the “-i” flag passed to the rpm command with “-U” to upgrade the existing installation.
For technical support with installing WaveForms on various Linux distributions, please visit the Test and Measurement section of the Digilent Forum.
< –
3. Booting the Eclypse from SD
In order for the Eclypse to talk to WaveForms, it needs to be booted from SD, using a firmware image included in the WaveForms installer. This section will walk you through booting the device with this firmware and getting it connected to the application.
Note: Both the firmware image used to talk to WaveForms and the bit files used while running WaveForms are closed source.
- Preparing and Booting Eclypse from a microSD Card
-
1. Get a microSD card and format it with a FAT / FAT32 file system.

2. Navigate to the WaveForms install directory. Navigate to the Config directory -default paths are listed below- and find the file DCFG_07_01_01.bin.
- Windows 64-bit:
- C:\Program Files (x86)\Digilent\WaveForms3\Config
- Windows 32-bit:
- C:\Program Files\Digilent\WaveForms3\Config
- Linux:
- /usr/share/digilent/waveforms/firmware
- macOS:
- /Applications/WaveForms.app/Contents/dwf.framework/Versions/Current/Resources/digilent/waveforms/firmware

3. Copy the file onto the SD card and rename the copy “boot.bin”.

4. Plug the SD card into your Eclypse Z7 board.

5. Set the programming mode select jumper (JP5, next to the SD card slot) to “SD”.

6. Make sure you've got your Zmod(s) plugged into the board, as they are not hot-swappable. Please use one of the supported combinations of Zmods from the table at the beginning of this page in order for them to work with Waveforms.

7. Connect power to the Eclypse Z7, and connect its USB OTG port (labeled “USB” on the PCB and “OTG” on the enclosure) to your host PC via a USB cable - note that this isn't the PROG port! Flip the power switch to the ON position and wait for it to boot - this is a fairly quick process.
Make sure that the power-good LED (RED, at the top of LD4), and the Zmod power indicator LEDs, LD2 and LD3, are all on. The DONE LED in LD4 will not be illuminated as the firmware allowing Eclypse to make initial contact with WaveForms does not include a bitstream.


4. Taking a Measurement
This section walks through using the Eclypse Z7 for the first time. In order to take your first measurement, you will need a couple of additional accessories - either the SMA to Alligator Clip set or the SMA to SMA cable set. This section assumes you have followed steps 1 through 3 above, meaning you have formatted and installed the micro SD card, updated to the latest version of WaveForms, and the Eclypse Z7 is powered on and booted up. For this demo we are going to do a quick loop back test, using the Zmod Scope 1410 and the Zmod AWG 1411.
- Measurements
-
1. Make the connections.
For this loop-back test we are going to use the SMA to SMA cable to connect Channel 1 of the Zmod AWG to Channel 1 of the Zmod Scope. Make sure you tighten down both sides of the cable to ensure a good connection.

2. Power on.
Launch WaveForms. Select your Eclypse Z7 in the Device Manager and get ready to take your first measurement. Please note that the Eclypse configuration is automatically selected based on the connected Zmods. Just make sure you use one of the supported combinations of Zmods from the table at the beginning of this page.

3. Open the WaveGen and Scope Instruments
Open the WaveGen tool and configure an output on Channel 1. The specifics of the signal you select are up to you. Launch the Scope tool and click Run to see the measurement.

-


Other Resources
For more information on the products used in this guide, check out the following resource centers:
As with any other WaveForms-compatible device, the Eclypse Z7 can be used with WaveForms SDK in order to get programmatic control over the device and develop custom software applications. See Getting Started with WaveForms SDK for more information.
For technical support, check out the Digilent Forum.