Using the Zmod Scope 1410-105 with the Zmod Library and Eclypse Z7

Description
This demo uses the Zmod Scope 1410, the initial release of the Zmod ADC IP cores (ZmodADC1410Controller and AXI_Zmod_ADC1410), and the Zmod ADC1410 software library to perform 10 μs captures of an incoming signal. Captured data is written to a file and standard out. Both baremetal and PetaLinux-based projects are provided.
Inventory
- Eclypse Z7
- A Zmod Scope installed in the Eclypse's Zmod A port
- Important! Only the Zmod Scope 1410-105 is supported
- Vivado and Xilinx SDK installations compatible with the latest release of this demo (2019.1)
- See Getting Started with Vivado for installation instructions.
- PetaLinux Installation compatible with the latest release of this demo (2019.1)
- See Xilinx's PetaLinux Tools Documentation (2019.1) (UG1144) for installation instructions.
- Only required if you want to rebuild the PetaLinux image
- Serial Terminal application to receive messages printed by the demo
- See Installing and Using a Terminal Emulator for more information.
- Git is required to download the sources
- A power supply for external power
- A microUSB cable for a USB connection to the host computer
- A an ethernet connection to a router or switch (if using the Linux projects), for remote debugging
- And some way to provide stimulus to the Zmod Scope's CH1 SMA connector - a signal to capture.
Download and Usage Instructions
The projects will be downloaded by cloning the Eclypse Z7 repo on Github. Use of git to obtain the sources is recommended. It is still possible to download ZIPs of the projects from Github but dependencies will need to be downloaded and placed in the correct locations manually. A Windows host can be used for either set of projects but will be unable to rebuild the PetaLinux project.
Since Zmods are not hot-swappable, you should ensure that you plug the Zmod Scope into Zmod Port A on the Eclypse prior to powering the board on.
Get the power supply, USB cable, and ethernet cable plugged into the board. Additional setup will be performed in the “Setting up…” dropdowns, below, so don't turn the board on just yet.
Some stimulus should be provided to the Zmod Scope's CH1 SMA connector. The demo, without user modification, performs a capture immediately, providing a 1024-sample, 10 us long, buffer of data to the host.
The results shown later in this document were produced by connecting CH1 to the first waveform generator channel of an Analog Discovery Pro (ADP3450) via a BNC cable and a BNC-to-SMA adapter.
- Setting up the Linux Projects
-
The steps below need to be followed in order to obtain a complete SDK workspace and to be able to build and run any of the projects, in either Linux or Baremetal platforms.
The ZmodADC1410_Demo_Linux and ZmodDAC1411_Demo_Linux are run from Xilinx SDK.
This step-by-step tutorial roughly follows the How to debug Linux Application in SDK 2019.1 by Xilinx, with some changes due to our Debian 10 rootfs.
The following steps are for the Eclypse Z7 board. If a Zmod Scope is used, it should be attached to the Eclypse Z7's ZMOD A port. If a Zmod AWG is used, it should be attached to the Eclypse Z7's ZMOD B port.
1. Download the Source Code
- Download the git repository containing the libraries and demos using the below command:
git clone --recursive https://github.com/Digilent/Eclypse-Z7-SW.git -b zmod_adc_dac/master
The directory created when you run this command (“Eclypse-Z7-SW”), will be used as the Xilinx SDK workspace in later steps.
Note: If you choose to download the repository as ZIP, the folder zmodlib will not be populated and you will have to populate it manually.
If you want to download the Vivado and PetaLinux projects at the same time, instead clone the
Eclypse-Z7repository (still using thezmod_adc_dac/masterbranch). Instructions on working with these projects, as well as on how to check them out from source, can be found in the Eclypse Z7 Git Repositories documentation.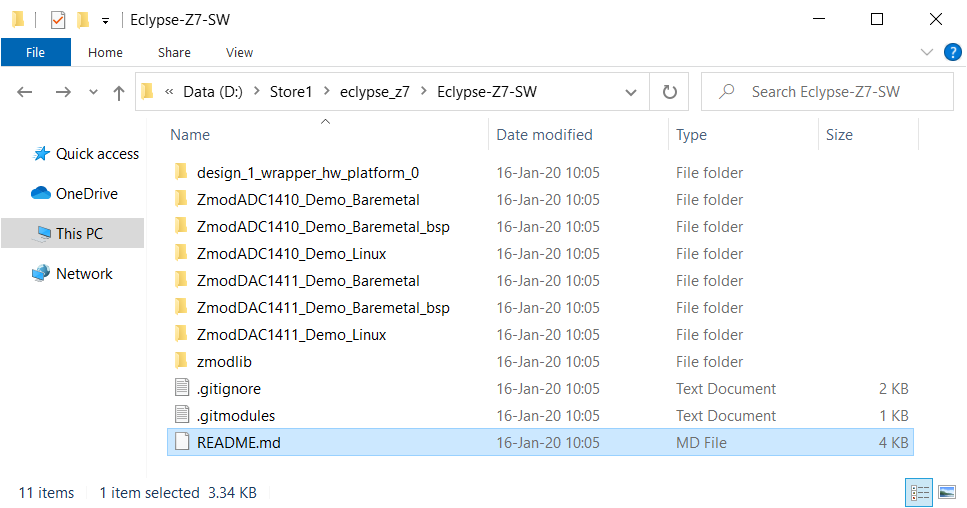
2. Download the SD Card Image
- Download the latest eclypse-debian-buster-armhf-rfs.img_X.X.zip Petalinux image from the Eclypse Z7 git repository Releases and extract it on your PC.
- You need to expand the Assets section to see the files.
- Write the image to an SD card:
- Linux: in a terminal window use the following command:
dd if=/path/to/extracted/image/eclypse-debian-buster-armhf-rfs.img of=/dev/(sdX or mmcblkX} && sync
- Windows: use Rufus or Win32DiskImager.
- Connect the board to your Ethernet network.
- Insert the SD card and boot the board. On first boot, the rootfs partition will resize to fill the SD card then reboot.
- Open a Terminal and connect to the board via its USB-UART interface (labeled PROG) with a baud rate of 115200.
- Login with username: eclypse and password: eclypse.
3. Select Xilinx SDK Workspace Location
- The downloaded workspace contains demo applications for both Linux and Baremetal and is intended to be used in place.
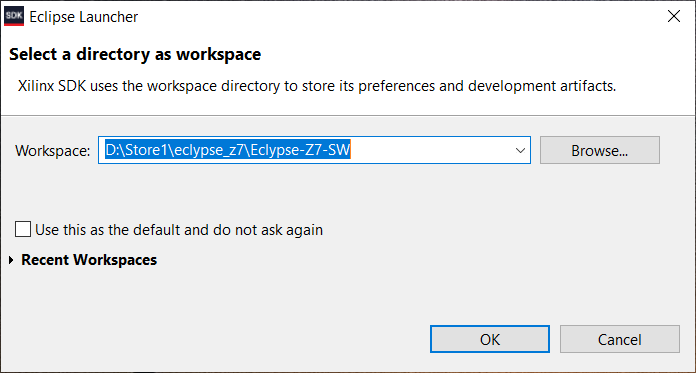
- Open Xilinx SDK 2019.1 and assign the workspace location to the project download location.
- If you want to use the demo projects, open the desired Linux or Baremetal demo project. The projects are already configured and ready to be used, except the Linux project where SYSROOT environment variable must be set according to the Add SYSROOT Environment Variable section (step 1.5, below).
4. Import Projects to Xilinx SDK
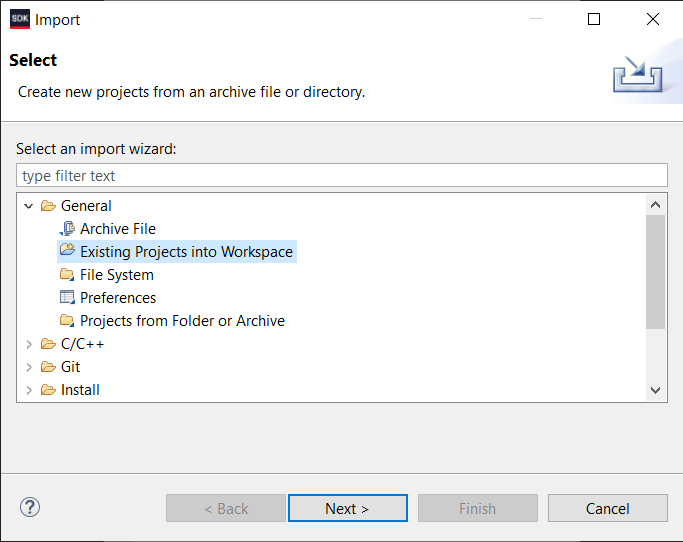
- File → Import

- Select General → Existing Projects into Workspace → Next
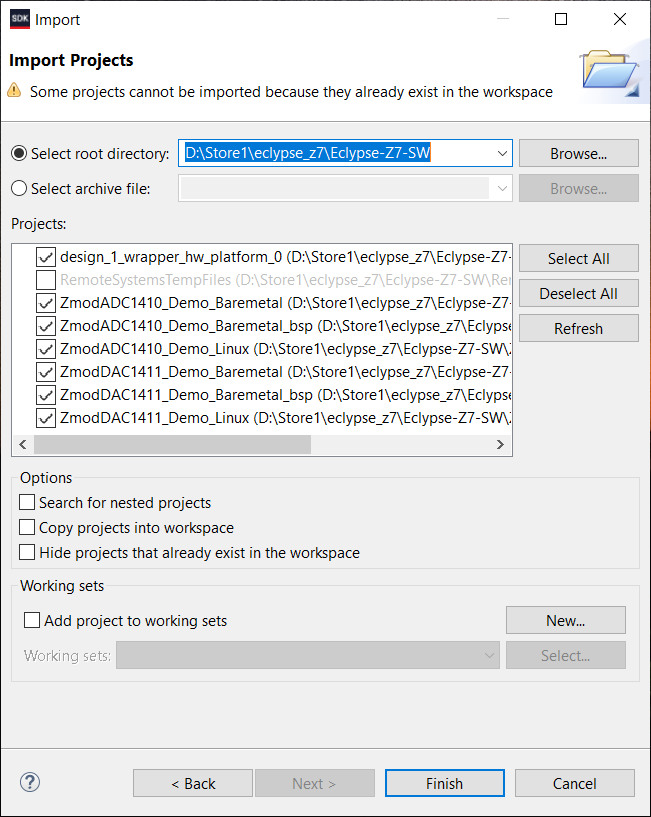
- Select the project download location
5. Add SYSROOT Environment Variable in SDK
- Download the latest eclypse-debian-buster-armhf-sysroot_X.X.tar.xz (.zip for Windows ) sysroot from the Eclypse Z7 git repository's Releases page and extract it on your PC (the location of the extracted folder will be later used as the path for the SYSROOT Environment Variable)
Note: You need to expand the Assets section from github to see the eclypse-debian-buster-armhf-sysroot_X.X.tar.xz and .zip files.
Windows only: When prompted whether to replace existing files, choose to replace. - In the SDK Project Explorer, right-click on the application project you wish to run, then click “C/C++ Build Settings”
- In the “C/C++ Build” group, select the “Environment” category
- Add the SYSROOT variable pointing to the location where eclypse-debian-buster-armhf-sysroot rootfs folder can be found. For example “/home/cosmin/Documents/eclypse-debian-buster-armhf-sysroot”
Windows: The SYSROOT environment variable if exists must be Deleted then reAdded to the list, rather than Editing the existing variable. - Click OK and wait for the Project to build

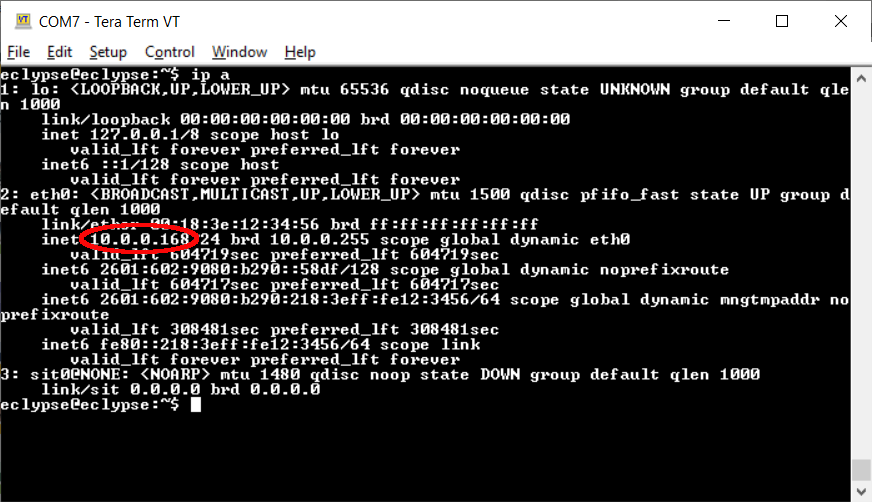
6. Find the Board IP Address
- In the UART Terminal connected to the board, log in with the username/password combination eclypse/eclypse
- Run the following command:
ip a
- Copy the IP address of the board, example: 10.0.0.168
7. Establishing Connection to the Board
- In the SDK Target Connections panel, open the Linux TCF Agent folder
- Right-click on Linux Agent [default] and click Edit
- Enter the board IP address into the Host section
- Click Test Connection to make sure that SDK can communicate with the TCF-agent on the board
- Click OK

8. Run the Demo Project
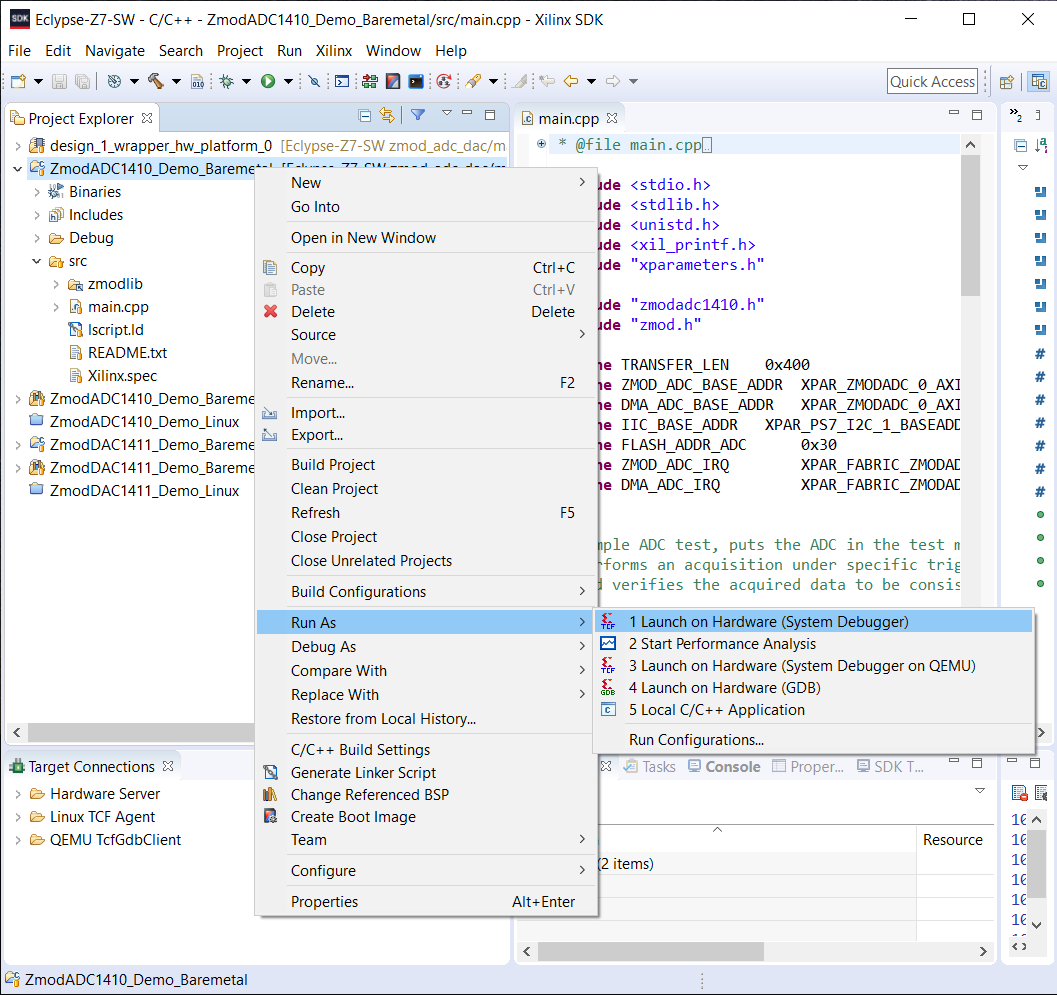
To run the demo application, right-click on Project name → Run as → Launch on Hardware(System Debugger)


- Setting up the Baremetal Projects
-
The steps below need to be followed in order to obtain a complete SDK workspace and to be able to build and run any of the projects, in either Linux or Baremetal platforms.
1. Download the Source Code
Download the demo project with the below command:
git clone --recursive https://github.com/Digilent/Eclypse-Z7-SW.git -b zmod_adc_dac/master
The directory created when you run this command (“Eclypse-Z7-SW”), will be used as the Xilinx SDK workspace in later steps.
Note: If you choose to download the repository as ZIP, the folder zmodlib will not be populated and you will have to populate it manually.
If you want to download the Vivado and PetaLinux projects at the same time, instead clone the
Eclypse-Z7repository (still using thezmod_adc_dac/masterbranch). Instructions on working with these projects, as well as on how to check them out from source, can be found in the Eclypse Z7 Git Repositories documentation.
2. Add Xilinx SDK Workspace Location
- The downloaded workspace contains demo applications for both Linux and Baremetal.
- Open Xilinx SDK 2019.1 and assign the workspace location to the project download location.
- If you want to use the demo projects, open the desired Baremetal demo project. The projects are already configured and ready to be used.
3. Import Library to Xilinx SDK
- File → Import
- Select General → Existing Projects into Workspace → Next
- Select the project download location
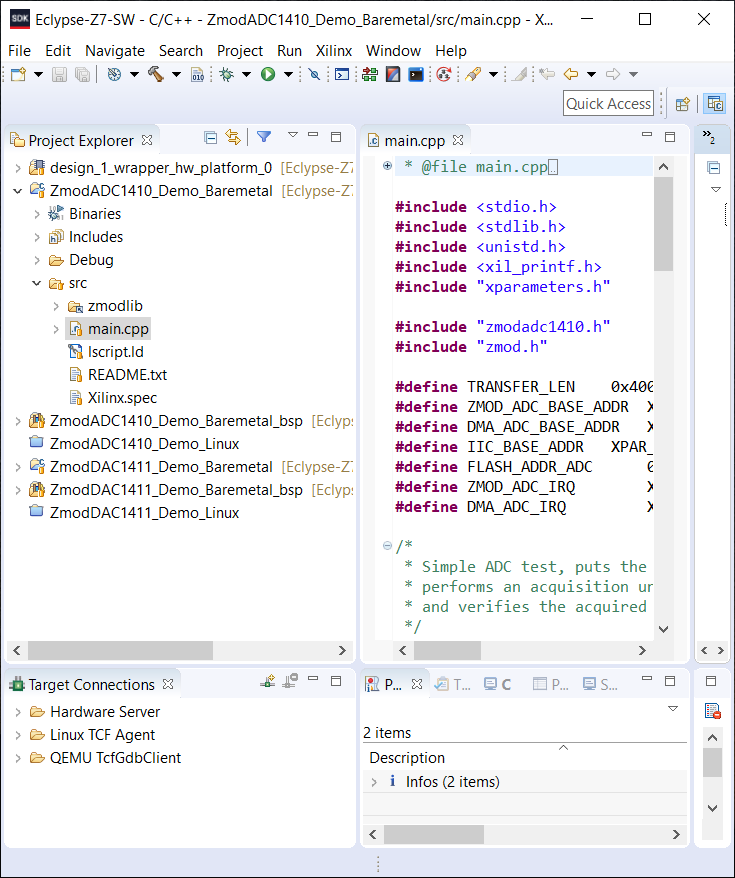
4. Xilinx SDK Project Explorer
- The ZmodADC1410_Demo_Linux and ZmodDAC1411_Demo_Linux projects must be closed or deleted from Project Explorer (right-click on project name→ Close Project or Delete)
5. Run the Demo Project
- Make sure the board is connected to your PC and it is powered on.
- If required by the particular demo application, connect a serial terminal application to the device's port, using a baud rate of 115200.
- Make sure the jumpers are set accordingly.
- Program the board: Xilinx → Program FPGA

- Run the demo application: right-click on project name → Run as → Launch on Hardware(System Debugger)


When the project is run, data will be printed to a connected serial terminal, as seen in the screenshot to the right. The data is printed in both volts and 14-bit raw twos-complement form, along with the time since the start of the buffer, tab-separated.
When using the Linux project, the same data is written to a CSV file, which can be found in the /home/eclypse directory of the Eclypse's filesystem.

Once you've run the projects, check out the Eclypse Z7 Git Repositories documentation for more information on how the repository you cloned is structured and how to obtain and build the software project's dependencies.
For more information on the structure of the software projects and libraries, and how to modify the projects, or create new ones, check out the Zmod Base Library User Guide.
Additional Resources
All materials related to the use of the Eclypse Z7 and Zmod Scope can be found on their resource centers, linked below:
For technical support, please visit the FPGA section of the Digilent Forum.