Check out our full list of Verilog based projects!
Verilog® HDL: Project 2
Using switches to control LEDs
Project Overview
The goal of this project is to take the simple example from Project 1 and program our FPGA with it so that we can control a single LED with a single switch. Then, we'll take the same program and expand it to have multiple switches control multiple LEDs. Brave users will be challenged at the end to do the same thing with some external components. If you have not already installed Vivado, you can find a guide to do so here. If you are hoping for a Project 0 where you learn how to navigate the Vivado interface in the first place, we highly recommend the Getting Started with Vivado Guide.
A list of the previous projects can be found here.
This project presumes you are using an FPGA development board that has external slide switches and LEDs built into the board, much like the Digilent system boards. However, the project can be easily modified to accommodate different types of external inputs (buttons instead of switches) or to use external I/O components rather than embedded components. If you have any questions after reading through the project, please feel free to post them on the Digilent Forum where an engineer will be happy to assist you.
Some Background Information
The digital circuit we are building from Project 1 is called led_sw. With this project, the FPGA is receiving an input signal, in this case from an embedded switch, that can be logic high, '1', or logic low, '0'. The input is then passed directly to an embedded LED that shows the corresponding logic by being “on” (a logic high) or “off” (a logic low). Both the embedded switch and LED are connected to their own ports on the FPGA and are specified in the constraint file (for Vivado, this is the XDC file)
Relooking at the Simple Example HDL
The code shown in the Simple Example from Project 1 that we will break down was as follows:
'timescale 1ns/1ps

module led_sw(
output led,
input sw
);
assign led = sw;

endmodule
The timescale portion 'timescale 1ns/1ps provides a base time length followed by a minimum time resolution. Generally speaking, this is only used during simulation and if delays are specifically implemented into the HDL, of which we are doing neither, but is a required part of Verilog modules nevertheless.
The module portion
module led_sw(
output led,
input sw
);
names and defines the number of inputs and outputs that we are creating on our custom “black box” (so-to-speak).
The assign portion assign led = sw; defines what our “black box” actually does. Multiple assign statements can be used as needed, as well as other ways of defining what our “black box” does (which we will get to in a later tutorial).
The endmodule is the keyword that signals the end of us defining what our module (our black box) does. Other modules could then be created with their own set of inputs and outputs, assign statements, and of course endmodule's.
But enough with the review, let's make our project!
Programming our FPGA
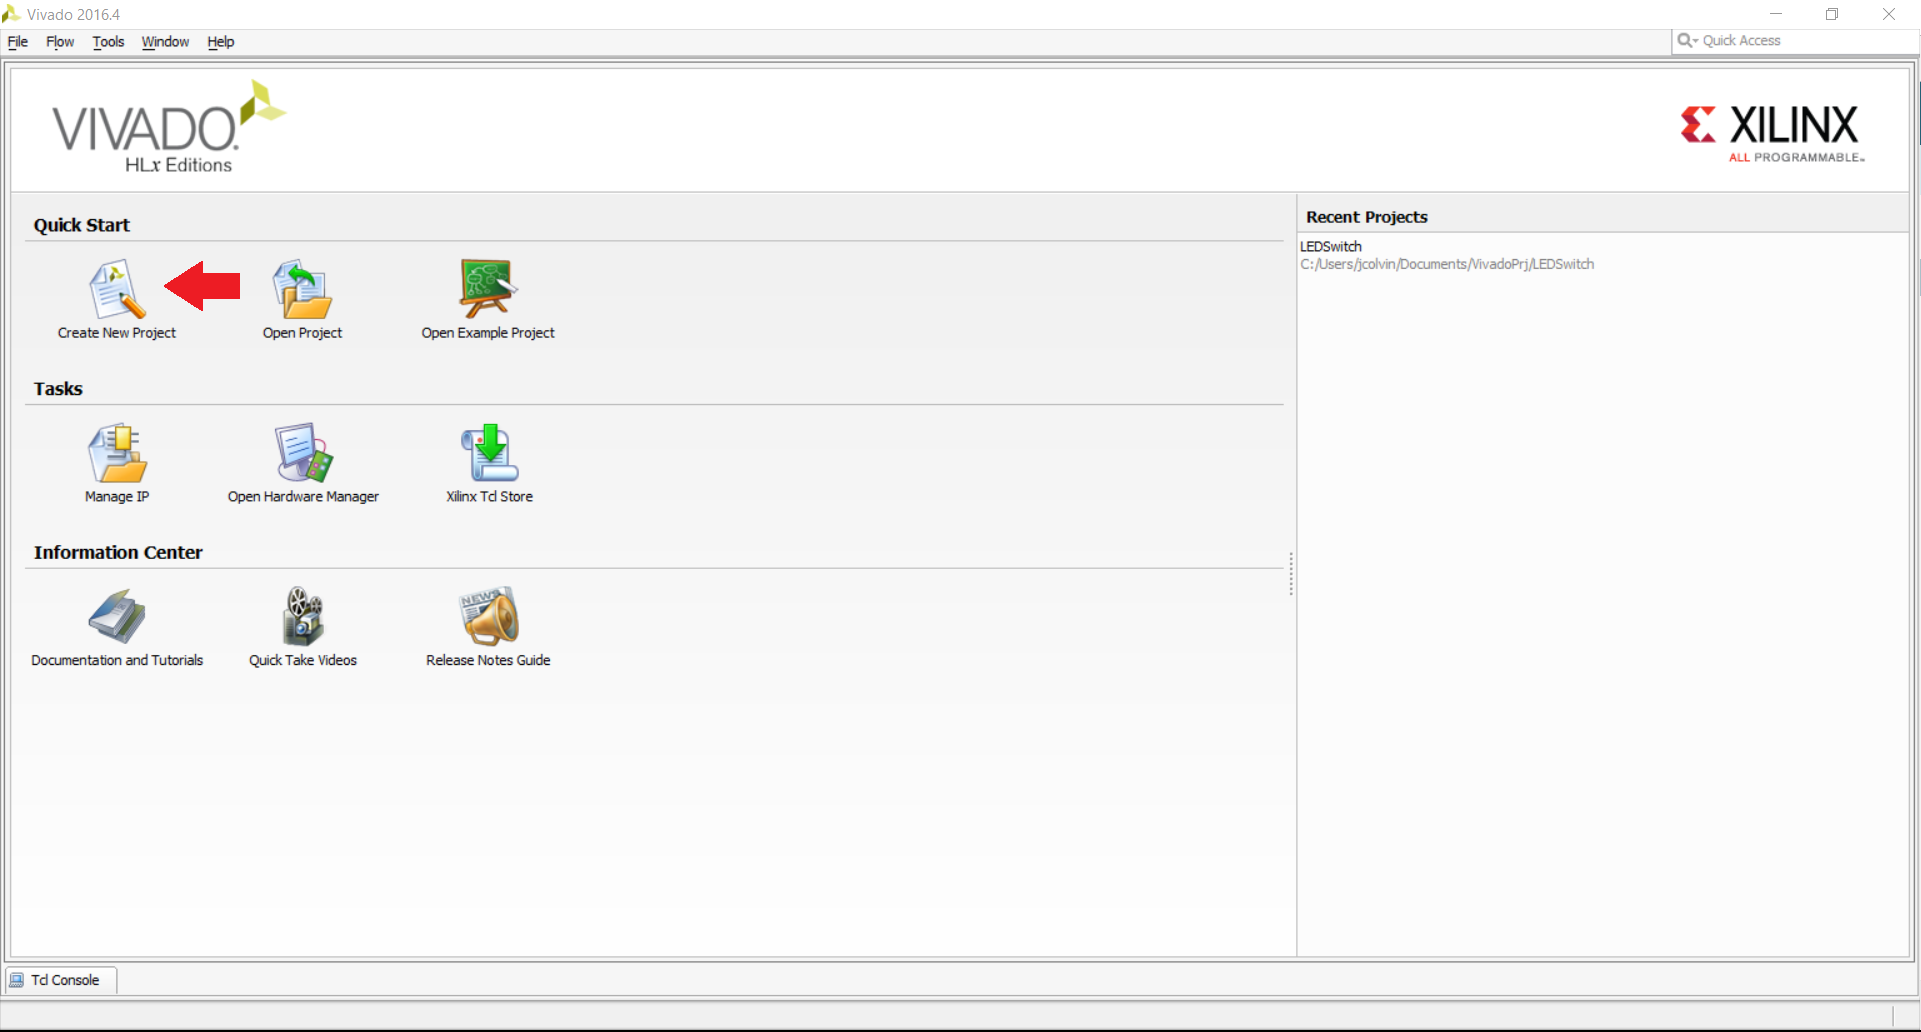
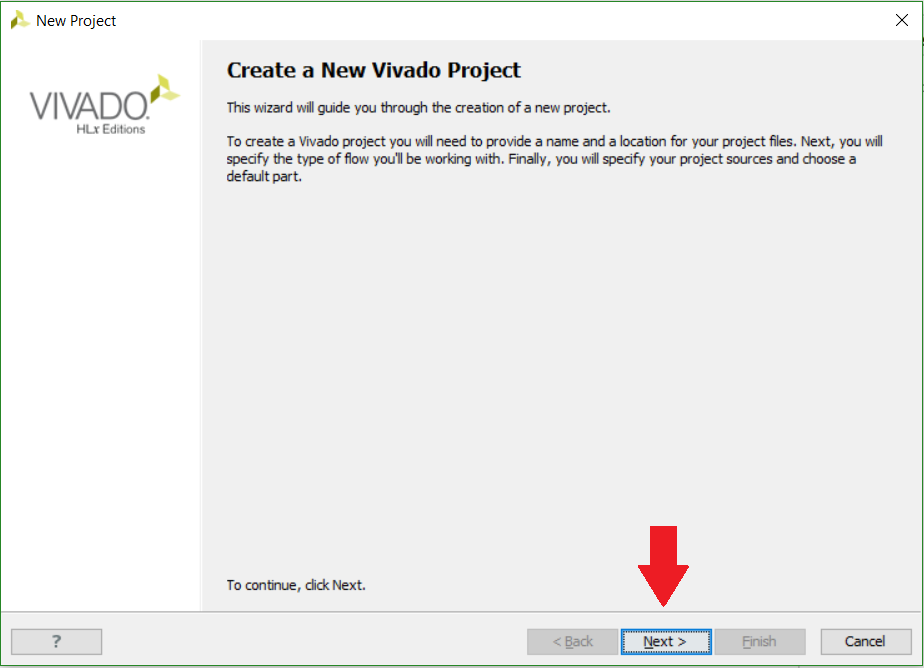
0) If you haven't already done so, go ahead and open up Vivado to the first screen and click on the “Create New Project” button. If you've gone through the Getting Started with Vivado Guide already, a lot of this will be very familiar to you (or near identical). You can follow along if you like, or if you feel that you can get your board programmed by yourself without the guide, feel free to do so (just to confirm you've got it right), and then jump down to the multiple switches and LEDs section.
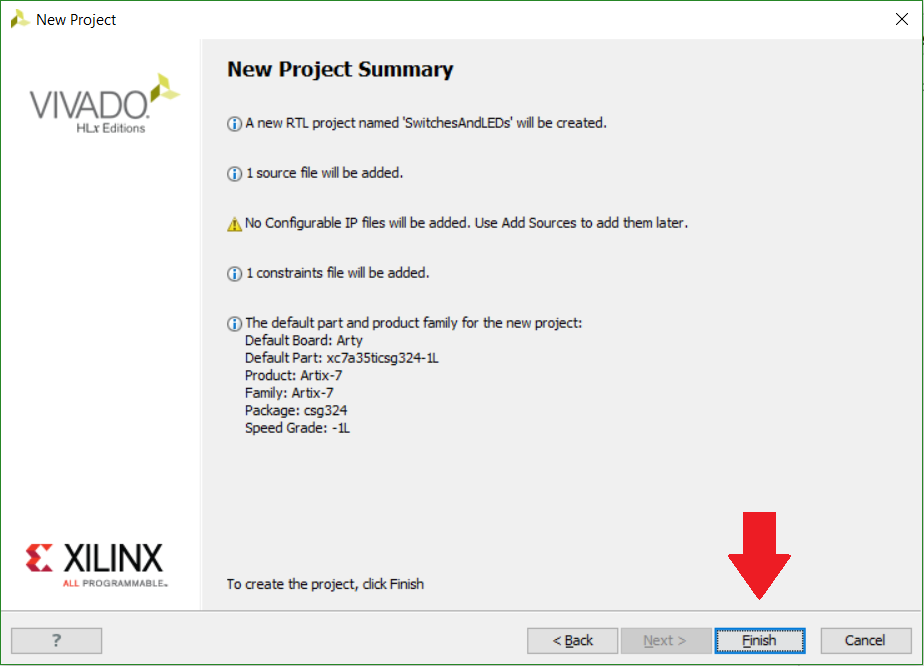
3) Here, we'll name our project and choose where to save our project file on our computer. It is critical that no spaces are used in either the name of the project or the file path that project is saved in; Vivado notoriously has problems with spaces, so using underscores or camelCase is recommended. It is also recommended to keep the file names and file paths relatively short so that character limits are not accidentally reached (maximum of 256 characters for a Windows operating system). ClickNext.
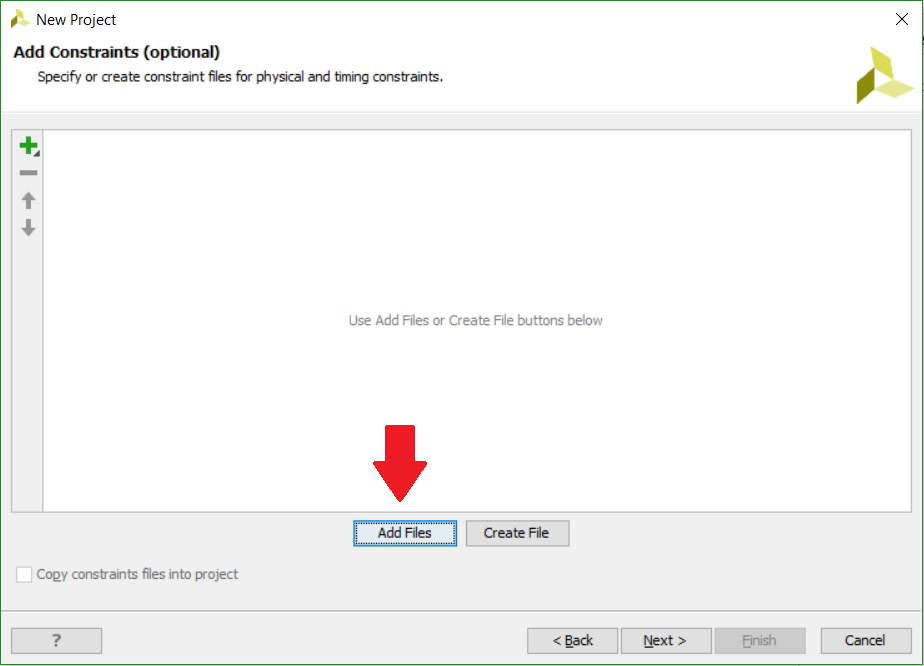
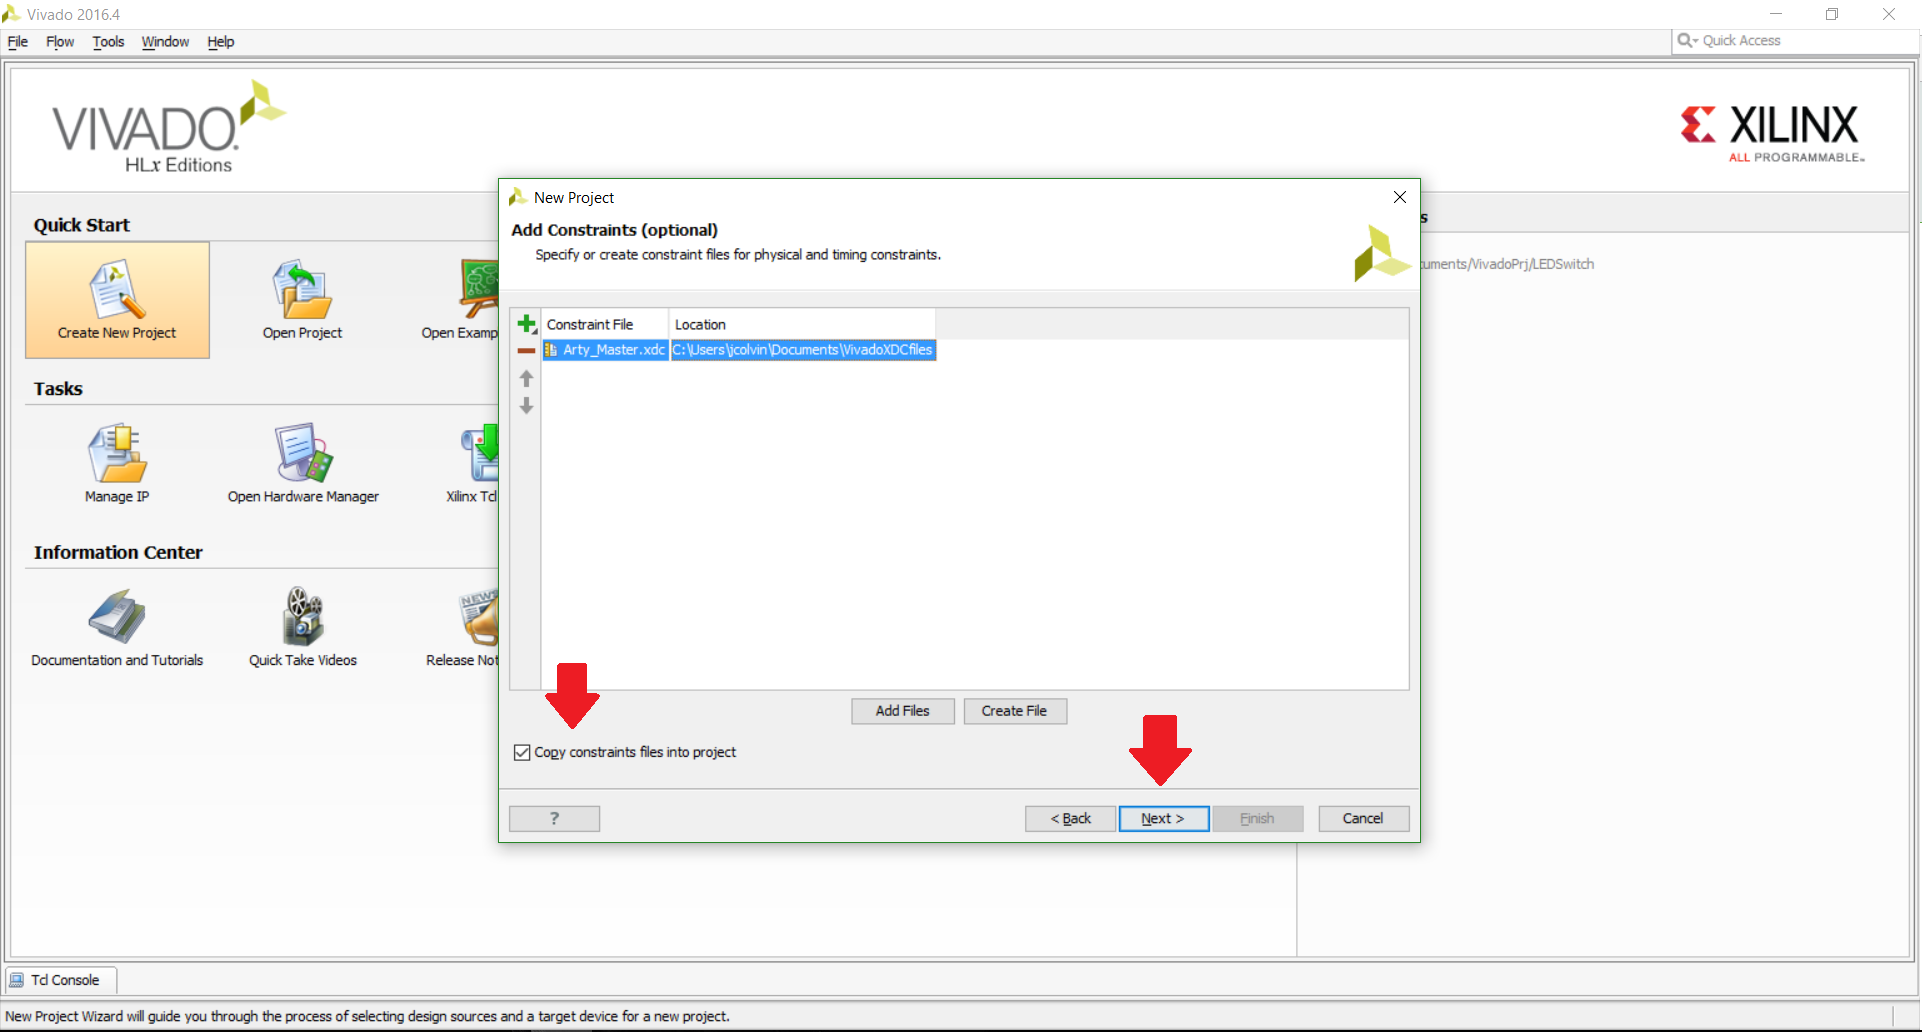
7) After clicking next on the IP cores since we don't have any to add, clickAdd Fileson the Add Constraints page. Digilent boards have a master XDC (Xilinx Design Constraints) file available on their Wiki pages. Since I am using the Arty, I used the Master XDC available on it's Resource Center on the right hand side under “Design Resources” and saved mine to a convenient location on my computer.
10) Here you will want to select the FPGA that you are using to ensure that Vivado designs and programs the hardware correctly. You can either search by FPGA part number from thePartstab, or you can select your board from theBoardstab if you have a board file available. Digilent has board files available for each of their boards on GitHub; you can follow a tutorial on how to get them installed on your computer here. Once you have chosen the appropriate FPGA part (or board), clickNext.
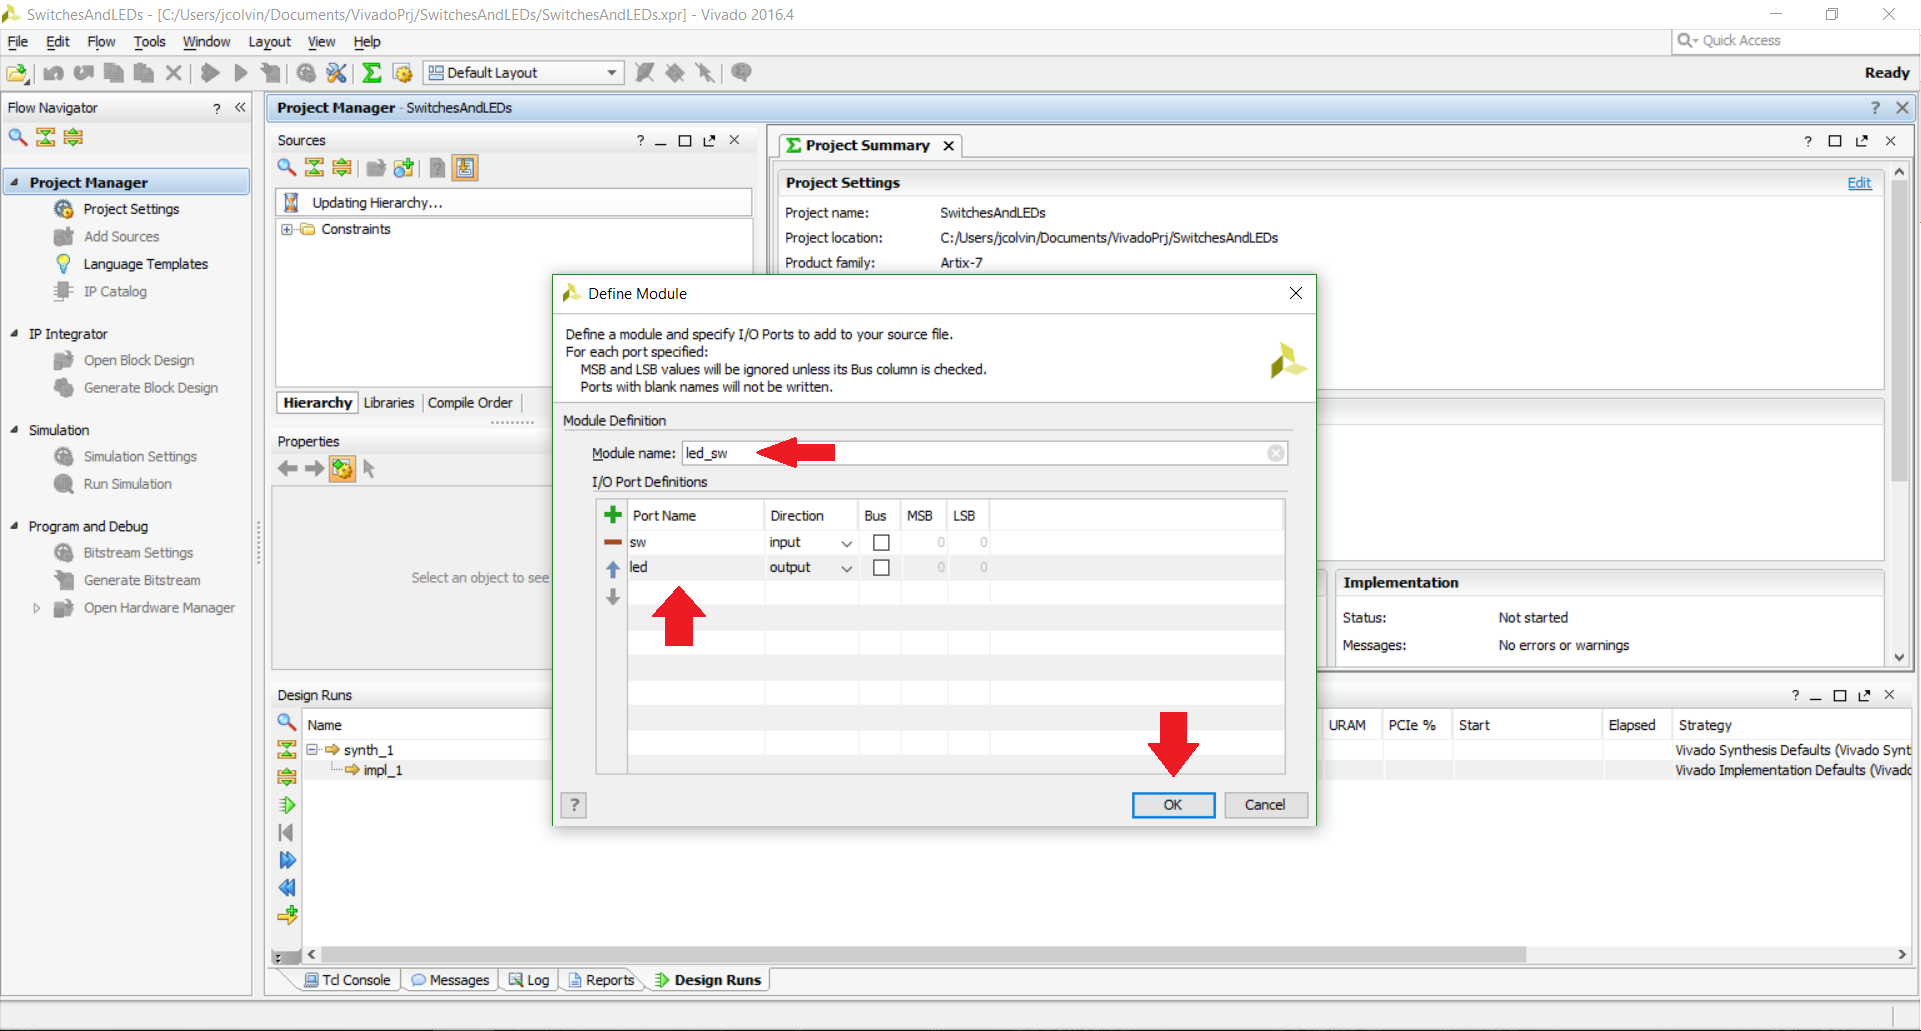
12) After a brief loading, we are presented with a top module wizard (since we said we were creating our own source file called “top”). For this project we want to have an input called “sw” and an output called “led”. Both of these are single inputs and outputs, so leave thebusbox unchecked for both of them. ClickOkwhen you are done.
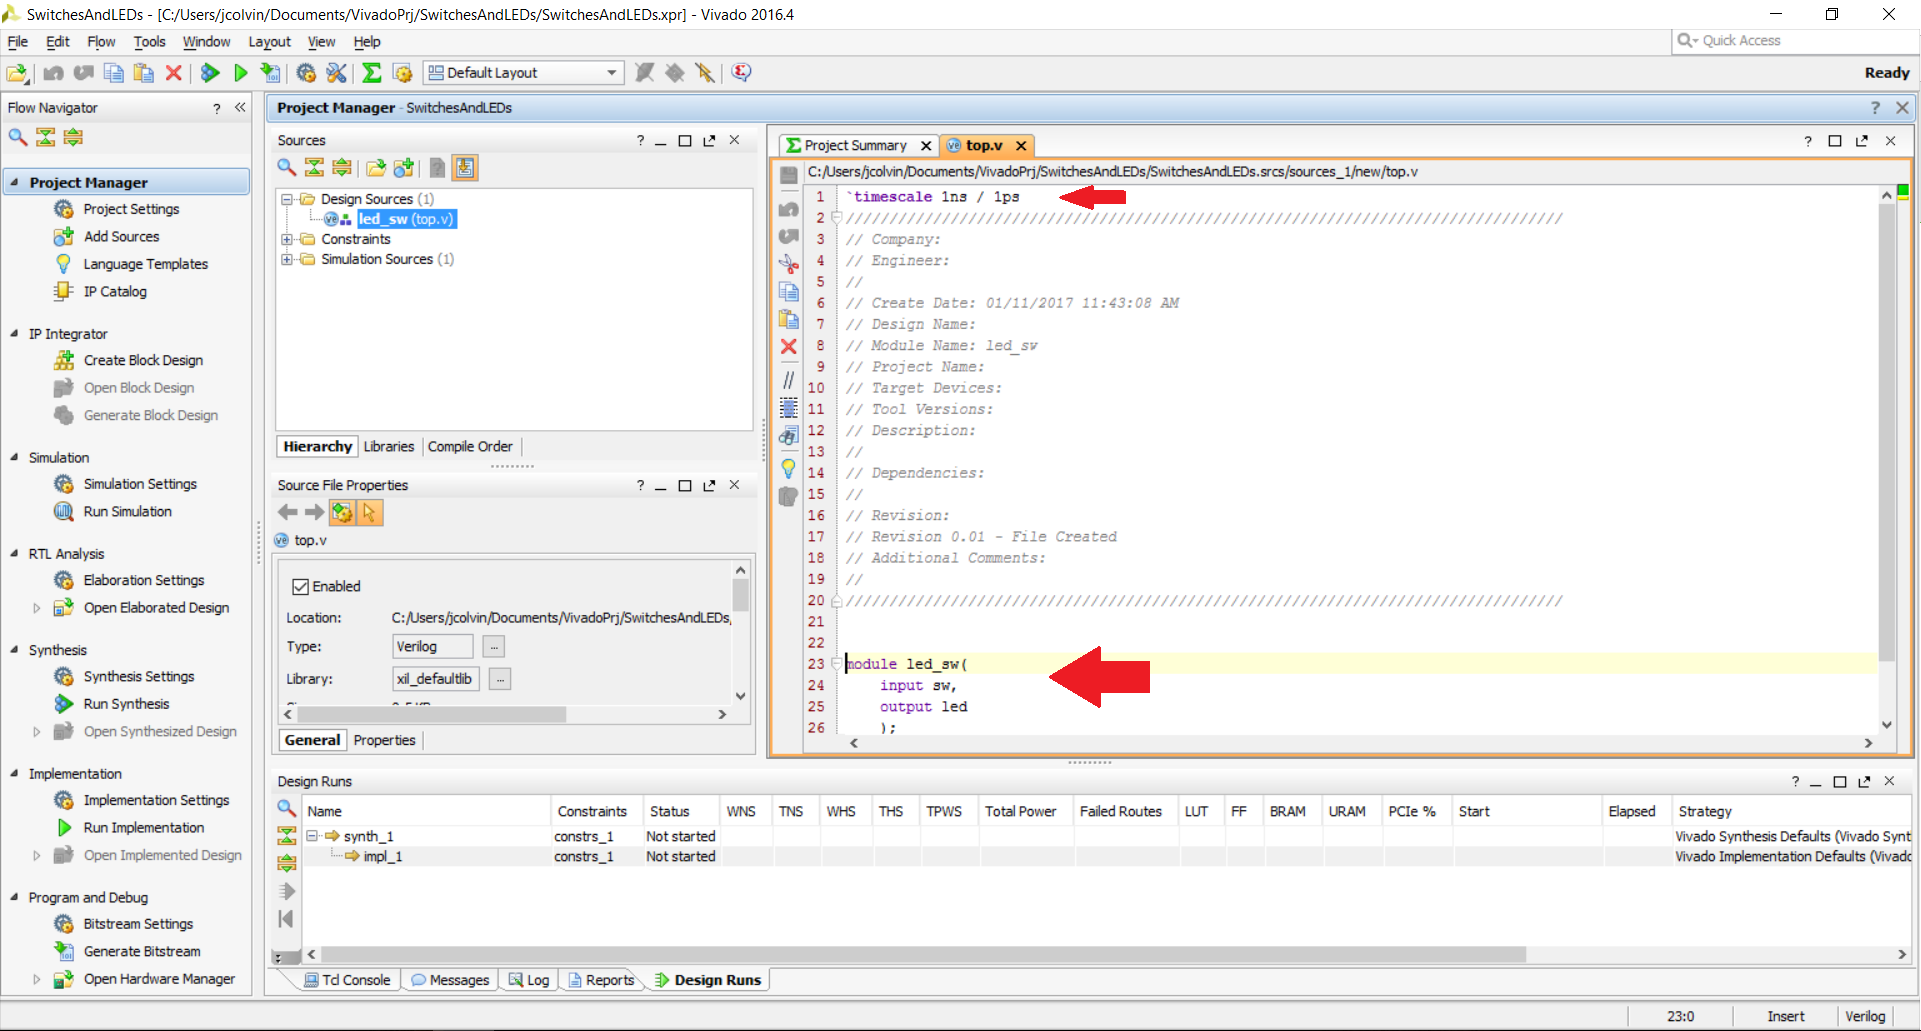
14) Our Verilog module will appear in the upper left window known as the workspace. It comes prefilled with some Verilog code including the required timescale, a nice comments section for documentation purposes, our named module with the inputs and outputs we created in the wizard, and theendmodulestatement.
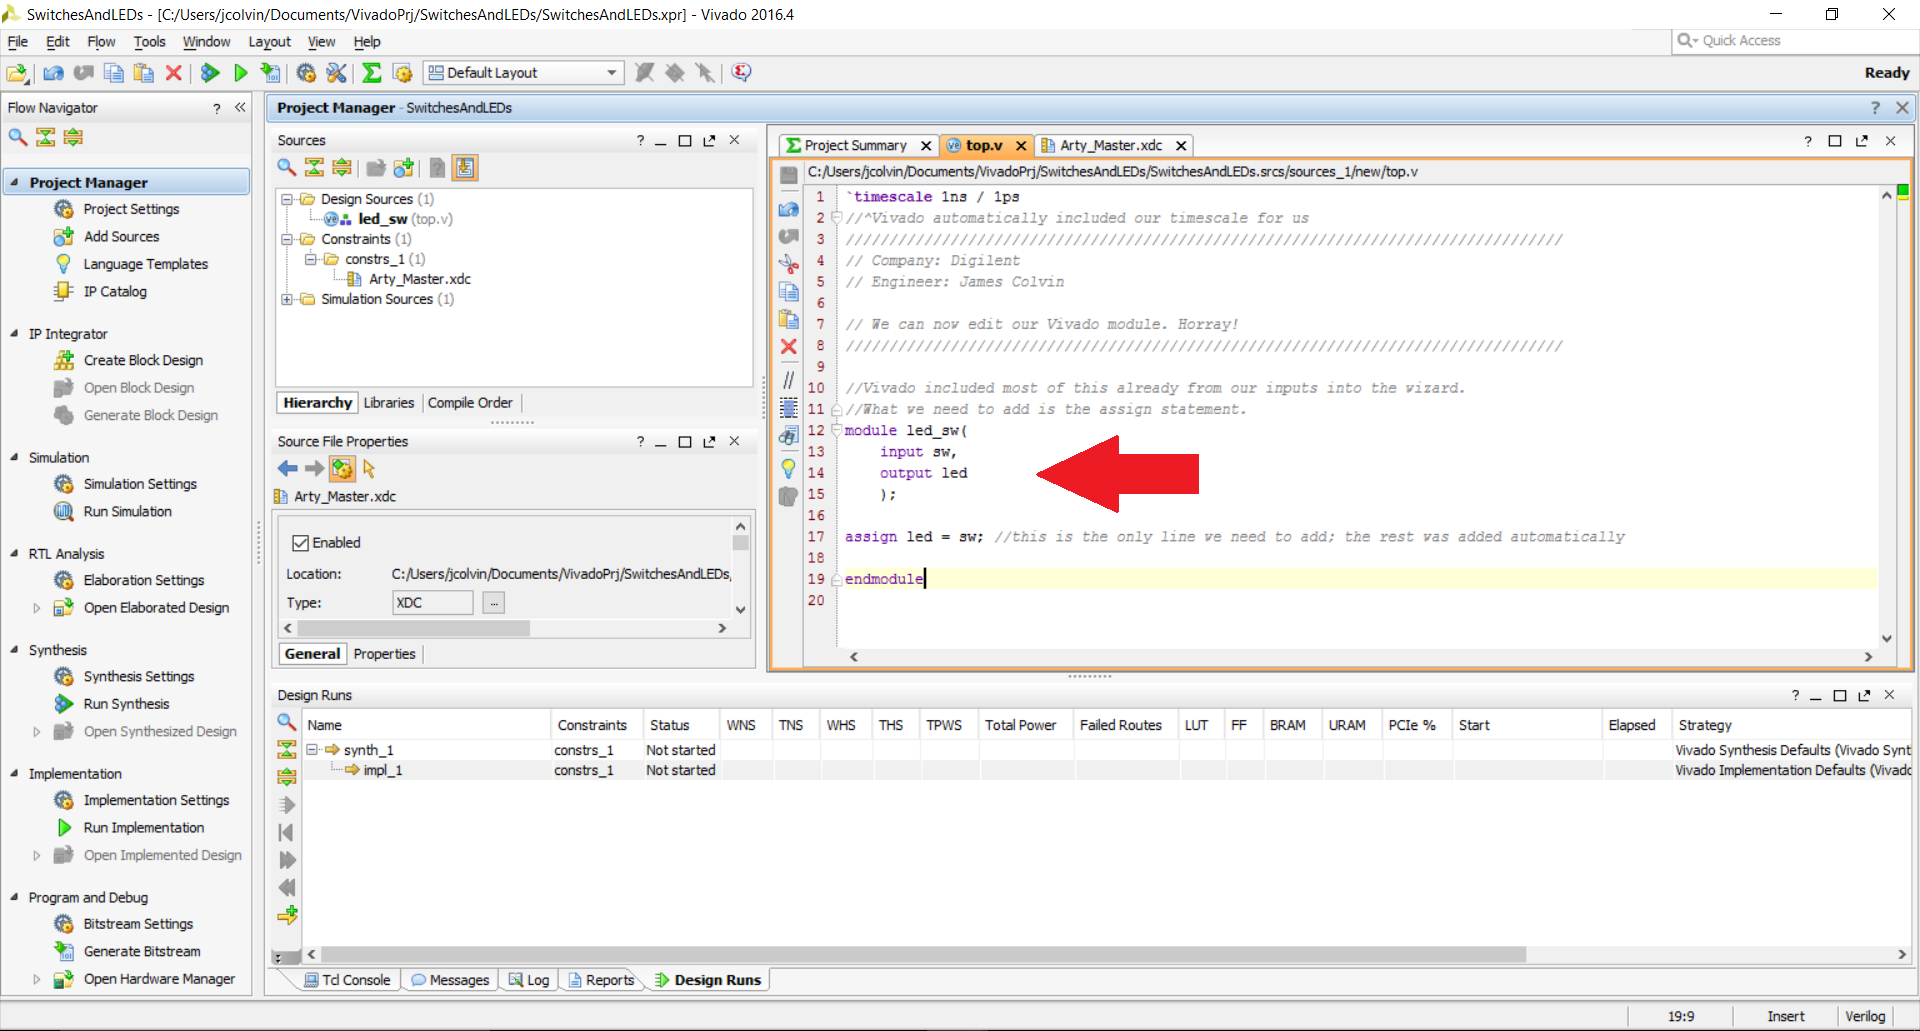
15) Now we just need to add the functionality of how our circuit module we are creating on the FPGA that has a single input and a single output is going to work. This is done by declaring our inputs and outputs between the};in the module and the keywordendmodule. For this project, we just want to have the state of the output (the LED) be the same as the state of the input (the switch), so we will use anassignstatement to assign the state of the LED to be equal to the state of the switch via the following line of code:
assign led = sw;
Press Cntl+S to save your changes.
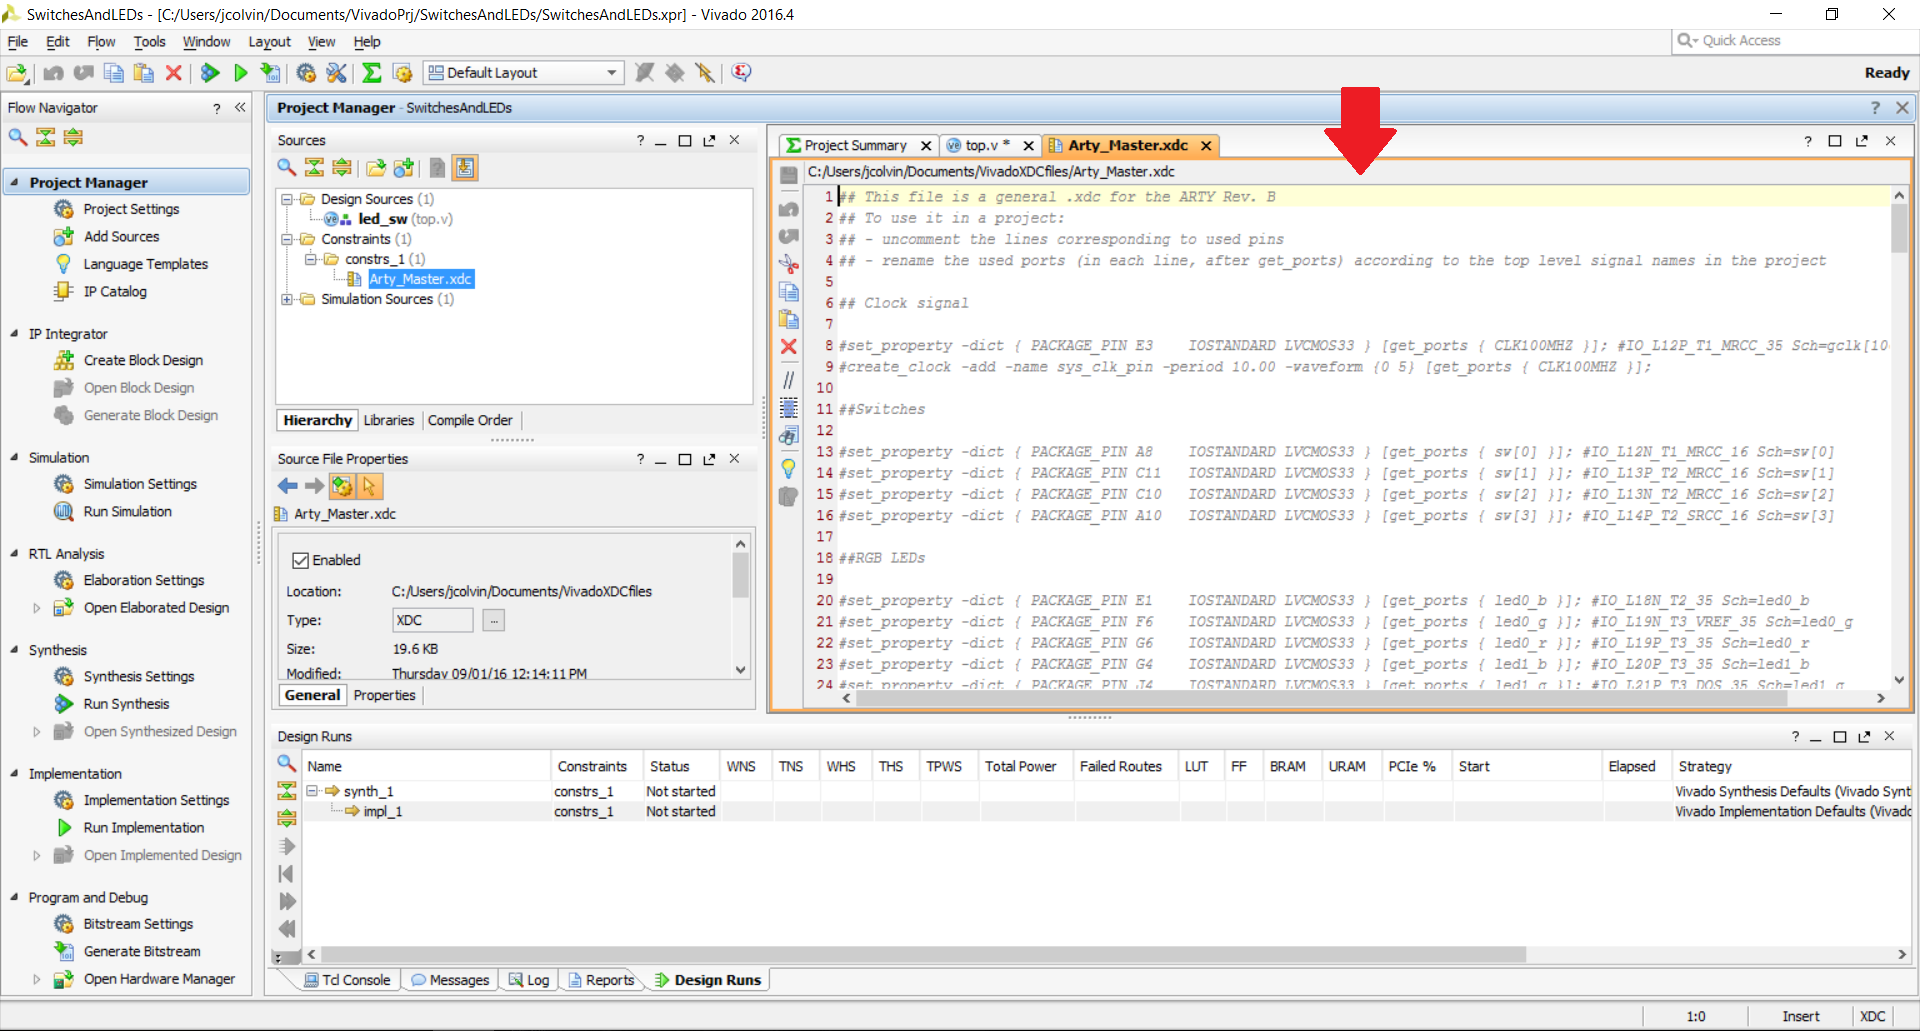
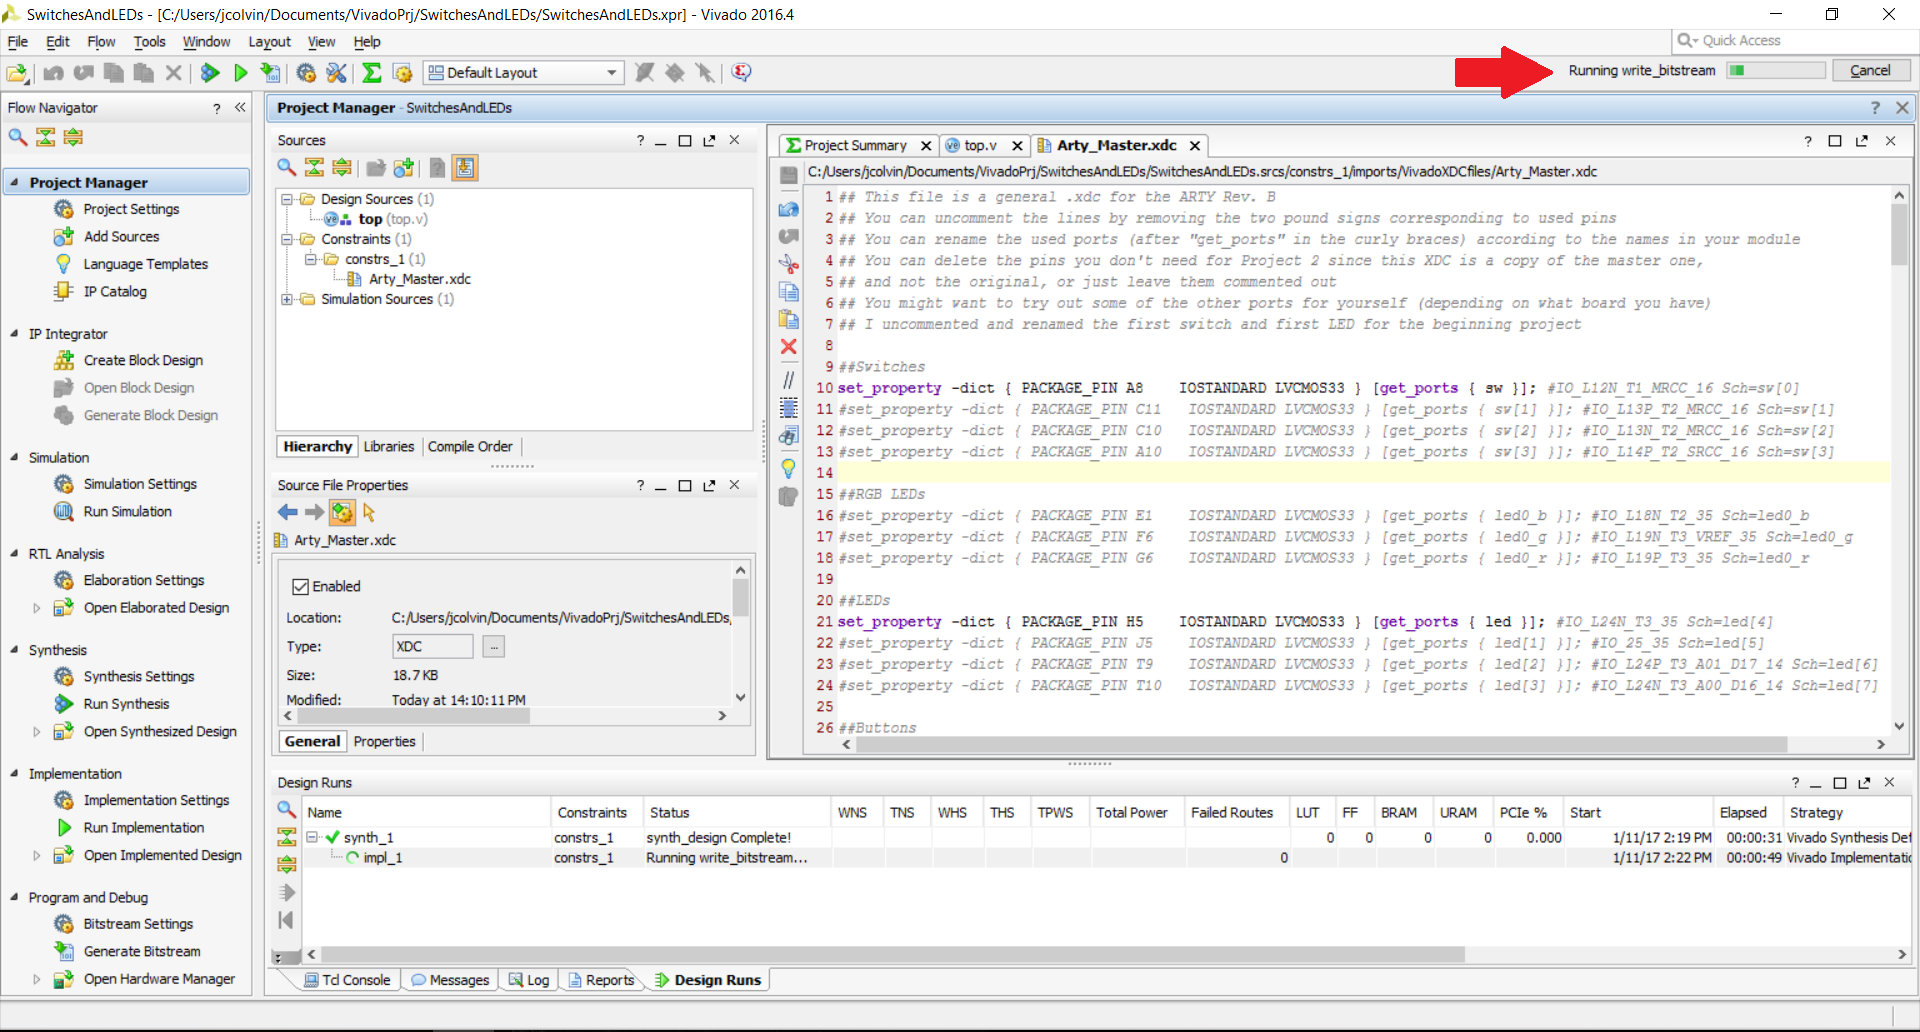
17) Our XDC will become visible in the workspace window (as mentioned in the step above). As this is a master XDC file (at least for me) there's a lot of lines of text so we want to only uncomment the pins we are using and change the name of the pin to match the names of our inputs and outputs on our top module. You can learn some more details about a XDC file here.
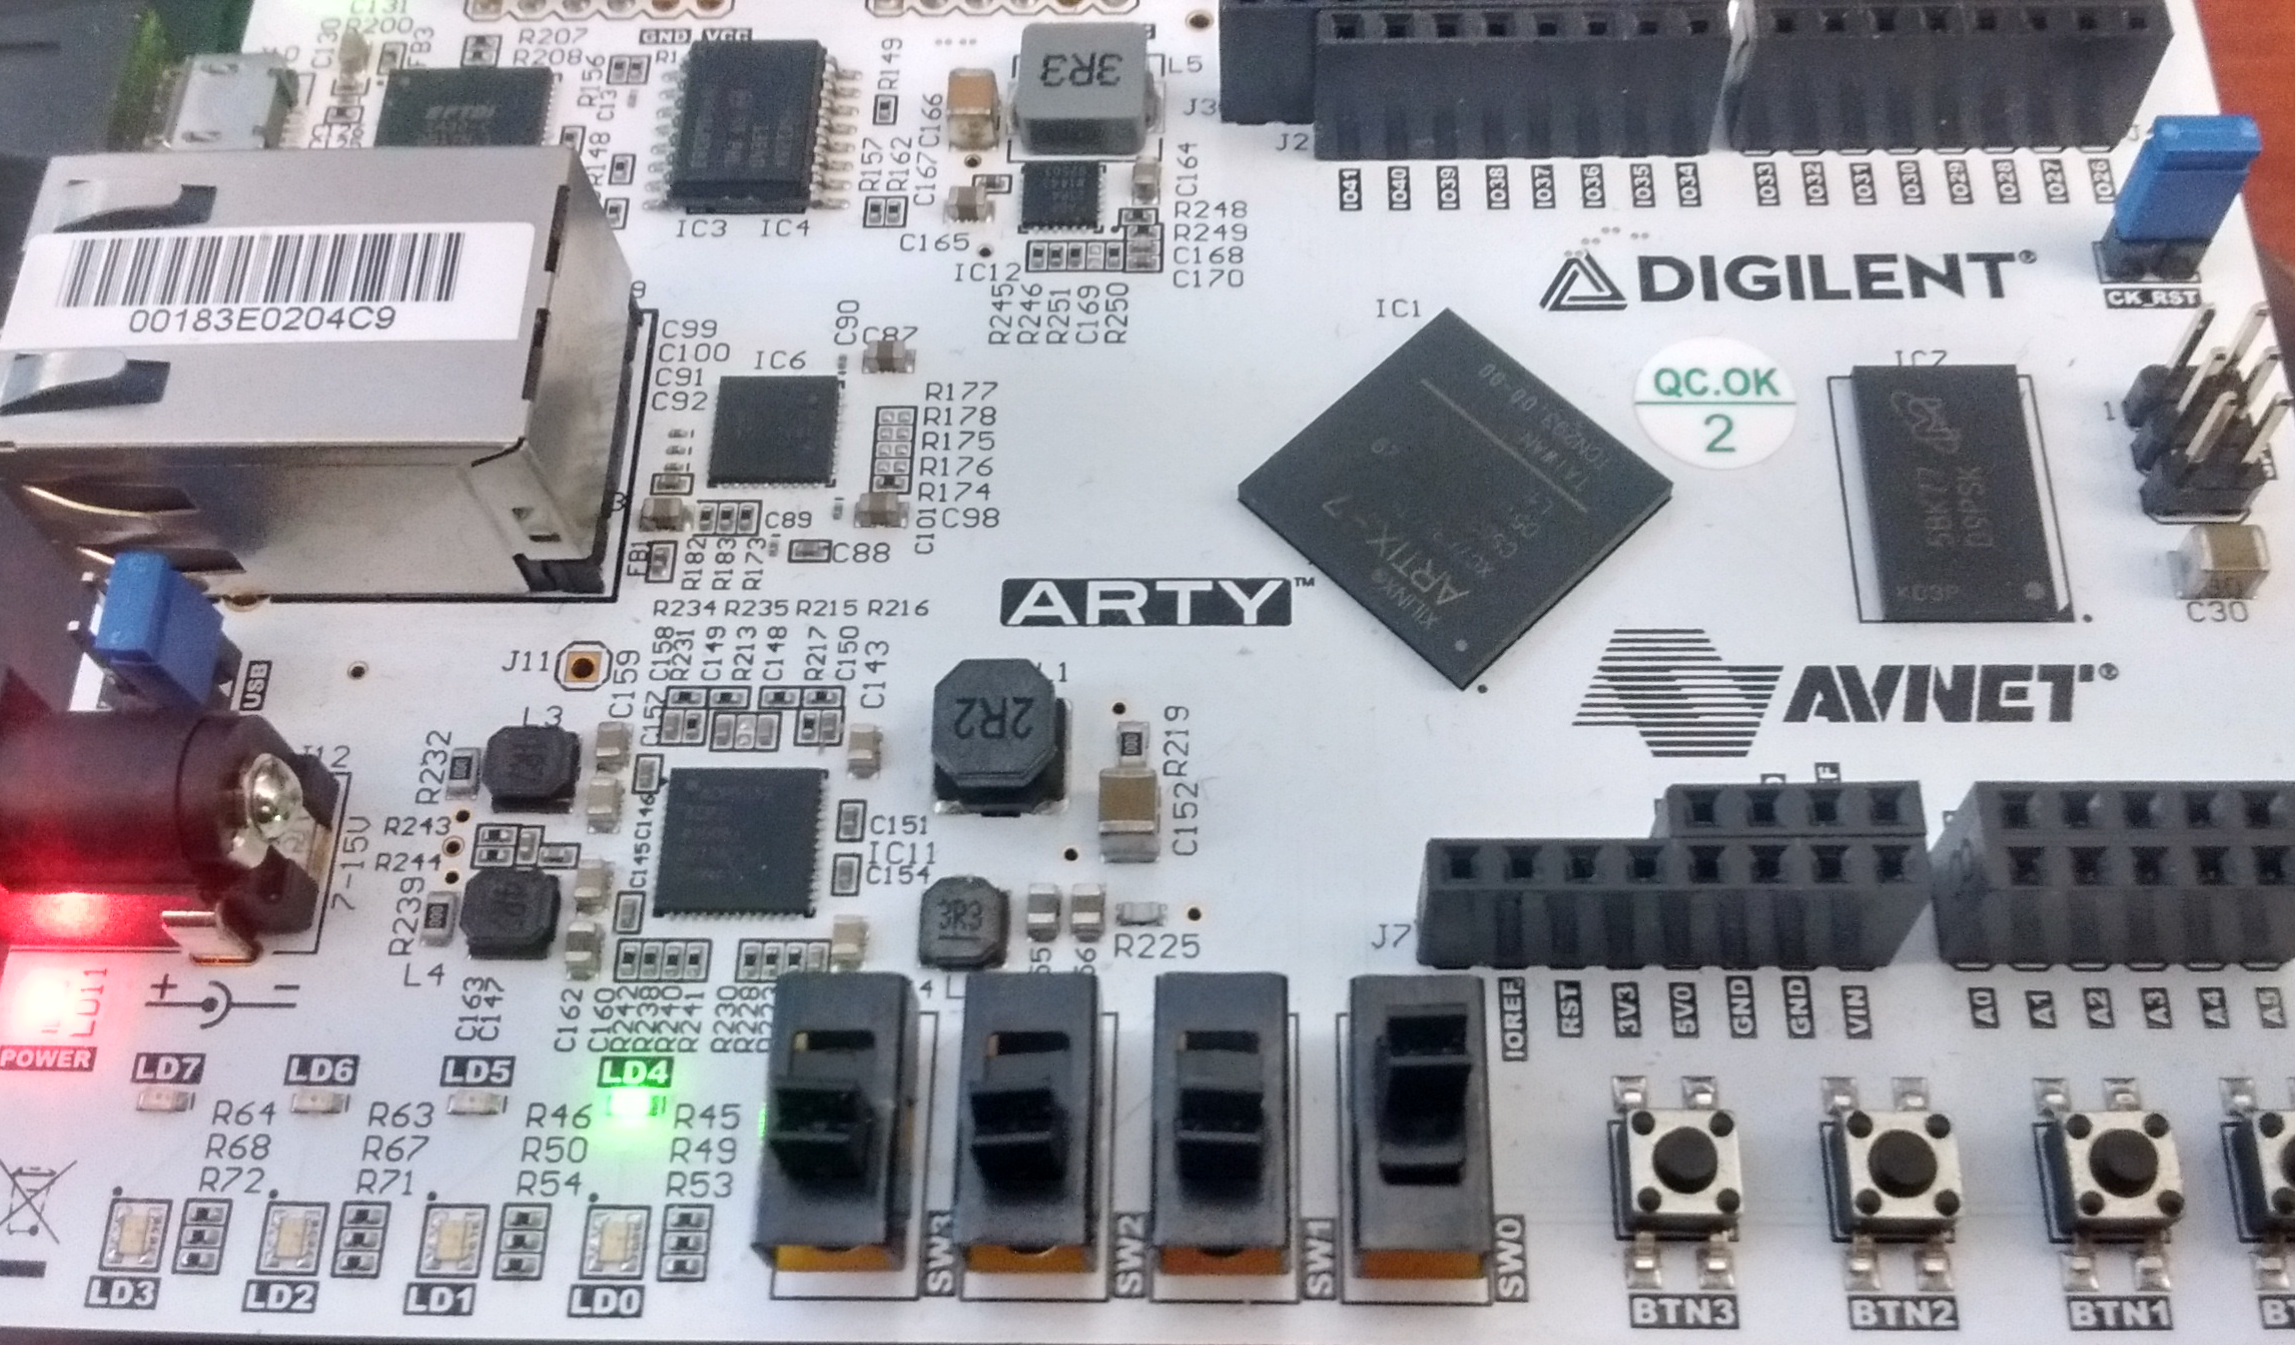
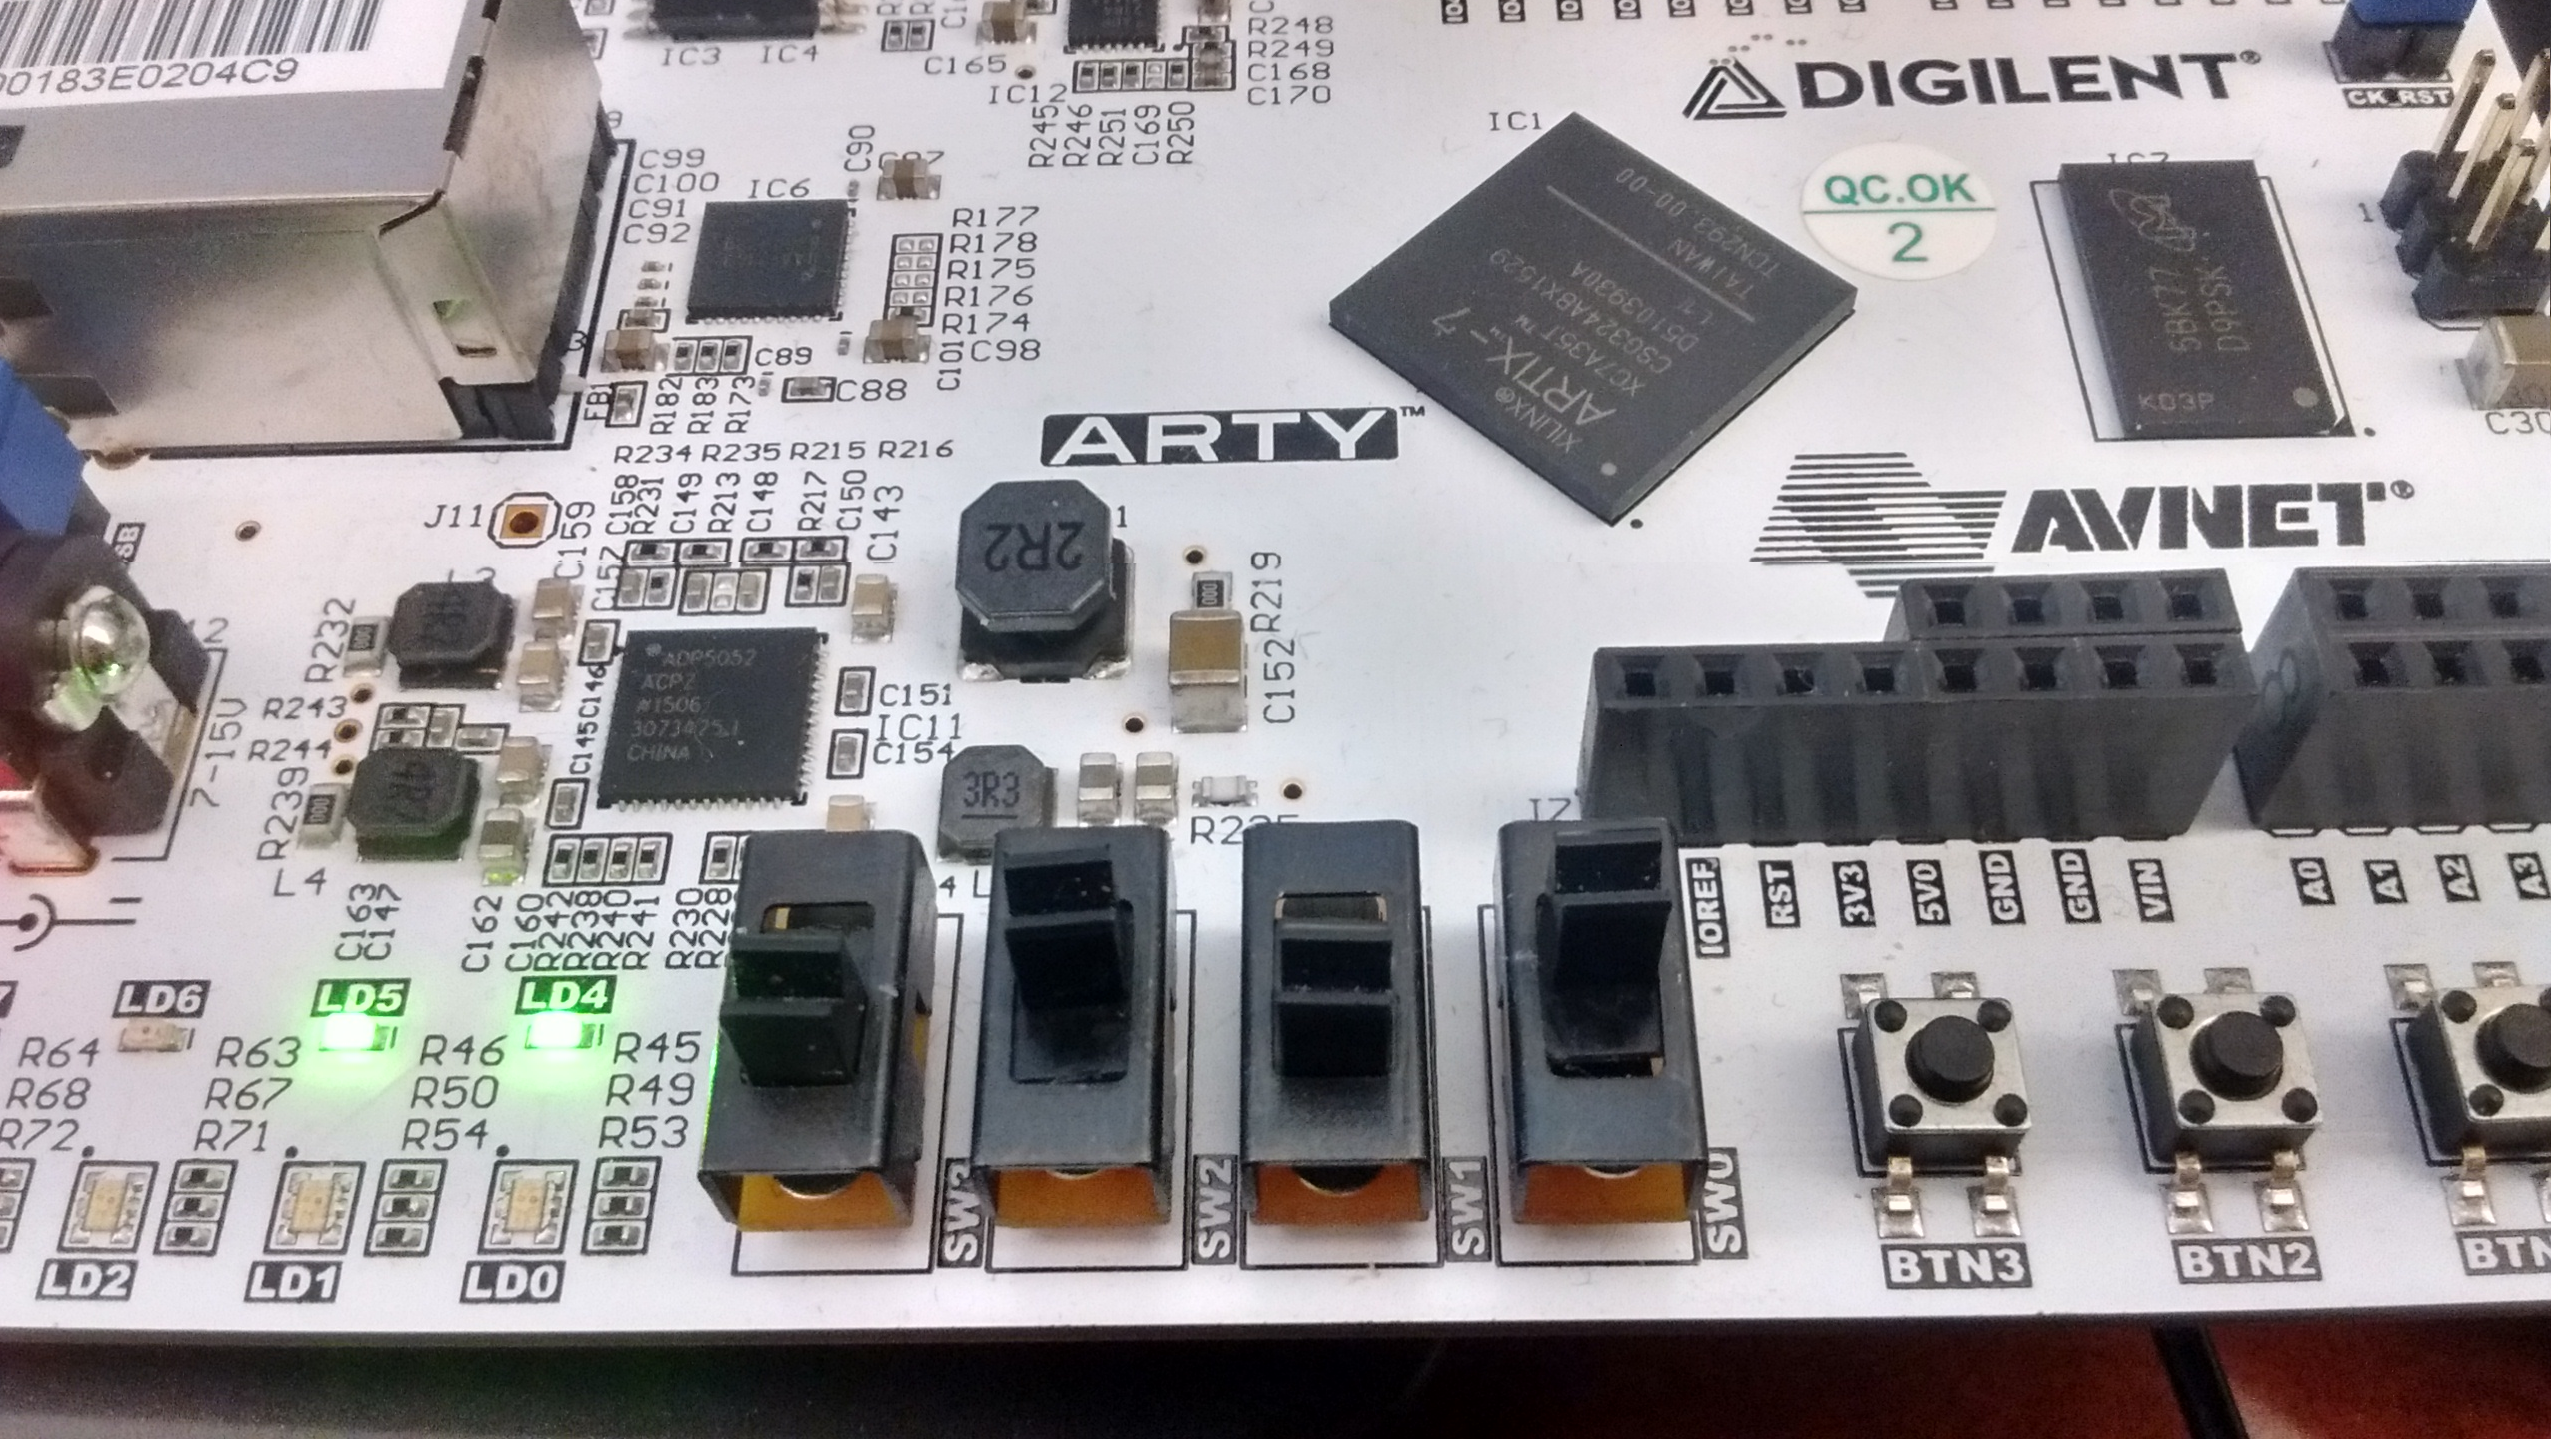
18) The two lines I will uncomment in this project will be the line corresponding to the first switch (labeled SW0 on the silk screen of the Arty) and the line corresponding to the first mono-color LED (labeled LD4 on the silk screen of the Arty). I renamed the switch (pin A8 on the FPGA) to sw and renamed the LED (pin H5 on the FPGA) to led. Press Cntr+S to save your changes.
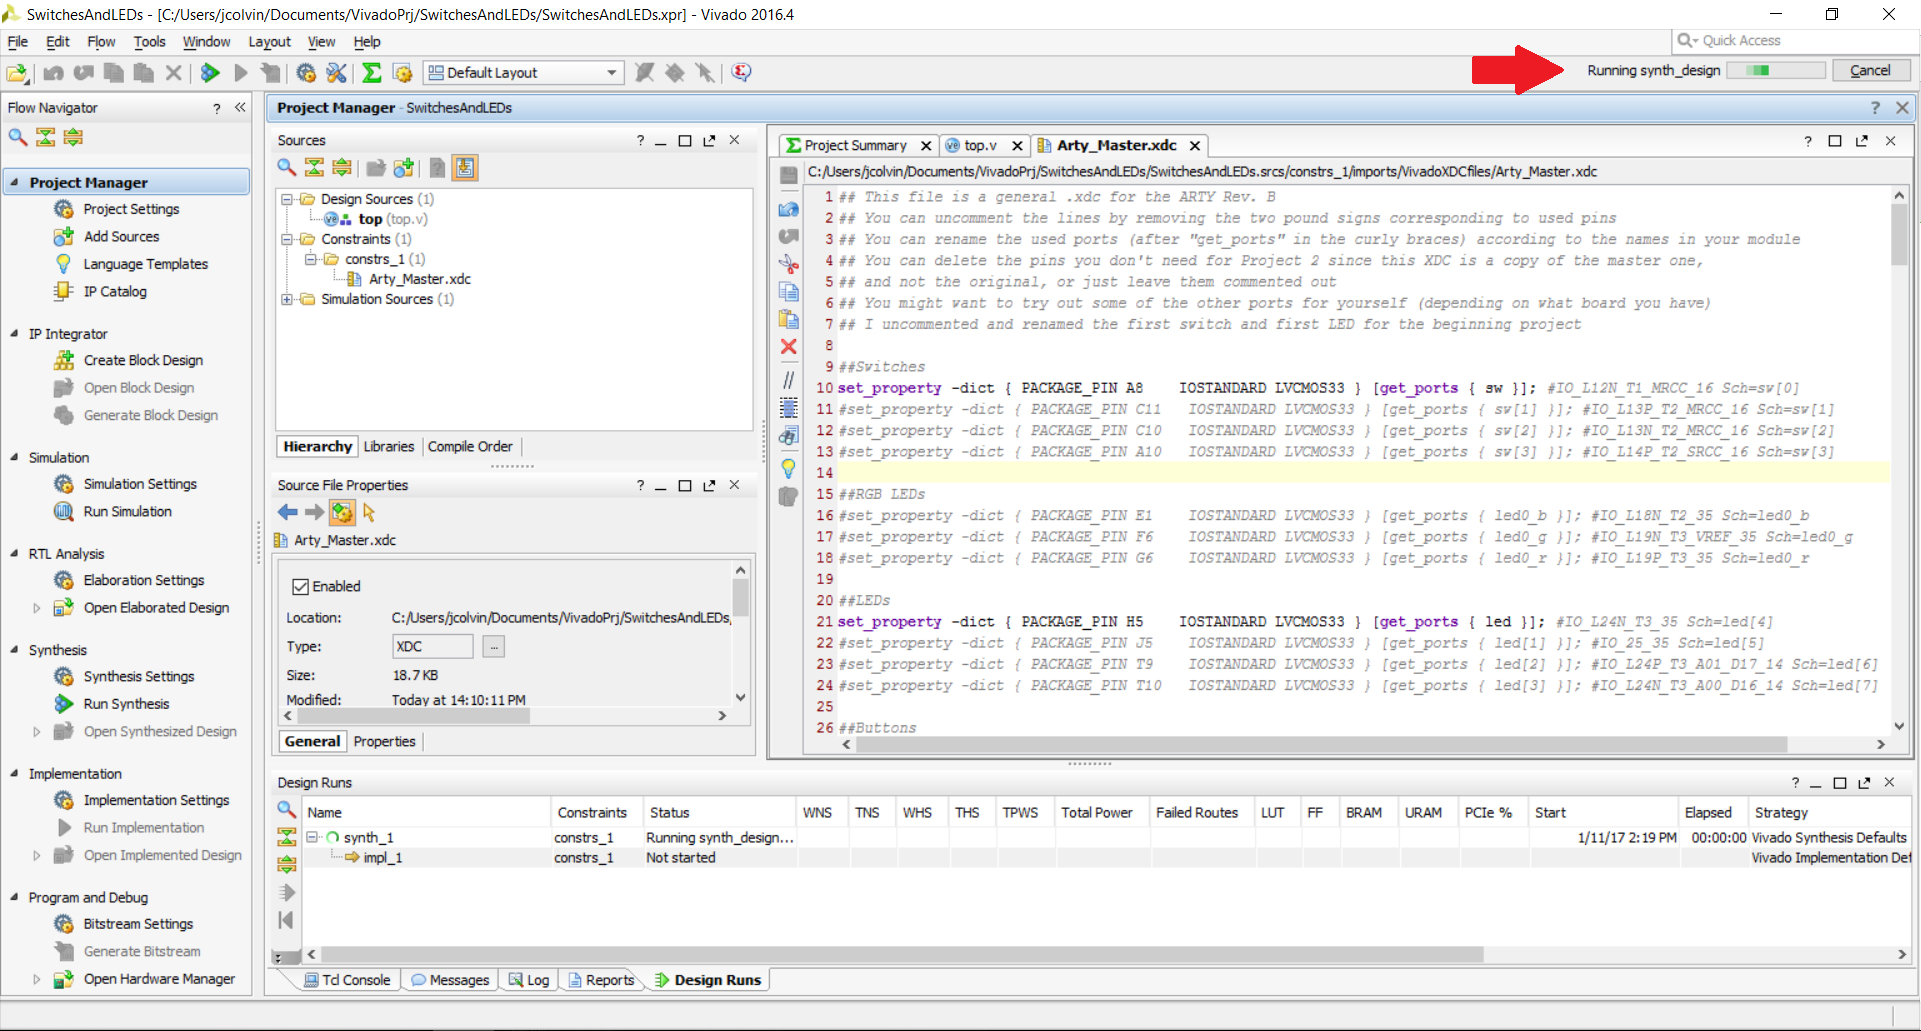
20) A wizard will pop up that will allow you to choose your synthesis options. You'll want to have your project launch in the local directory and run on the local host (as opposed to only generating scripts.
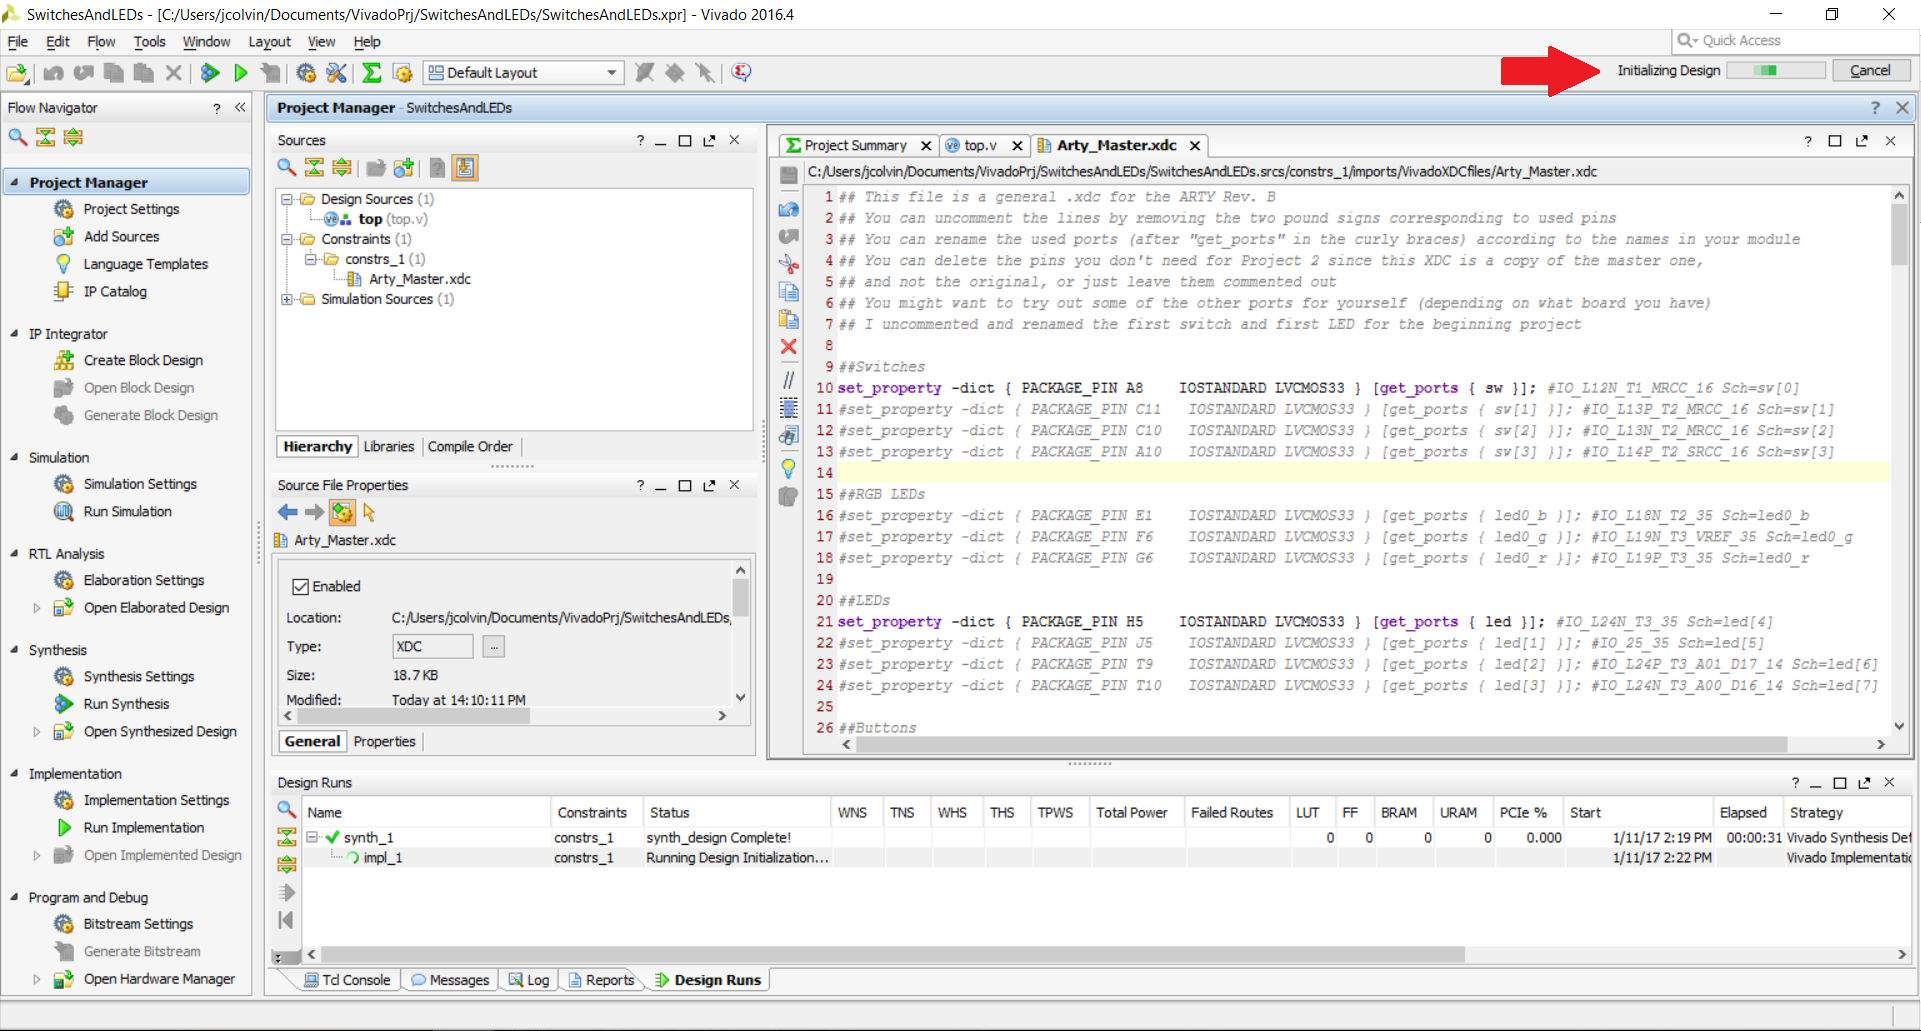
As a side note, the whole combination of synthesis, implementation, and the generation of the bitstream to program the FPGA can take a bit of time (i.e. more than 10 minutes in some cases) since Vivado processes a ton of things hidden to the user and works with the entire FPGA and not just what we are utilizing, so you will probably want to maximize the number of jobs (computer cores Vivado is allowed to use) unless you plan to be doing a lot of other things simultaneously.
When you are happy with your selections, clickOK.
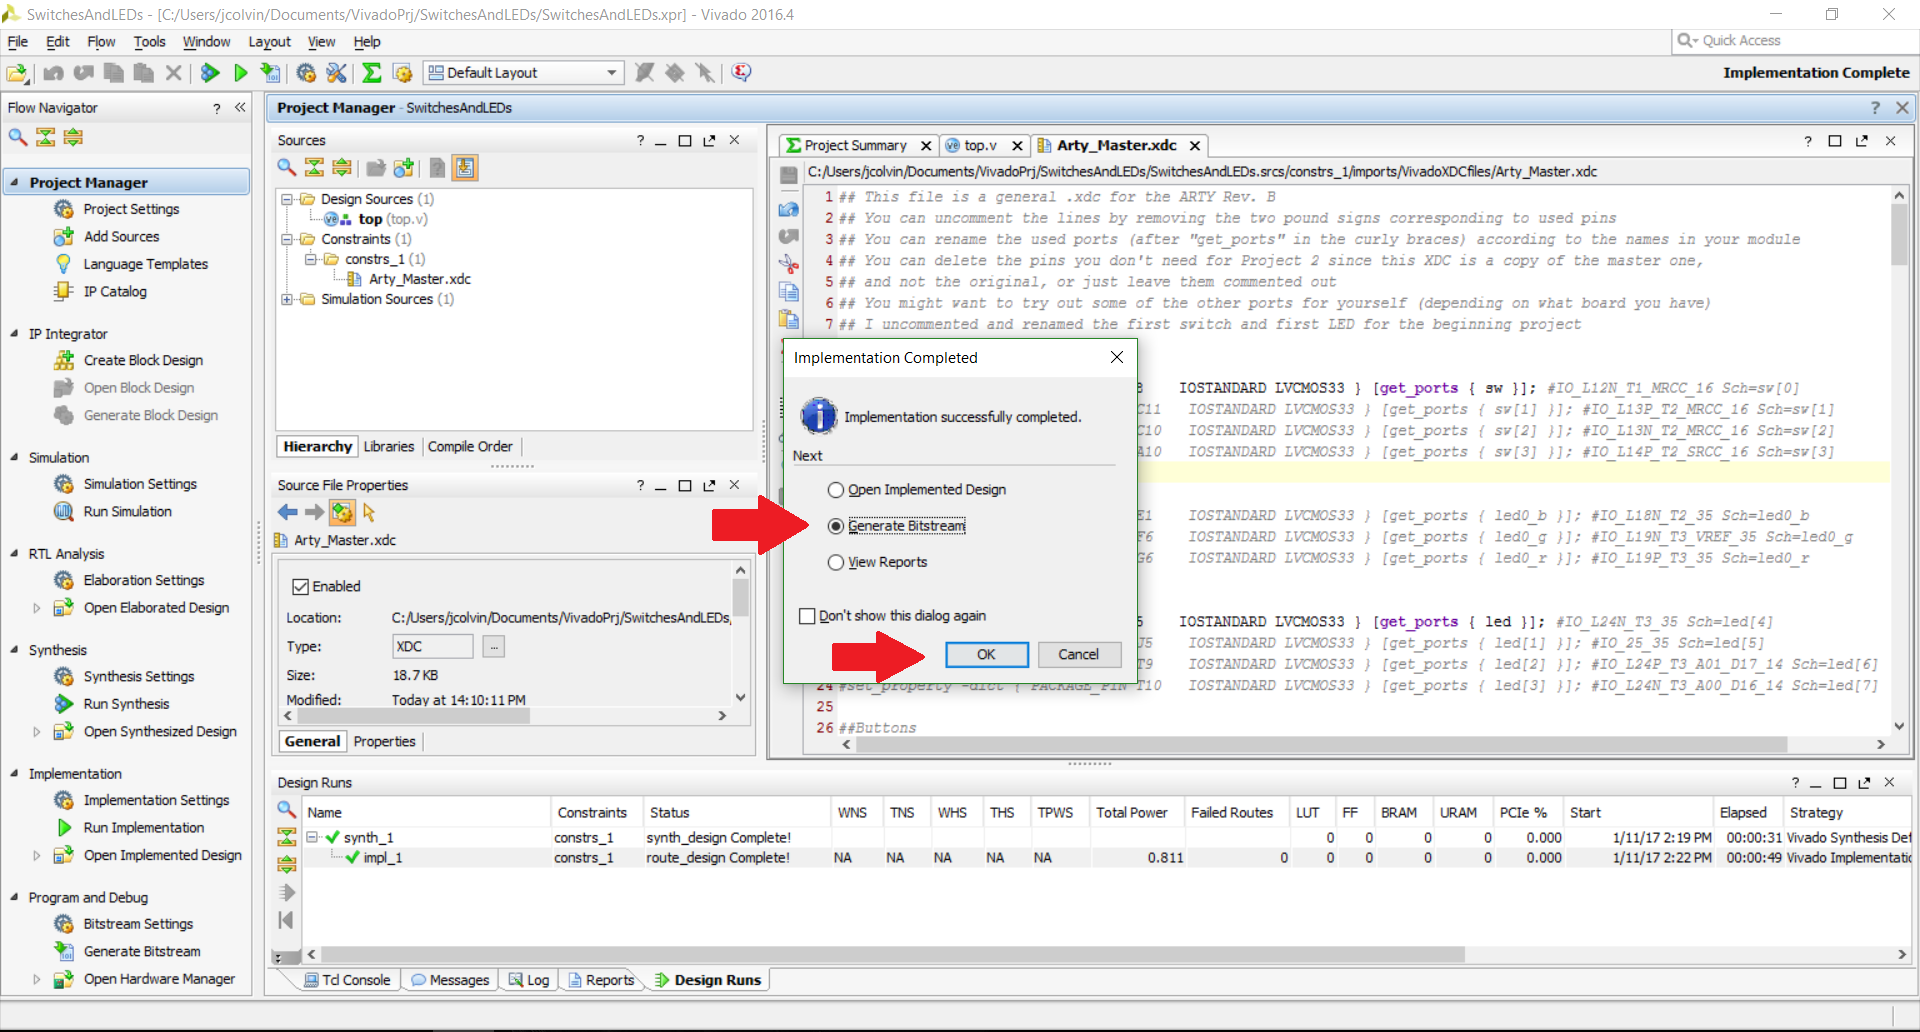
23) Another wizard will pop up where you will want to clickGenerate Bitstream.
As a side note, you may not necessarily want to click thedon't show this dialog againbox this time because if you are designing a circuit for your FPGA to run, you may just want to check to see if Vivado was able to successfully able to make it through synthesis and implementation. If there is a warning or error, you would not want to generate a faulty bitstream.
After this screen you will be able to choose some bitstream generation options, much like for synthesis and implementation. When you are happy with your selections, clickOk.
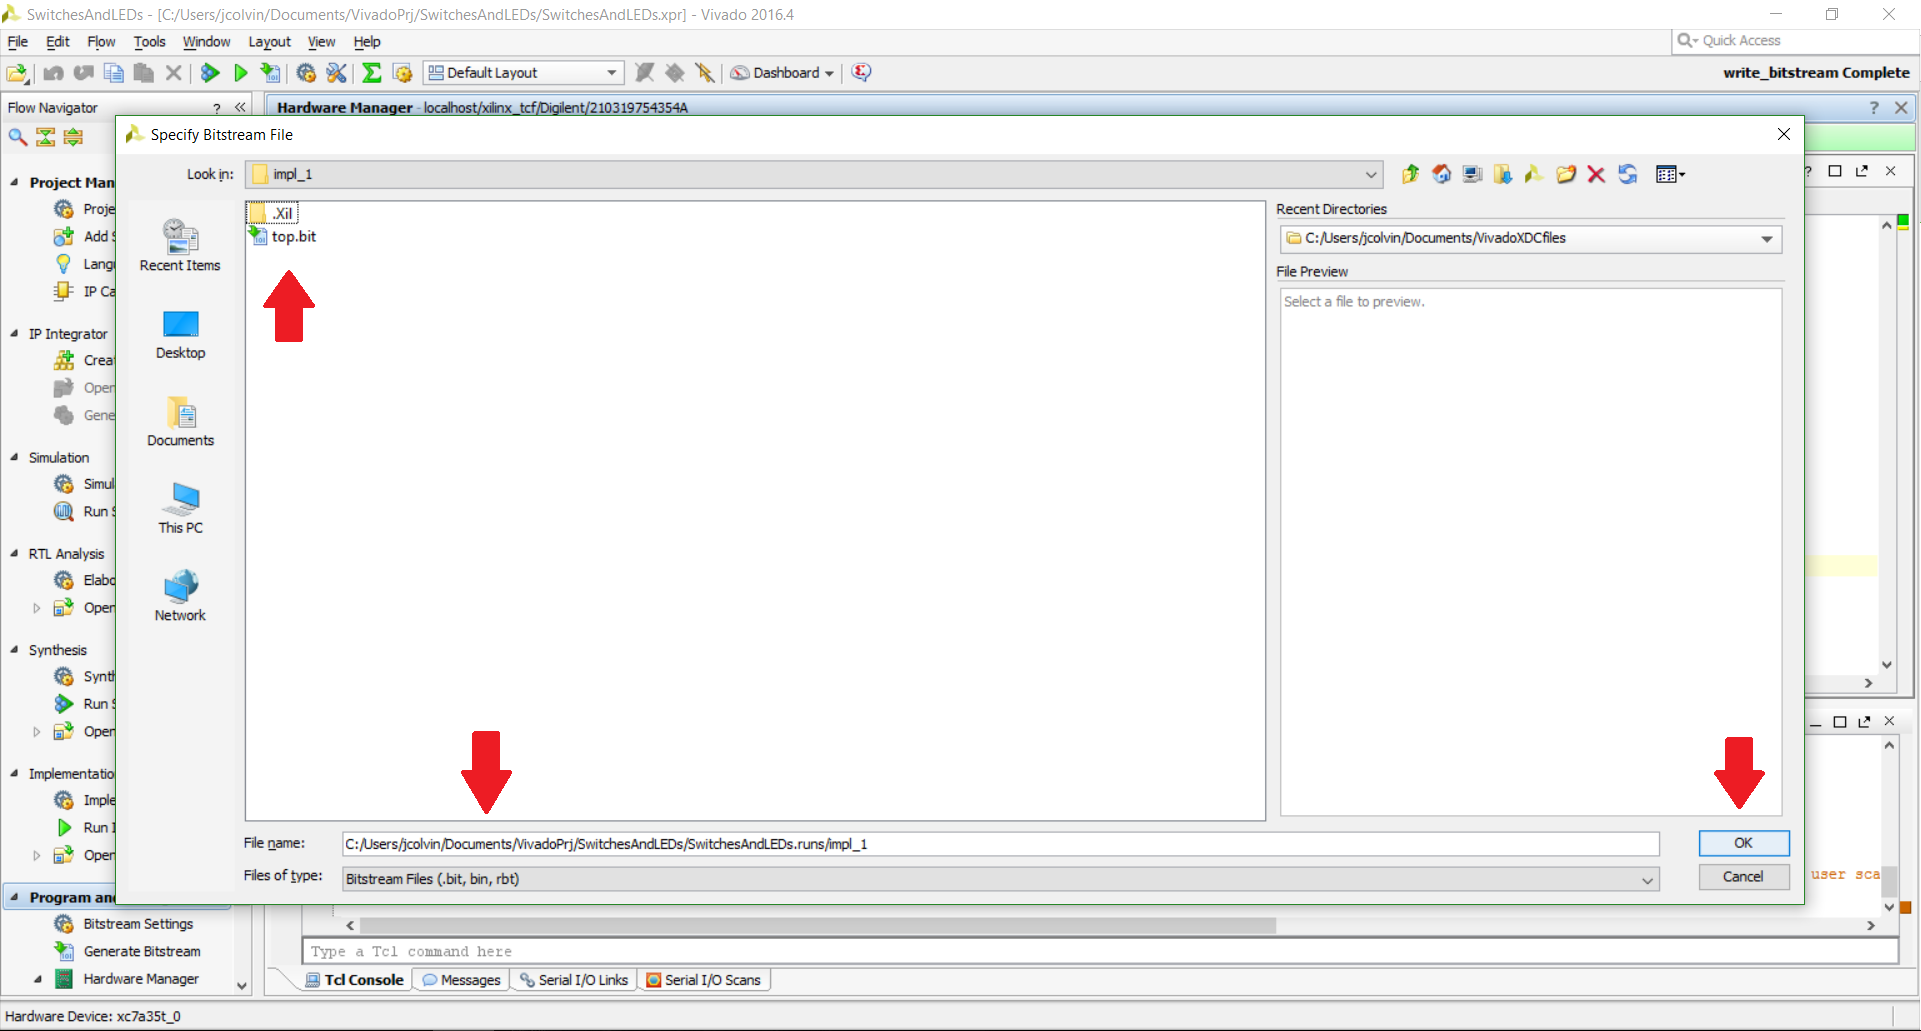
29) The bitstream file itself is a little unintuitive to find. You can find it by opening up the folder where you told Vivado to initially save your project, go to<projectName>.runs, thenimpl_1, and then choose the.bitthat you see. I named my overall Verilog module top.v, so the bit file istop.bit. Then clickOk.
Now we're done! The way this project was setup, the first switch (labeled SW0 on the Arty) controls the status of the first LED (labeled LD4 on the Arty).
Multiple Switches and LEDs
But why restrict ourselves to a single input and a single output? Perhaps instead we want create a bus of inputs and outputs (like an array in a C/C++ environment) so we can try out some more complex (but still simple) combinatorial logic.
As I am using the Arty board which has four embedded switches and four mono-color LEDs (as well as four tri-color LEDs if I want to use them) I can easily use up to a 4-bit bus for my inputs and outputs. Your FPGA board may have a different number or a different type of available inputs and outputs, or perhaps you need to use some external components to get some physical inputs and outputs. If I took advantage of some external components, I could theoretically create as large of a bus as I wanted, but that is beyond the scope of this project. We won't be going through every step like we did the first time, although some key screenshots will be shown as a reference point for your convenience. Remember, If you have any questions after reading through the project, please feel free to post them on the Digilent Forum where an engineer will be happy to assist you.
This tutorial presumes that you created a new project to for the bus inputs and outputs, but you can easily modify your existing project to accept these additions.
1) The same process of a creating a Vivado project was followed; a top module was created, no IP was added, and the Master XDC file was copied into the local directory. Once we confirm our project settings, we can then create our new module with buses on the module wizard that appears. For each input or output that you want to be a bus, check thebusbox and indicate the size of the bus through theMSBandLSBoptions.
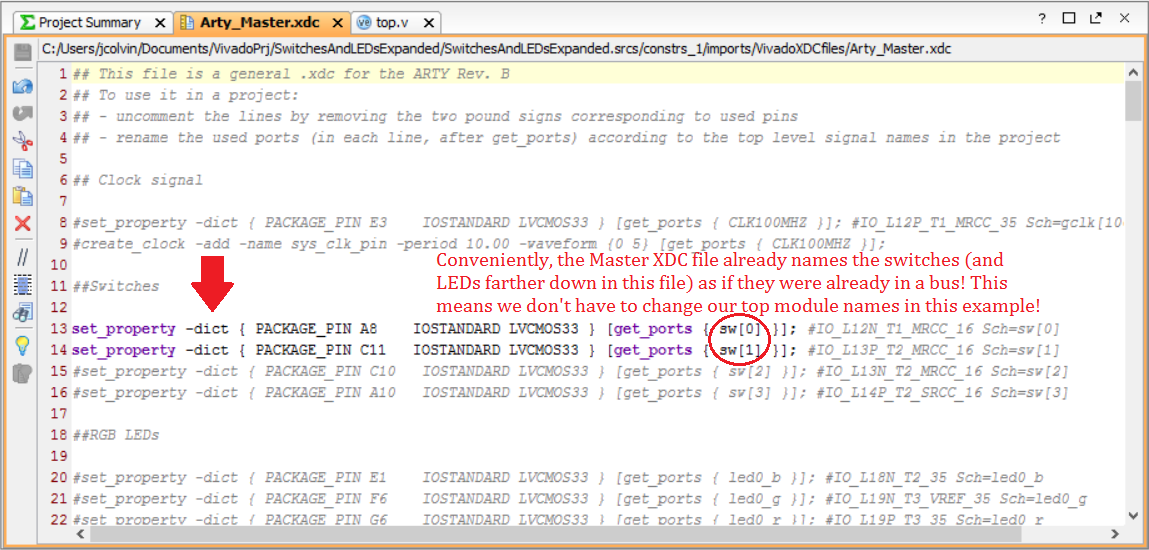
3) The XDC file will also need to be edited so that Vivado knows which FPGA pins we intend to use. With this Master XDC file, the names of the pins for both the switches (shown) and the LEDs (not shown in the image) are already named in such a way so that they match the names used in our Verilog module. You could change the names in both the module and the XDC file to something else, but why do more work if it is already legible?
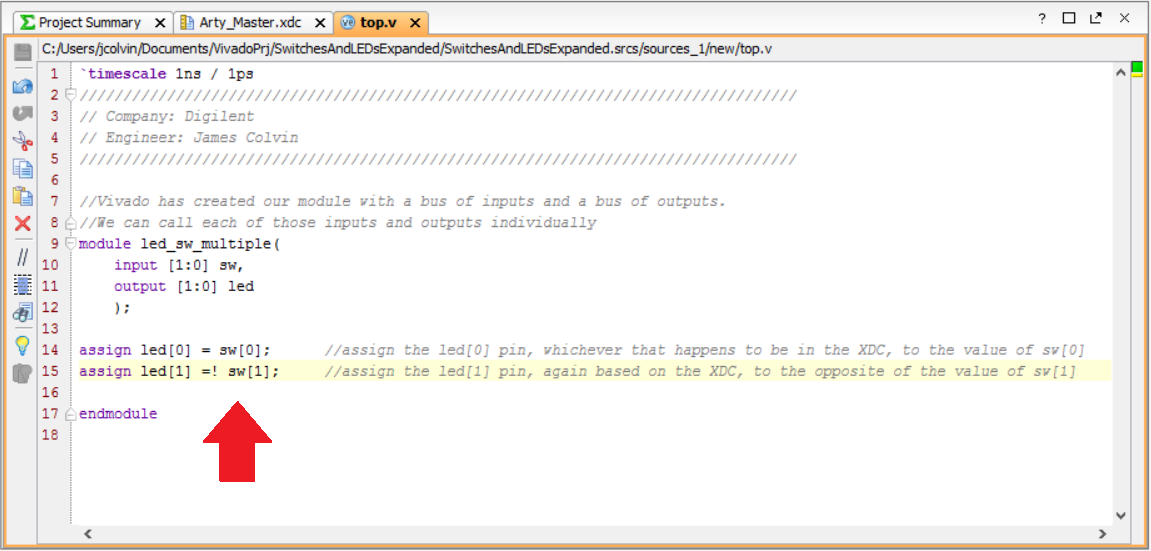
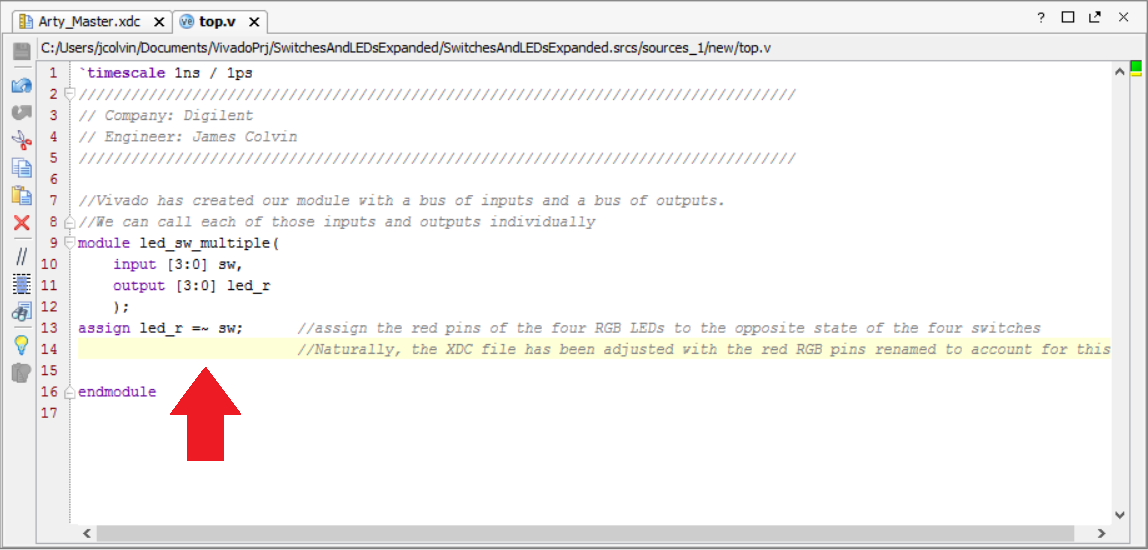
5) It is also possible to assign a bus of outputs the value of a bus of inputs. The trick here is that you need to use the bit-wise negation operator,~, rather than the logical negation operator,!, which operates on the entire bus rather than bit by bit. The~operator will also work for single bits much like the example immediately above this one.
Taking it one step further
Try using some of the external I/O rather than the embedded I/O on your system board. You can even keep the Verilog module code exactly the same; the key here will be to change the XDC file so that the pins you want to use instead (such as some Pmod Host port pins) match the names used in your port declarations in your Verilog module.
Important Takeaways from Project 2
- Creating single bit and multi-bit inputs and outputs
- Assigning input ports to output ports for single bits, bits within bus's, and bus's to bus's
- Confidence in going through the Vivado design flow from creating a project, editing it, and programming the system board

