Arty Z7 HDMI In Demo
Overview
Description
The Arty Z7 HDMI In project demonstrates the usage of the HDMI in and out ports on the Arty Z7 board. There are two projects, one for each variant of the board: Arty Z7-10 and Arty Z7-20. The behavior is as follows:
- Video data streams in through the HDMI in port and out through the HDMI out port.
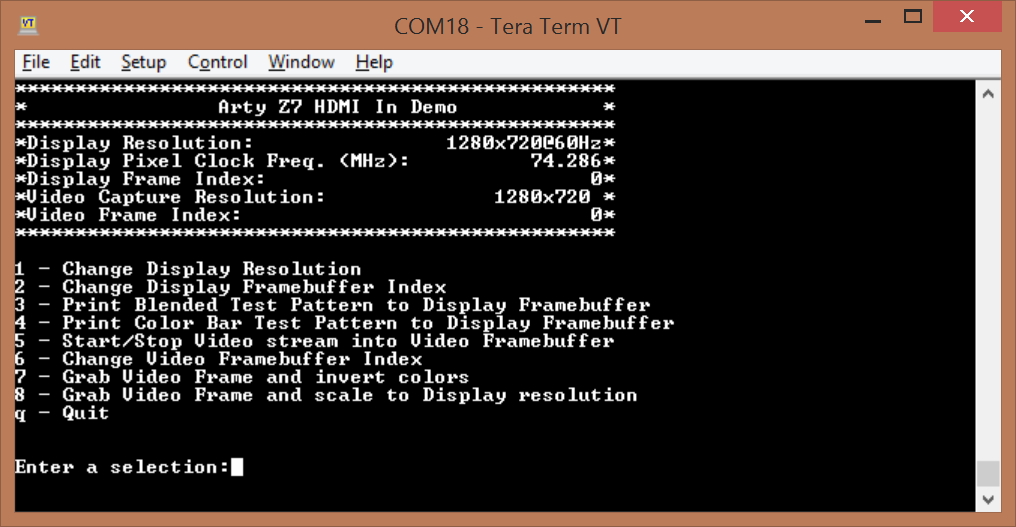
- A UART interface is available to configure what is output through HDMI.
- There are 3 display frame buffers that the user can choose to display or write to.
Features Used
| Not Used | Used | |
|---|---|---|
| 2 user switches | X | |
| 2 user LEDs | X | |
| 2 user RGB LEDs | X | |
| 4 user push buttons | X | |
| USB-UART Bridge | X | |
| Micro SD card connector | X | |
| HDMI Sink and HDMI Source | X | |
| PWM mono audio out w/ 3.5mm jack | X | |
| 10/100/1000 Ethernet PHY | X | |
| 512MiB 1050Mb/s DDR3 Memory | X | |
| Quad-SPI Flash | X | |
| Two Pmod ports | X | |
| chipKIT connector for XADC signals | X | |
| USB HID Host | X |
Prerequisites
Hardware
- Arty Z7 board
- Micro-USB cable
- HDMI cable
- HDMI source
- HDMI monitor
Software
- Vivado Design Suite & Xilinx SDK 2016.4
- Version 2016.4 must be used to generate the project
- Digilent Board Support Files for Vivado
- Follow the Vivado Board Files for Digilent 7-Series FPGA Boards guide on how to install Board Support Files for Vivado.
Downloads
Arty Z7-10 Hdmi In Project Repository – ZIP Git Repo
Arty Z7-20 Hdmi In Project Repository – ZIP Git Repo
Download and Launch the Arty Z7 HDMI Input Demo
1) Follow the Using Digilent Github Demo Projects Tutorial. Since this is a Vivado SDK Project, you can either directly launch SDK and import the hardware handoff, or you can generate a bitstream in Vivado before launching SDK. Select the hardware handoff options in the tutorial if you don't want to modify the project block design later. Return to this guide when prompted to check for additional hardware requirements and setup.
3) Turn on your board and open a serial terminal (such as TeraTerm) on your computer to receive status messages. Setup the serial port to connect to the appropriate port for your board, with a baud rate of 115200, 8 data bits, no parity bit and 1 stop bit. Then return to the Github Project Tutorial to finish programming and running the demo.
Using the Arty Z7 HDMI Input Demo
HDMI Display Options
1 - Change the resolution of the HDMI output to the monitor.
2 - Change the frame buffer to display on the HDMI monitor.
5 - Start/Stop streaming video data from HDMI to the chosen video frame buffer.
6 - Change the video frame buffer that HDMI data is streamed into.
8 - Scale the current video frame to the display resolution, store it into the next video frame buffer, and then display it.


