Table of Contents
Nexys Video GPIO

Overview
Description
The Basic User Demo project demonstrates a simple uses of the Nexys Video's GPIOs, UART serial port, and OLED display. The behavior is as follows:
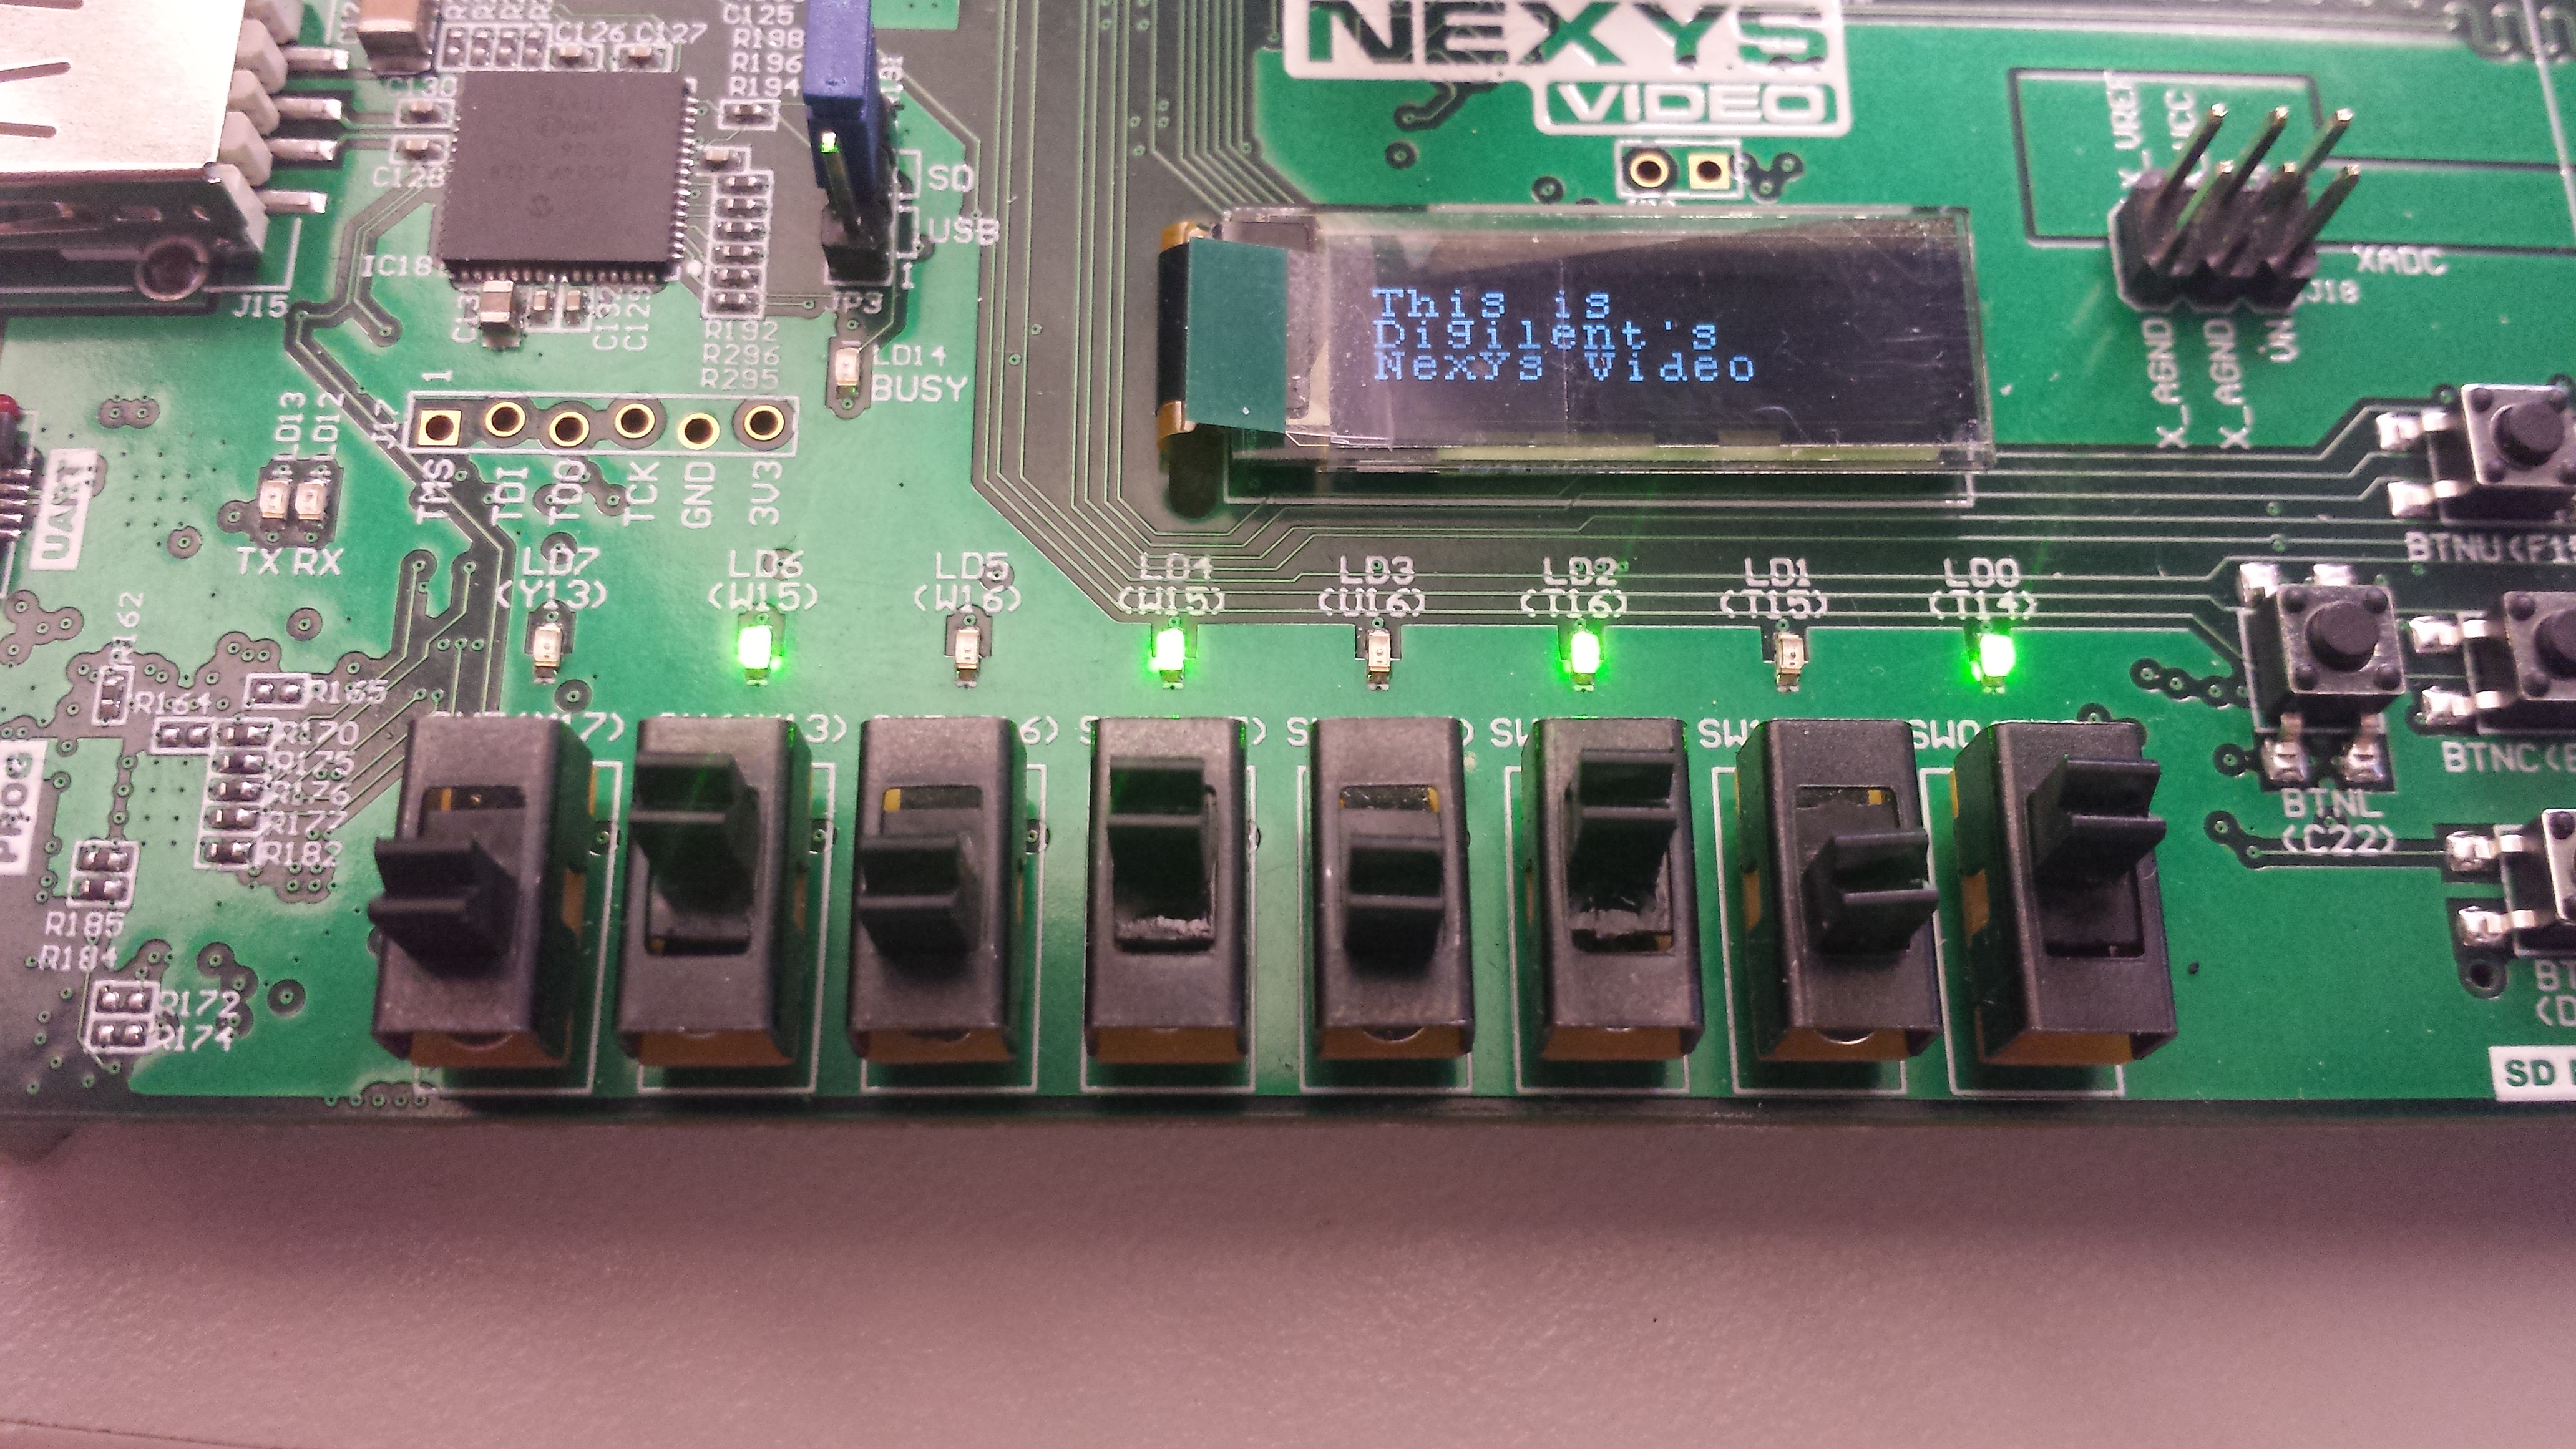
- The 8 User LEDs are tied to the 8 User Switches.
- An introduction message is sent across the UART when the device is finished being configured.
- BTNC resets the LED and UART modules.
- A message is sent over UART whenever BTNU, BTNL, BTND, or BTNR is pressed.
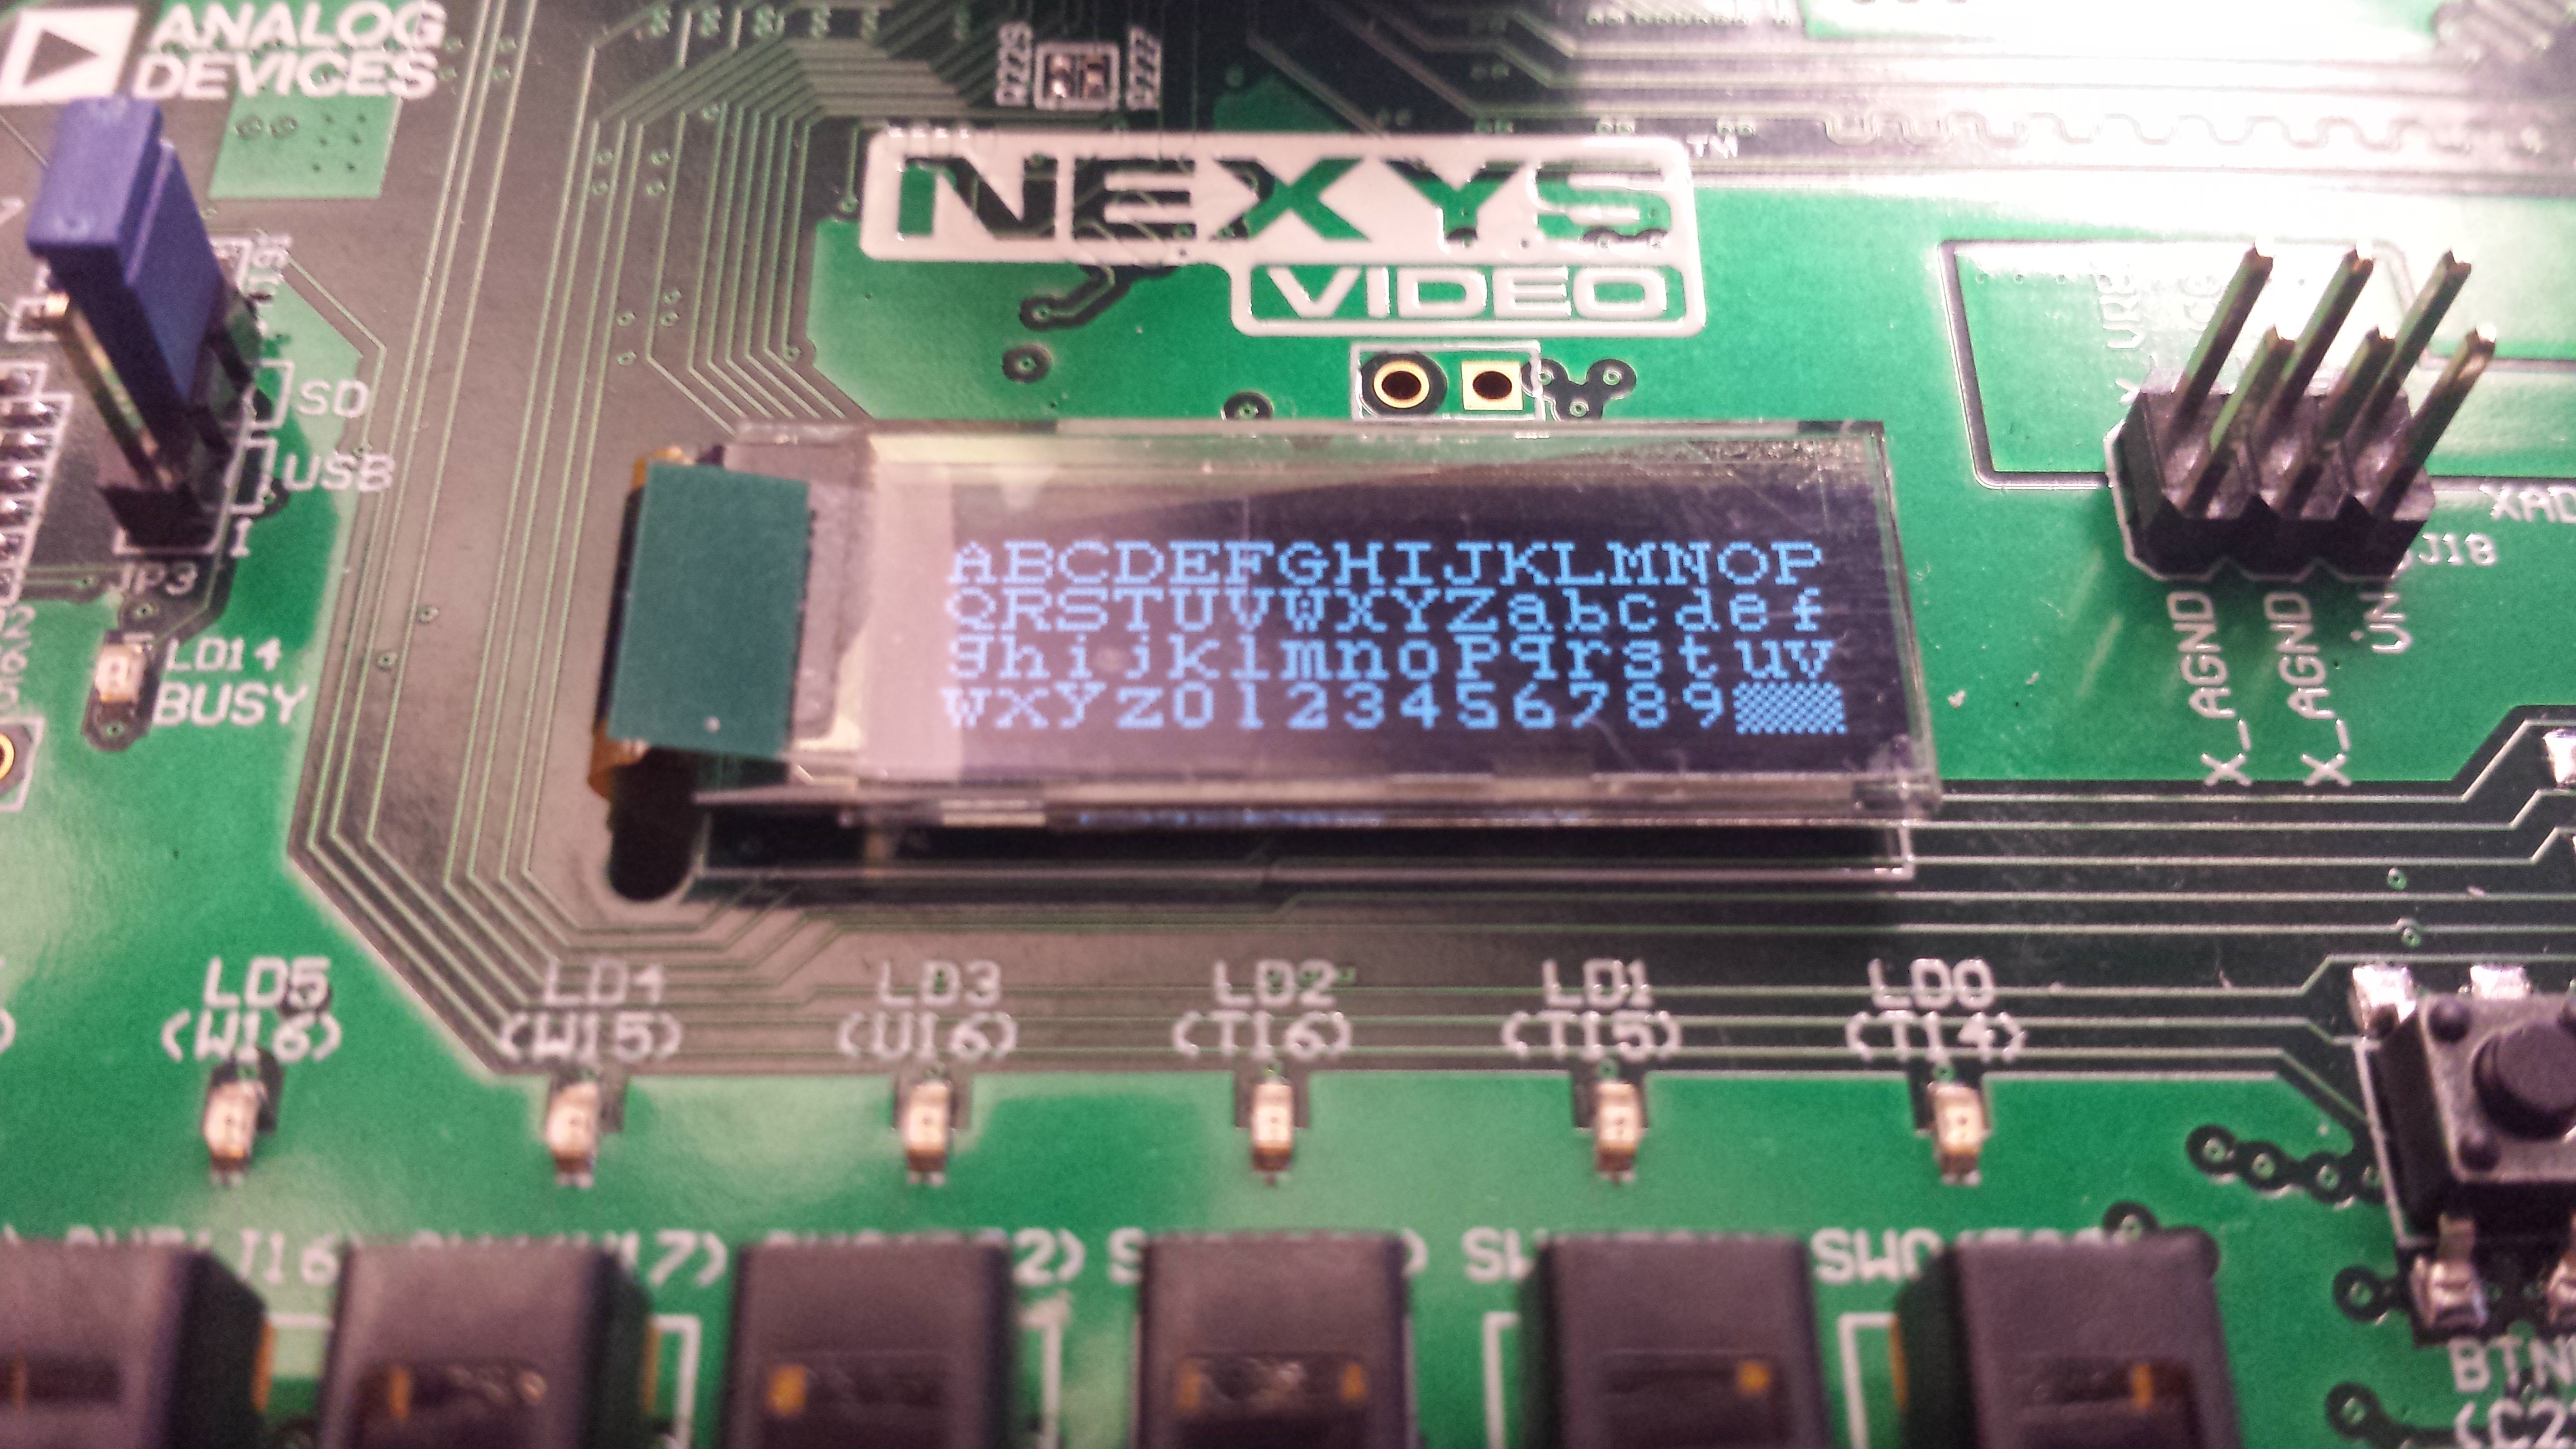
- The onboard OLED display shows the alphabet followed by the message “This is Digilent's Nexys Video”.
- The onboard OLED display is turned off by pressing the CPU_RESET button.
Features Used
| Not Used | Used | |
|---|---|---|
| 8 user switches | X | |
| 8 user LEDs | X | |
| 128×32 monochrome OLED display | X | |
| USB-UART Bridge | X | |
| 160-pin FMC LPC connector | X | |
| Micro SD card connector | X | |
| HDMI Sink and HDMI Source | X | |
| DisplayPort Source | X | |
| Audio codec w/ four 3.5mm jacks | X | |
| 6 user push buttons | X | |
| User EEPROM | X | |
| 10/100/1000 Ethernet PHY | X | |
| 512MiB 800Mt/s DDR3 Memory | X | |
| Serial Flash | X | |
| Four Pmod ports | X | |
| Pmod for XADC signals | X | |
| USB HID Host | X |
Prerequisites
Skills
- Basic familiarity with Vivado
- This experience can be found by walking through our “Getting Started with Vivado” guide
Hardware
- Nexys Video FPGA board
- Two Micro-USB cables
- Nexys Video 12 Volt Power Supply
Software
- Vivado Design Suite 2016.4
- Newer/older versions can be used, but the procedure may vary slightly
Downloads
Download and Launch the Nexys Video Basic User Demo
1) Follow the Using Digilent Github Demo Projects Tutorial. This is an HDL design project, and as such does not support Vivado SDK, select the tutorial options appropriate for a Vivado-only design. Return to this guide when prompted to check for extra hardware requirements and setup.
2) In order to fully use the demo, you will need to connect a serial terminal to your Nexys Video. Plug your board into your computer with Micro USB cables attached to the PROG and UART ports and make sure the board is turned on. Then open a serial terminal (such as TeraTerm) on your computer. In the terminal application, setup the serial port to connect to the appropriate port for your board, with a baud rate of 9600. Then return to the Github Projects Tutorial to finish programming and running the demo.


Using the Nexys Video Basic User Demo
1. Using the Switches with LEDs
For this section, all the switches are tied to their corresponding led. Every time a switch is toggled, the led directly above it will toggle with it.


2. UART Communication Using the Buttons
On startup, the Nexys Video will transmit “Nexys Video GPIO/UART DEMO!”. Whenever one of BTNU, BTNL, BTND, or BTNR is pressed, the Nexys Video transmits “Button press detected!”.
3. OLED Display
On startup the onboard OLED will display the full alphabet and numbers 0-9. Then after about a second, the OLED will turn off for another second. After this, the OLED will display the message “This is Digilent's Nexys Video”.


Important
Before turning off or reprogramming your board, shut down the OLED display by pressing the CPU_RESET button.