Getting Started with the OpenScope MZ
Despite our hopes and effort to create an innovative and low-cost T&M solution, we’ve received consistent negative feedback on the OpenScope MZ and OpenLogger regarding overall reliability that has led us to determine that it is not up to our high standards for our test and measurement products.
Unfortunately, we are unable to fix many of the issues, so we have made the difficult decision to pull both products, and related accessories from our shelves. This will allow us to ensure we can continue to deliver on the Digilent brand promise and focus our efforts on expanding our popular and core line of Test and Measurement Products.
The materials on this page will remain here as legacy sources. Any Digilent provided support for this material will be extremely limited at best. Thank you for understanding.
This document will walk you through the OpenScope MZ setup process. Please post any questions or comments in the WaveForms Live and OpenScope MZ forums
- Setup the Digilent Agent and Connect to the OpenScope MZ(Required)
-
The Digilent Agent is a service that runs in the system tray on Windows, Mac, or Linux and enables WaveForms Live to communicate with Digilent hardware. The Digilent Agent makes it easy to update the OpenScope MZ's firmware, configure Wifi and calibrate the instruments.
- Download and install the Digilent Agent.
WaveForms Live provides a browser-based instrumentation environment for managing devices and acquiring data. WaveForms Live uses the Digilent Agent to communicate with local devices via USB.
- Connect the OpenScope MZ to the computer via USB.
- It may take the several seconds for the computer to recognize the device the first time it is connected. Subsequent connections will be established faster.
- Right click the Digilent Agent in the system tray and click Launch WaveForms Live.
- This will launch waveformslive.com if you have internet access or a locally hosted version of WaveForms Live if not.
- Add the Digilent Agent and OpenScope MZ to WaveForms Live.
- Click Add A Device.

- Choose Agent.

- Enter the hostname or IP address of the device where the Agent is running and click Add Device.
Typically the default value “http://localhost:42135” is correct for an agent running on the local machine.

- Select the COM port associated with the OpenScope MZ from the drop down.

- Update the OpenScope MZ Firmware (Required)
-
- Click Update Firmware and follow the instructions to update the firmware on the OpenScope MZ.

- Review the Current Firmware Version on the device and the Latest Firmware Version available.
- Select the desired Available Firmware Version
- Click Update.
- The firmware update should take about 10 seconds and Waveforms Live reports the firmware update progress.
- Click Done. The firmware is now updated.
- Calibrate the OpenScope MZ (Required)
-
- Under the Calibration section click Calibrate.

- Device specific instructions are provided.
- Connect the solid red wire to the solid orange wire.
- Connect the solid white wire to the solid blue wire.
- Click Next to begin calibration.

- The calibration process takes about 30 seconds.

- The calibration information is displayed. Select the desired storage location (flash is recommended) and click Save. Then click Done.

- The new calibration data has been applied to the instrument and will be applied at boot.


- Take A Measurement (Recommended)
-
- Click the new device card to navigate to the instrument panel for the OpenScope MZ.

- Connect the solid orange wire (Osc Ch 1) to solid yellow wire (AWG Ch 1).
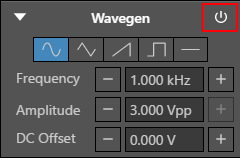
- Click the power button to turn on the WaveGen. This will generate a 1 KHz sine wave which can be read on oscilloscope channel 1.
- Click Single to acquire a single buffer of data.

- The data is displayed on the chart.
