
Recently we released the Analog Discovery 2 Toolkit for LabVIEW. Until now the Waveforms Toolkit for LabVIEW has been the only way to interact with your AD2 in LabVIEW. Since the time of its release, the AD2 has become increasingly popular among LabVIEW users. That is why we created the new Analog Discovery 2 toolkit, not as a replacement but as an add-on. In this blog post, I will explain the differences between these them and give you more information about what this new toolkit has to offer.
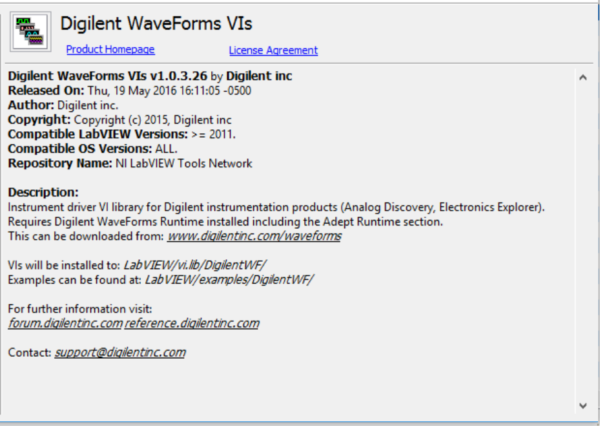
The original toolkit offers a large variety of VIs that allow you to take full advantage of your AD2 in LabVIEW. It includes MSO VIs to set up measurements and acquire data from mixed-signal oscilloscopes, FGEN VIs to output waveforms with the function generator, DIG VIs for reading and writing digital I/O, and PWS VIs for configuring and controlling the power supplies.
The new toolkit doesn’t allow you to control the pattern generator, the arbitrary function generator, or the power supplies. Instead, it lets you have much greater control over analog and digital channels. This toolkit allows you to control your AD2 in LabVIEW in a way that is similar to how NI-DAQmx software allows you to control the myDAQ.
So basically rather than grabbing buffers like an oscilloscope it allows you to read:
- Read 1 Sample, 1 Channel – This is ‘software timed’ or ‘on demand’ which means you just get a single data point for the specified channel each time you execute the VI.
- Read 1 Sample, N Channels – Same as above but you can specify multiple channels to read from.
- Read N Samples, 1 Channel – Same as 1 but you get to specify how many samples and at what rate you want to acquire. Each time the VI is called it starts acquiring samples at the specified rate until N samples have been obtained and then returns the entire buffer.
- Read N Channels, N Samples – Same as 3 but for multiple channels. We’ll have to figure out if the sample rates and buffer sizes can be configured per channel or if they all have to match
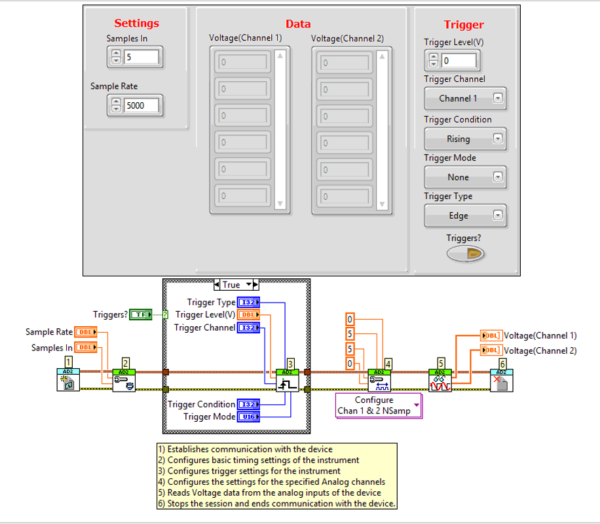
It does this for both the analog (Osc channels) and digital channels.
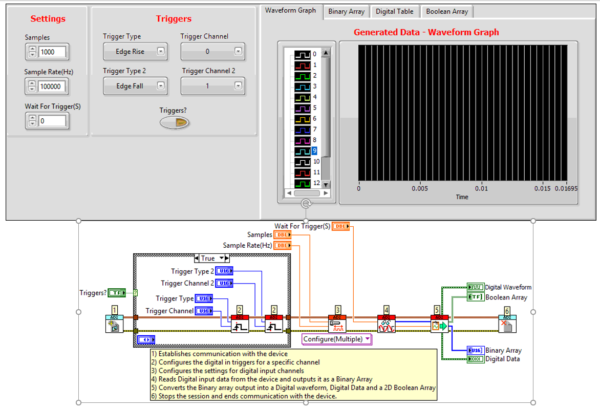
The SubVI’s are set up in the form:
- Open (same SubVI for both analog and digital)
- Configure timing(only needed for Analog)
- Trigger configuration
- Configure settings
- Read (Polymorphic VI that can be set to a single or multiple channel read)
- Close (same SubVI for both analog and digital)
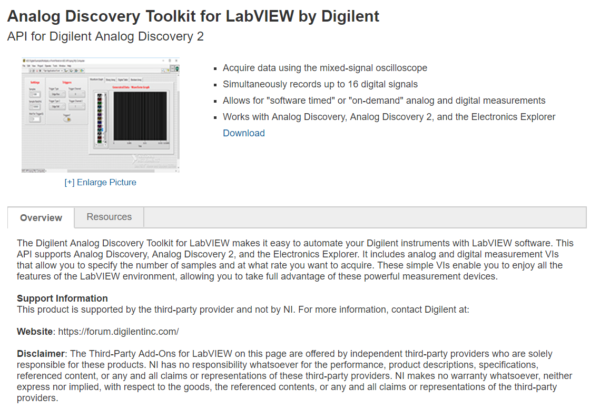
The new Analog Discovery 2 Toolkit for LabVIEW makes it easy to automate your Digilent instruments with LabVIEW software. It supports Analog Discovery, Analog Discovery 2, and the Electronics Explorer. These simple VIs enable you to enjoy all the features of the LabVIEW environment, allowing you to take full advantage of these powerful measurement devices.
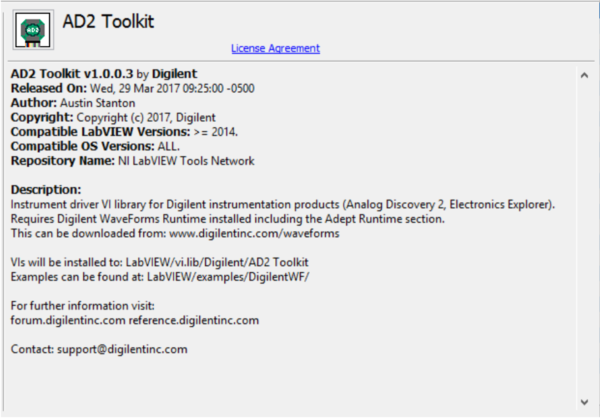
Thank you for reading my blog post, for more information about the new Analog Discovery 2 Toolkit, follow this link. If you are interested in trying out LabVIEW for yourself, you can purchase a copy of LabVIEW 2014 Home Edition which includes everything you will need to run LINX 3.0. Please comment below with any questions or comments you may have.
Sorry, I wanted to download the Labview Toolkit for analog Discovery 2. But it’s not possible. There is always an error. Please can you help me.
Best wishes
Rudolf Bierl
Can “Analog discovery toolkit for LabVIEW” be used for analog dsicovery Pro 3000?